• Updated 2023-07-12: Hello, Guest! Welcome back, and be sure to check out this follow-up post about our outage a week or so ago.

Wife twisted my arm into buying an SE/30

just.in.time

Well-known member
Glad to hear you are making progress with the SE/30.

Some things are definitely "one step at a time" processes.  Completing each step can be critical, definitely been there before.

What other parts are you adding to the SE/30?


carguyty

Well-known member
Memory is going to come in two parts. Memory X has a decent price for 16 MB modules so I'm ordering 64 Mb as soon as possible. If I ever find a good enough reason to setup A/UX, I'll max it out. Probably snag a ROM-inator II for developing. And not just because it's a great Phineas and Ferb reference.

After I have a functional machine that I can use to play games and I feel comfortable moving it from desk to desk and having the kids use it periodically, I want to retro-bright the case, keyboard, and mouse to bring back the original "luster".

The ongoing reverse engineering of the frame buffer for retrofitting grey-scale is of huge interest, but that's a study for after school.

Trying to find PDS cards for this machine is basically crazy (IMHO). I'd love to have a full page monitor hooked up with grey-scale, or even Ethernet, but I doubt that will ever happen with the pricing they've seen recently.

I have a long rant that I keep typing and erasing about how to preserve the machine and the culture surrounding it, but that's best saved for another place. Much of why I have my museum is to learn the science and develop the missing links between vintage hardware and modern expectations. So for the time being, I'm going to teach myself how to use the IDE of the period and keep a close ear to the ground for any grassroots style hardware development that I can assist through driver/extension support. Maybe develop some more modern style replacements for parts (like the entire logic/analog system miniaturized and modernized for a direct replacement).


CC_333

Well-known member
Wow, that's quite a bit of work you've done there! Congratulations on getting it running!!

If you don't already have one, I might have a spare PDS networking card for you (it would have an ehternet port, so you can actually use a modern-ish cable with it, though you might need an older 10 or 10/100 hub to act as a go-between, as old network cards such as this don't always talk to modern networks very well (the hubs can be found very cheaply depending on where you look; perhaps you can find one at that recycling place you spoke of).

c


carguyty

Well-known member
I've thought about seeking out a network card, but initially the nostalgia of disk swapping appealed to the my inner luddite. However, after going through the process of searching the repository servers and downloading, then storing on my G3 server, then using either Tiger or OS 9 on a combination of machines to expand and then write to disk...and then what if I need to break the images into pieces to fit on the disks?!?!?!

I think I have more than enough hard disk space inside to hold whatever I throw at it. Having the SCSI2SD makes mounting large images from EOL era software much easier, but I don't like fishing out the card or even moving the USB cables in and out of the case. I thought about adding a permanent mount for a female to male USB micro so that I could just plug into the back of the machine, but that seems super sketchy and not quite in line with the museum quality that I'm trying to achieve. Something later on with a whole SBC to manage things through a PDS breakout...meh. I need to finish these books on C and Pascal first.

That was a really long way of saying, "Why, thank you for your offer! What would you like for your network card?"  ;D


carguyty

Well-known member
The parts came in! 

01) new parts.JPG

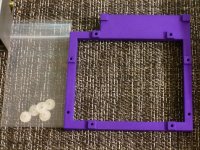
They are perfect! I got a set of 5 printed gears for the Superdrive and a purple universal SCSI2SD (that's universal for v5 and v6) mount that is claimed to fit all styles of classics in the wild. Special thanks to @joethezombie for taking so much time to proof the design. He should really monetize the design, though. It's too cool to pass up.

The gears are "high detail matte", whatever that means. Doesn't seem to be polycarbonate, but it's damn dense and has a good solid feel when I scraped it with the pick. Pick up these bad boys http://www.shapeways.com/product/M84R343FR/gears-for-macintosh-512k-vintage-floppy-drive-ejec?optionId=42282434&li=ostatus at Shapeways
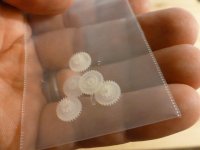
02) tiny parts.JPG

You can see the teeth are very precise.
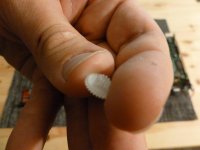
03) detail.JPG

Once attached, I noticed a bit of extra noise. Maybe that's the tool marks (or dithering I guess?) making chatter while the part gets settled. 

This is the mount from joethezombie. 
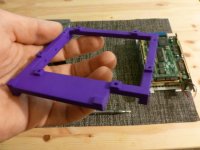
04) PURPLE.JPG

He prints his from what I think is PLA, but I chose a material called "strong and flexible". I don't know why the company can't bother with posting up the chemical name of their plastics. I suppose it doesn't really matter since I REALLY just wanted the purple one. 

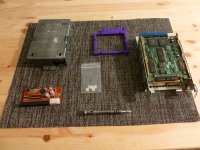
Here is everything I'm fixing at the moment. Always put all the parts on the table before you get elbow deep in 2 part epoxy and bandsaws.05) layout.JPG

Assuming you have the Superdrive out of the machine already, spot the screws on the side and get them out. A torsion bar on your screwdriver will help un-seize years of neglect and abuse.
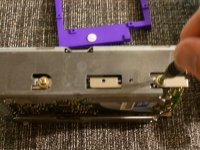
06) remove cage.JPG

The cage slides off the main drive mechanism
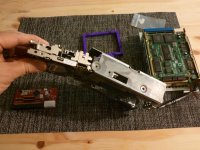
07) slide2theleft.JPG

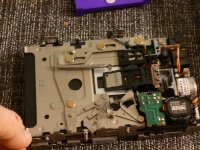
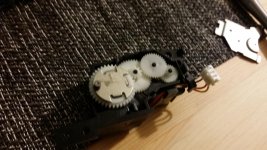
Take a minute to admire the beauty of mechanical engineering that is the first generation Superdrive. It's able to read all 3.5" disks that Apple had used previous to this machine.
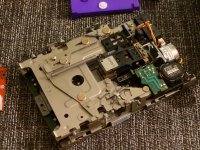
08) guts glory.JPG

Now, I read somewhere that some pieces of the carriage needed to be removed. Specifically this spring.
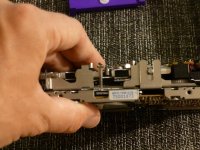
09) spring.JPG

See how it releases when the carriage is in its service position?
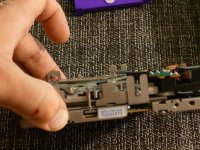
09a) sprung.JPG

I don't know if that's really needed, though if you are taking time to tend to a broken cog in the works, maybe take time to put some white grease on some of the slidey bits. Remove this spring on both sides with tiny pliers or tweezers while it is in the service position.

While it's all open, take note of how the head will move. In my machine, the drive wouldn't eject so that means I need the machine to be as if it has a disk inserted so that everything will line up during reassembly. Notice how the pieces move when a disk is injected. These will need to be moved by hand to put this into the aforementioned service position.
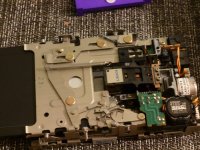
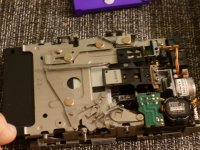
10) easy.JPG11) does.JPG12) it.JPG

DO NOT ALLOW THE READ/WRITE HEAD TO SCRAPE ANY TOOL, OR SLAM INTO ITS READ POSITION!!!

Violence and electronics do not make good bedfellows. Everything should be smooth, slow, and purposeful.

Undo the 2 screws holding the eject motor to the assembly.
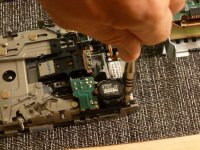
13) motor.JPG

Unplug the feed.

14) plug.JPG

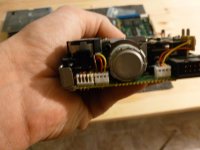
Remove eject motor subassembly.

15) outs.JPG

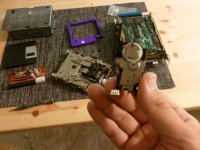
Make sure the final drive gear has its (idunno...) tang in this position. 12 o'clock is where it needs to be in order to engage the carriage on reassembly. The cap there, needs to be removed with the greatest care.
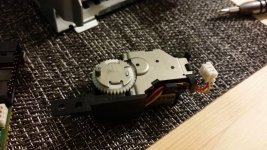
16) inverse.jpg

The fingers holding it in place are like 300 years old and made of dead dinosaurs, so be gentle. We live in a world where the gears can be reverse engineered and printed on demand, but that took somebody nearly a century of study and almost 4 cases of really cheap beer to concoct. We don't have replacement cases yet, so be gingerly here.
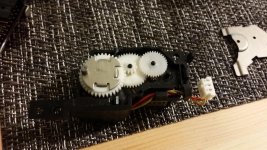
17) caps off.jpg

I've fitted the replacement gear inside the transmission. You just have to tug at the overlapping gear in order to get at the underside. Its got a bit of greasy jelly in there, so don't worry none. Don't lick your fingers either. 
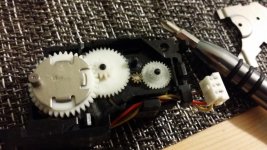
18) snug.jpg

Toss back the overlapping gear.

19) replace.jpg

That's that!!! Reinstall the parts in the reverse order that you took them out of the case and accidentally dropped on the floor trying to get the lights just right. When I was fitting the carriage springs back into place, I just kind of shoved the disk in the hole while lifting (ever so gently as to not strain the thin bits) the read/write head. It chunked into place and the manual eject got everything lined up again. TEST before you reinstall the bucket. 

As for the SCSI2SD...
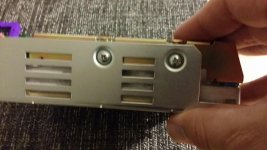
20) remove.jpg

Pull the hard disk from the machine and pull the 4 screws that keep the drive inside it's bracket. Throw away the screws (er, put them into your screw sorting bin over on the workbench).

Take a look at the underside of the 40MB Quanta drive (or whatever you have. I'm not psychic.) and find the 6 smallish dark screws holding the logic to the drive. We want them to live on!
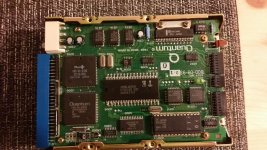
21) extra parts.jpg

Layout the parts and inspect everything for burrs or artifacts or liens or unpaid library fines...
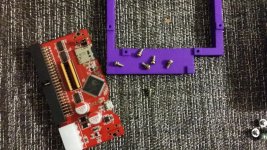
22) layout.jpg

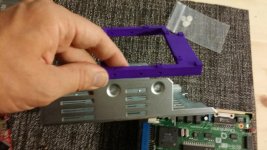
23) sizing up.jpg

See where your mount will line up with the bracket (if you have one) and use 4 of those screws we just liberated from the old drive to secure it in place. DO NOT OVER TORQUE! There's no need to tap, since the plastic is pretty fine. But I can tell you that it sure felt like one of those is just a bit too small and about to slip in its threads. 
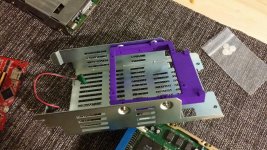
24) secure.jpg

You see that joethezombie made sure there is a bit of relief for the molex plug on one side? This is the only way the SCSI2SD will fit on the mount.
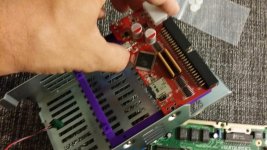
25) ends.jpg

And if you're pretty savvy (unlike green ol' me) you'll see right here where my interest in aesthetics monkeyed up my installation.
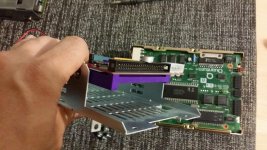
26) final form.jpg

Don't forget to attach the activity LED. It works just fine!
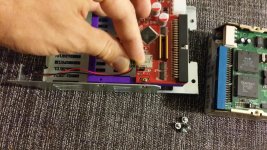
27) replace LED.jpg

Then if you get fed up with twisting and fighting your SCSI cable, you can flip over the assembly, mount the thing properly in the bracket, and everything BUT the LED leads will fit just right. I made a choice.
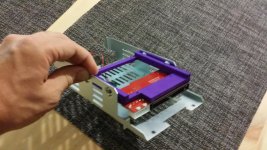
28) thats better.jpg

Again, TEST TEST TEST!!! And do it before completely closing up the case. It's always easier to bench test a component when you don't have the daunting task of yet another teardown between you and a properly working kit.
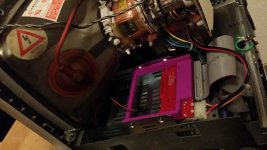
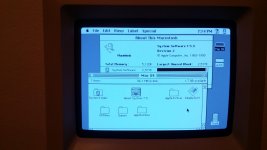
29) final fit.jpg

30) puddin.jpg 


peafour

Well-known member
With regards to the USB cable for the SCSI2SD: on the SE there's a metal security loop on the back, which I removed and was able to fish a slim micro-USB cable through, and then hook everything back up inside.  You need to be a bit careful opening and closing the case, but it does the job.

I'm sure there's a more precise term, but it's the bit under the label on the back in this photo, with the chain looking logo: http://www.vectronicscollections.org/apple/images/macintoshse30/msnap2.jpg


carguyty

Well-known member
You know...I read that some people like to do that, and I'm not really against it. I like the simplicity it offers, and I like that it offers redundant access to the data store. The only thing I don't care to see in this specific example is that isn't a very elegant solution. Somebody might have a spare PDS blank or perhaps somebody could print up one with a port and standoffs already moulded in. That would allow a more "seamless" solution to the access problem. Maybe if I put together the ethernet card and cut a port for micro USB in the slot cover next to the RJ-45...

But that's a cool way to use whatever that predecessor to the Kensington lock happens to be called.


peafour

Well-known member
You know...I read that some people like to do that, and I'm not really against it. I like the simplicity it offers, and I like that it offers redundant access to the data store. The only thing I don't care to see in this specific example is that isn't a very elegant solution. Somebody might have a spare PDS blank or perhaps somebody could print up one with a port and standoffs already moulded in. That would allow a more "seamless" solution to the access problem. Maybe if I put together the ethernet card and cut a port for micro USB in the slot cover next to the RJ-45...

But that's a cool way to use whatever that predecessor to the Kensington lock happens to be called.
I had thought about drilling a small hole, and designing a 3D printable filler to keep it in place, but this seemed like a much easier and less destructive idea.  I like it because if you're not using it, you can kind of tuck the cable in so only the connector end is hanging out of the back, or you can go full on tail mode, which is what I'm doing, because I am supremely lazy.  I'm also potentially using the PDS slot for an ethernet card, so this allows me to have all kinds of access to the SD card if need be.

 
Last edited by a moderator:

carguyty

Well-known member
So what if we make a proper snap in panel for the PDS slot that has the USB B connector molded in it and give the design to the community?

 
Top