David Cook
Well-known member
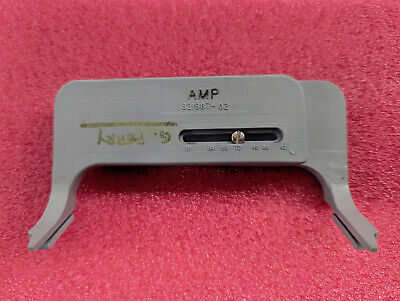
Yesterday, I posted about some "for parts" Macintosh II/IIx motherboards I recently repaired.
 68kmla.org
There was one last repair that I hadn't discussed, as I was waiting for a miniature end mill bit to arrive.
The Macintosh II has two banks of memory, each consisting of four SIMMs that must be fully populated. Bank A is critical, as it must not be left empty. Unfortunately, Apple used plastic retention tabs to hold the memory in place in the slots. The tabs have a habit of breaking if you aren't careful. In my case, apparently a gorilla last removed the SIMMs from Bank A of the motherboard, breaking six of the eight tabs!

That's right. There is one good tab on one slot, another good tab on another slot, and everything else is broken.
There was no way I was going to desolder 120 leads to replace these slots on this motherboard.
However, since the entire bank must be populated, perhaps I could quickly make a brace that leveraged all four SIMMs being square with each other and the board. That is, rather than being a single SIMM clip, it is a 'bank clip'. As you can see below, it works beautifully.

This is nothing more than a 10 mm x 10 mm plastic bar (kitchen cutting board material) with slits cut in it every 10 mm. The slits are 1.3 mm thick with a 5 mm depth.

The SIMMs really are firmly in place. The SIMM slot itself retains the SIMMs in all directions. The original retaintion tabs only prevented the SIMM from rotating and I guess acted a little like spring clamps to hold the SIMM steady. The slits in the bank clip now perform that duty. The memory SIMMs are almost friction fit in the bank clip's slits, with any slight rotation of any SIMM (due to slit tolerance) causing the mating parts to grab even more.
This is not a complicated design. I imagine it could be 3D printed. (And, perhaps someone else thought of this idea years ago.)
The critical dimensions are:
1. The thickness of the slits. Too wide and the memory SIMMs can independently rotate enough to be loose.
2. The spacing between slits. The bank won't press down if an slit is out of alignment.
3. The squareness of the slits to each other
I used a hobbyist milling machine with a homemade caliper DRO to make the precision cuts.

Here is a close-up showing that there is nothing more fancy to this than a bunch of slits in a bar of plastic. Aside: I broke two bits before realizing I needed to crank up the RPMs (3000) and make passes of less than 0.5 mm depth of cut with such a tiny end mill.

This was just a 'make do' prototype. I think a neater solution would be to cut slits in a piece of FR-4 circuit board substrate (without copper). It is a tough and rigid material. You'd end up with a thinner brace.
- David
Spare Parts Mac II and IIx Successful Restorations
For some weird reason, I keep buying Macintosh II series boards and computers. Recently, I purchased a sealed AppleService NOS IIx motherboard. I also purchased another lot that consisted of a Macintosh II upgraded to a IIx with the Macintosh II board separate. Upgraded Macintosh II The seller...
There was one last repair that I hadn't discussed, as I was waiting for a miniature end mill bit to arrive.
The Macintosh II has two banks of memory, each consisting of four SIMMs that must be fully populated. Bank A is critical, as it must not be left empty. Unfortunately, Apple used plastic retention tabs to hold the memory in place in the slots. The tabs have a habit of breaking if you aren't careful. In my case, apparently a gorilla last removed the SIMMs from Bank A of the motherboard, breaking six of the eight tabs!
That's right. There is one good tab on one slot, another good tab on another slot, and everything else is broken.
There was no way I was going to desolder 120 leads to replace these slots on this motherboard.
However, since the entire bank must be populated, perhaps I could quickly make a brace that leveraged all four SIMMs being square with each other and the board. That is, rather than being a single SIMM clip, it is a 'bank clip'. As you can see below, it works beautifully.
This is nothing more than a 10 mm x 10 mm plastic bar (kitchen cutting board material) with slits cut in it every 10 mm. The slits are 1.3 mm thick with a 5 mm depth.
The SIMMs really are firmly in place. The SIMM slot itself retains the SIMMs in all directions. The original retaintion tabs only prevented the SIMM from rotating and I guess acted a little like spring clamps to hold the SIMM steady. The slits in the bank clip now perform that duty. The memory SIMMs are almost friction fit in the bank clip's slits, with any slight rotation of any SIMM (due to slit tolerance) causing the mating parts to grab even more.
This is not a complicated design. I imagine it could be 3D printed. (And, perhaps someone else thought of this idea years ago.)
The critical dimensions are:
1. The thickness of the slits. Too wide and the memory SIMMs can independently rotate enough to be loose.
2. The spacing between slits. The bank won't press down if an slit is out of alignment.
3. The squareness of the slits to each other
I used a hobbyist milling machine with a homemade caliper DRO to make the precision cuts.
Here is a close-up showing that there is nothing more fancy to this than a bunch of slits in a bar of plastic. Aside: I broke two bits before realizing I needed to crank up the RPMs (3000) and make passes of less than 0.5 mm depth of cut with such a tiny end mill.
This was just a 'make do' prototype. I think a neater solution would be to cut slits in a piece of FR-4 circuit board substrate (without copper). It is a tough and rigid material. You'd end up with a thinner brace.
- David