• Updated 2023-07-12: Hello, Guest! Welcome back, and be sure to check out this follow-up post about our outage a week or so ago.

SE FDHD Restoration

MOS8_030

Well-known member
Very interesting, must be unlike chrome plating. I'll look into it.

Have you done some?
Yes, chrome is complicated & toxic & expensive. Zinc, not so much!

I have restored several vintage motorcycles so I've done a lot of rust removal and I've done research into zinc plating, although I haven't had enough of an excuse to do any plating myself yet.


LaPorta

Well-known member
Apologies for not having pictures: time has been limited. I de-rusted the chassis, and it looks pretty darn good. The zinc plating unfortunately did come off from part of it, but that's ok. I will have to look into learning how to re-plate at some point.

Thus far, a list of things to be looked at/fixed:

-The speaker female end connector also corroded into dust inside it's housing. I removed it and stripped back the wires, but am uncertain as to how to find a direct replacement type (there are thousands on the usual supply sites).

- The PRAM settings don't appear to stick. I have to see if this is due to some faulty work on my part regarding battery holder installation.

- The floppy drive, after being cleaned/lubed is having some issues ejecting. I swear, the alignment of it with the front is always tricky. It also never seems to eject the same as it once did. I really wish we had access to some kind of Sony original spec manual for the drive, but it seems to have been lost to eternity plastic. No one knows what the original lube was, nor what the specs were. So far, I can't locate any Sony documentation at all.

Otherwise, it works just fine. I think the internal HD is shot. had to smack it around to get it to spin, and the drive does not appear mountable. I actually found it in HD SC Setup and also by looking for missing disks in Norton when I hooked it up to my PT Pro, but I can't seem to find a way to try and force mount i. It has the name "LO LO BEAN" (you can't make this stuff up).

That is it so far. Back to work tonight...

 
Last edited by a moderator:

LaPorta

Well-known member
Got the floppy drive in a bit better order. I did find that the battery terminal was not connecting to one trace that it is supposed to, so I bridged it. Otherwise, I'm having a hard time tracking down where in the schematics that the battery attaches and where it's power runs to. Can anyone guide me there?

Also: has anyone sourced the speaker connectors?


LaPorta

Well-known member
Managed to get the PRAM issue sorted out. I think bad soldering on my part. I ran new patch wires from the battery and did a better job. Thanks to an NOS never before used replacement SE board, I was able to verify traces and clock waves with my DMM/Scope and all checked out. It's tricky when the Maxell bomb eats up all of your battery holder traces!

Now, I just need to source the female speaker connector.

Slowly but surely...this has become a tale of survival.


LaPorta

Well-known member
Got the new speaker connector last night. Cut back the old one, crimped the new terminals and re-inserted into the connector. Boy, did the SE speaker at full volume sound better than the Plus/Classic! What a difference it makes having it in the front with a speaker grill. That just leaves an analog board/PS re-cap to do and then it will be good as new...all from a bombed-out hulk. Yes, I am sure I have put more money into it than it's worth, but that isn't the point. It works again, and now we have another example of the type to keep going.

I haven't had time to get the pictures up, but I will do so this evening.


LaPorta

Well-known member
...and...SUCCESS!

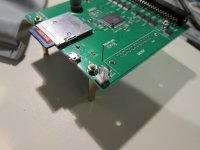
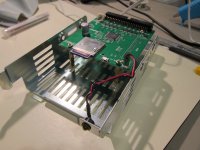
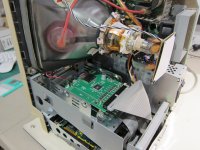
I managed to get it all done: speaker connector, SCSI2SD installed, dual boot from the SCSI2SD with 6.0.8 and 7.1, and got 4 MB RAM installed courtesy of Jessinator for a swap for some work I did.

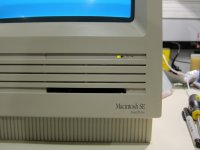
I also mounted the SCSI2SD on the original HD sled. It occurred to me to use the original LED so it looks original from the outside. I used the very handy SCSI2SD LED header to solder in a pin connector that mated perfectly with the original LED. Now you can't even tell that there is a stealth SCSI2SD in there! I am very happy overall, having resurrected this thing from battery explosion to a rock star.

I took the dimensions of the sled for the HD; I think I will take to designing a 3D printed tray for the SCSI2SD in there. For now...hot glue can hold anything!

IMG_4516.JPG

IMG_4517.JPG

IMG_4518.JPG

IMG_4519.JPG


LaPorta

Well-known member
So I made a 3D sled by brute force using Tinkercad. I think it came out rather well. I will need to see if it fits properly. Any of you are also welcome to use it too.


Torbar

Well-known member
So, I went to a somewhat local parts store with my original cables, and the guy found the identical piece in about 30 seconds. I used his part number to match to what he had on his website, and found the manufacturer's part number, which I then tracked online. The sad thing for the parts store guy is that, as helpful and awesome as he is, he sells the connectors for about $3 a piece, while Mouser has them for about 79¢ each...
What parts store?  Cables and Connectors in Newington?

 
Top