superjer2000
Well-known member
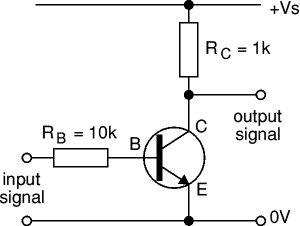
OK, I want to study this a bit more but I believe this is the setup required. Referencing the diagram on the right:
1. PFW would connect to pin 9 on the motherboard.
2. +5V would connect to +5V VSB on the ATX PSU
3. PS ON would connect to Pin 14 (PS-ON) of the ATX PSU.
4. The 74LS04N still needs power (5vsb) + GND connected to appropriate pins.
5. I'm assuming small 1/4 watt resistors will work here but i don't know for sure.
When PFW is low (i.e. near 0V) that means output 2 of the 74LS04N inverter is high (~5V). That prevents is fed to the ATX PSU PS ON pin keeping the unit from turning on.
When PFW goes high (i.e. near 5V) when soft power is pressed, that causes output 2 of the inverter to be pulled low so PS ON voltage is close enough to zero as to let the ATX PSU turn on.


") )*.
)*.