• Updated 2023-07-12: Hello, Guest! Welcome back, and be sure to check out this follow-up post about our outage a week or so ago.

Awful Macintosh SE FDHD Revival

PotatoFi

Well-known member
I received a Macintosh SE FDHD from a friend that is in very rough condition. In this thread, I'll attempt to [SIZE=1.4rem]revive it! Normally, I title these threads as "Restorations", but I don't think that's appropriate here due to the condition of the machine. I don't think it will ever look new again, but I want to see if I can get it working. And while I'm at it, I'll make it look as good as I can, because every Mac that we keep in circulation is another Mac in circulation![/SIZE]

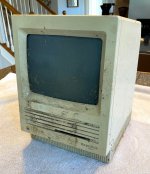
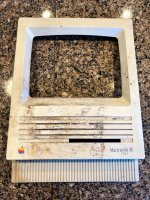
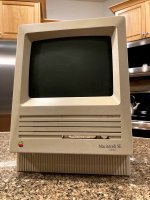
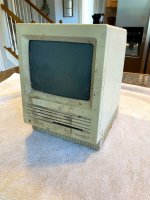
Here's what we have to work with. It is extremely dirty, and the front is obviously very, very scratched. At this point, I couldn't tell the condition of the CRT because of all of the dirt.
IMG_0311.jpg

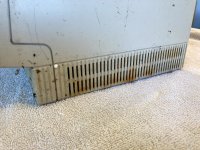
Yikes. Notice the rust stains around the bottom. That's not good.
IMG_0312.jpg

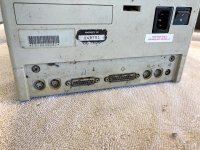
It gets worse. Check out the connectors on the back. At this point, it was becoming very clear to me that there was serious water damage.
IMG_0314.jpg

Expecting the worst, I grabbed my impact driver and broke the screws loose. I was pretty anxious to get it apart.
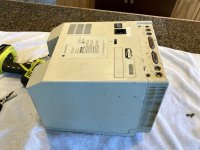
IMG_0315.jpg

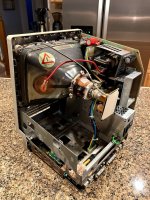
I wiggled the back bucket off, and this is what I was greeted with. Yikes. I seems that this machine sat in some water for awhile. I know it was in a 1940's basement for a couple of decades before coming to me.
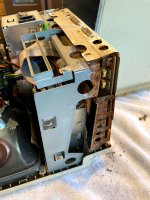
IMG_0316.jpg

At this point, I was thinking, "Well... maybe the CRT could be useful in another machine." Or maybe, "I guess I can salvage the flyback." 
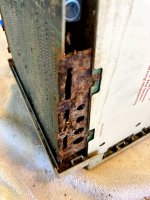
IMG_0317.jpg

I decided to keep going, and tear it completely down to see what I had to work with. Just to be safe, I followed the CRT discharge procedure of clipping a wire to the chassis and a screwdriver, and sliding the screwdriver under the anode cap. I'm sure this machine hasn't been powered on in ages, but better safe than sorry. I've done this on many compact black-and-white Macs, and I've never heard so much as a "click", but I always do it anyway.
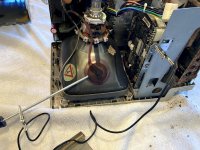
IMG_0318.jpg

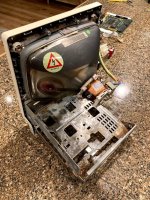
With the CRT discharge out of the way, I could starting tearing it down. But... where to start? The logic board was so rusted in that it wouldn't budge. I decided to unplug the floppy and hard drives first, but those were a struggle. Next, I removed the analog board. Check out the literal "water line". You can see exactly how far up the water came.
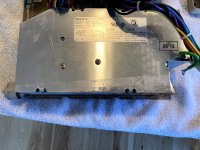
IMG_0319.jpg

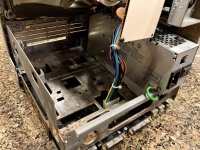
With the analog board removed, let's show another photo, just to drive home how totally trashed this machine is. My impact driver was key to getting a lot of the rusted screws loose.
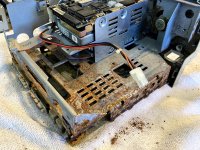
IMG_0320.jpg

Next, I took the machine out to the garage to try to figure out how to get the logic board out. I don't have any photos of this, but I managed to get a screwdriver down to the battery and pop it out of the holder. Amazingly, it hadn't blown up.

I soaked the logic board rails in some WD-40 to try to loosen things up, and let it sit for a few hours.
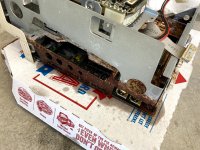
IMG_0321.jpg

While that sat, my daughters helped me clean up the back bucket a bit. We used Dawn dish soap and toothbrushes, as usual. I think they're hoping for a dedicated Sim City machine for their playroom. We'll see.
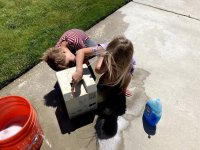
IMG_0323.jpg

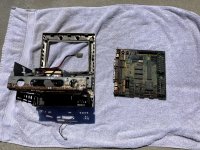
With a bit of persuasion, I was able to get the logic board out. I ended up jamming a screwdriver in between the logic board and blending the rails out slightly to remove the board. They didn't permanently deform, but they did move just enough to sneak out the board. Sliding the board out was a complete impossibility.
IMG_0325.jpg

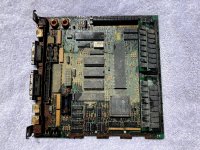
Here's the logic board up close. I think this is the point where any sane person would stop. But me? No. I decided to keep going.
IMG_0326.jpg

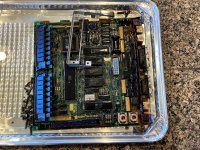
I hit the logic board with a garden hose, and then stuck it into a tray of vinegar.
IMG_0330.jpg

I stuck the screws in as well.

IMG_0332.jpg

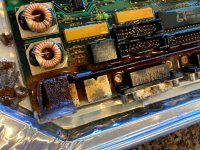
The amount of rust around the I/O ports caused me a great heck'n concern! But... let's let the vinegar do it's thing, and see what happens.
IMG_0331.jpg

I scrubbed the board with a toothbrush after a couple of hours, and was surprised at how much it cleaned up. But there was still a ton of rust around the I/O ports, so my wife helped me find a creative solution to submerge the I/O ports with the limited amount of vinegar that we have on hand right now (shortage due to coronavirus).
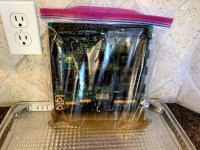
IMG_0333.jpg

With that marinating, I removed the chassis from the front of the case. Wow, this thing looks horrible...
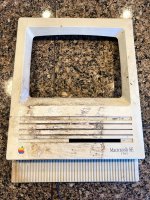
IMG_0327.jpg

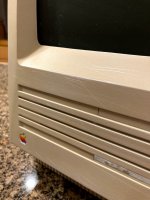
Hrm... I'll need to find a replacement Apple badge for it.
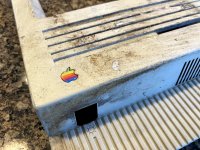
IMG_0328.jpg

Using a pair of flush cutters, I removed the plastic parts that hold the speaker down.
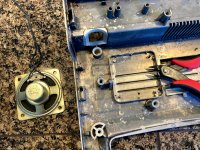
IMG_0329.jpg

And that's it for the night! Tomorrow, we'll take a look at the case and logic boards when they're all cleaned up. 


maceffects

Well-known member
Once cleaned and dried I wouldn’t be surprised if it “worked.”  Those original SE machines were quite robust. That said it won’t be reliable without more work.  You could sand blast the chassis and it should be able to be somewhat revived. 


joshc

Well-known member
Now this is a transformation that I'm looking forward to! I think this is what we call a 'project'. :cool:


PB145B

Well-known member
I bet this’ll work in the end. The SE is definitely the most reliable compact Mac out of them all.

I’ve got a regular and an FDHD. Both work great. One of the better Macs period in my opinion.


LaPorta

Well-known member
If you need an Apple, I have two (what I consider) beater SE cases, and could part it out to you.


PotatoFi

Well-known member
I'm with all of you, I think it's going to come back to life!

If you need an Apple, I have two (what I consider) beater SE cases, and could part it out to you.


Thanks LaPorta! Part of me wants to see how far we can go with original parts, and the other part of me thinks it would be kinda neat to source a few replacements and see how nice we can make this SE. Let's keep this open for discussion a little later on in the project.

But now, it's time for another update!

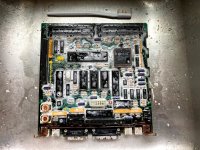
After sitting in the vinegar all Sunday afternoon, I pulled the logic board out and took it back to the sink for a soap and water scrub.

IMG_0335.jpg

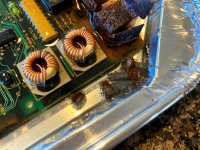
I took it out to the garage and hit it with the air compressor. Not bad... I think there's signs of life here, but the shield near the ports on the back is proving to be especially rusty and offensive. I decided to try removing it.

IMG_0338.jpg

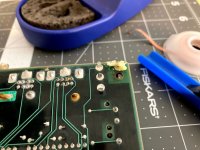
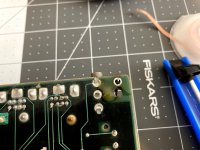
Looking at the back of the board, I located the solder joints that hold the shield in place. I set my soldering iron almost as hot as it will go: 990°F. Next, I coated one of the joints in flux paste.

IMG_0341.jpg

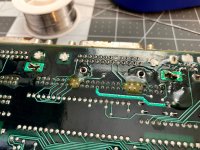
I heated up the joint with the iron. At a certain temperature, the flux, solder, corrosion, and rust started to pop, bubble and fizz! When the solder turned molten, I sucked it all away with the solder sucker. It worked great!

IMG_0342.jpg

Same story on the rest of the joints. I think the secret is lots of heat, and lots of flux.

IMG_0344.jpg

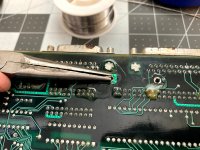
There are some tabs that are twisted about 22° before soldering, so I straightened them back out so I could pull the board through.

IMG_0345.jpg

With all of the solder removed, and the tabs straightened, it was time to remove the shield. I had my wife heat a couple of joints for me while I worked the shield loose. I knew that teaching her to solder would come in handy!

IMG_0347.jpg

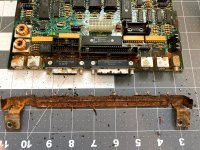
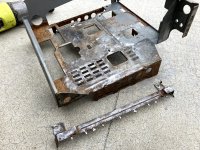
Next, I took a small wire wheel on a cordless drill to both the shield and chassis. Big improvement, but there were a lot of small corners that I can't get into. I think sandblasting will be the ultimate solution here, but I need to find someone with a sandblasting cabinet.

IMG_0348.jpg

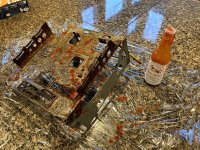
I would have liked to submerge it in vinegar for a few hours, but we're super low on vinegar right now. So, I decided to try something different: hot sauce, which is full of vinegar! Don't worry, we like our hot sauce around here. but while this bottle of Mule Sauce from Sticker Mule is fun, we aren't into the flavor. We're more of a Tabasco, Sriracha, and buffalo sauce family.

Anyway, onto the chassis it goes!

My 7-year-old daughter said, "Dad, don't you feel a little weird painting hot sauce onto your Macintosh?" 

"Yes. Yes I do."

IMG_0350.jpg

I wrapped it in plastic and put it in the garage overnight.

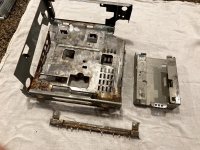
So, did it help? Maybe a bit. I washed it all off in the sink and left it to dry, which was a mistake. When I came back, it had all surface rusted, so I didn't get a great comparison. I hit it with the wire wheel on the drill one last time for now.

IMG_0354.jpg

Okay, now that the chassis isn't going to give us Tetanus just by looking at it, let's talk about what I did with the front shell! Sadly I didn't get any photos of this part, but I took it outside with my daughters, some toothbrushes, and Dawn dishwasher detergent, and we scrubbed the front like crazy. For the stubborn stuff (and there was a lot of stubborn stuff), I brought it inside and used wet paper towels and baking soda. This acts as a mild abrasive and removes stubborn scuffs and marks. It does also remove a bit of texture, but the scratches were so deep on this Mac that I was okay with that, especially on the chin. Where possible, I like to smooth out scuffs and scratches, even if that means losing some of the plastic texture.

To remind you, here's before:

IMG_0311.jpg

IMG_0327.jpg

And here's after, with the chassis and CRT re-attached.

IMG_0362.jpg

The scratches on the front are pretty unfortunate, but after retrobrite, these will hide a bit more.

IMG_0364.jpg

Normally, I tend to tear the Mac down and do retrobrite before doing any kind of reassembly and testing, but for this one, I decided to start move towards testing sooner rather than later.

Also, my livingroom looked like this:

61223698679__98CEC1A0-971B-43FB-8C8F-E400C1C6A878.jpg

So here's the current state of the Mac:

IMG_0358.jpg

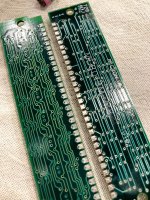
In the spirit of starting to reassemble things, I decided to reinstall the RAM. First, I hit it with an eraser to knock off any corrosion. Note the stick on the right with shiny pads.

IMG_0356.jpg

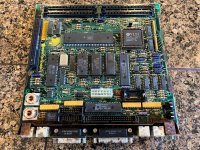
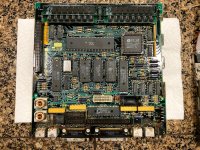
And here's the board again:

IMG_0361.jpg

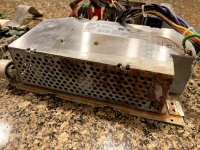
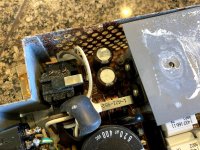
Let's take a quick look at the rest of the parts. Here's a closeup of the rust on the power supply. Next, I'll be taking this apart to see how bad the damage is. I don't think it's as bad as the exterior suggests.

IMG_0359.jpg

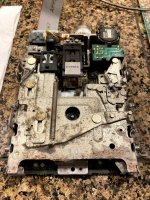
I won't bother to fix this until we've verified that the machine will power on and read an external floppy, but I'll have to clean up the floppy drive as well. Remember that this is a Macintosh SE FDHD, so this is a SuperDrive that can read 1.44mb disks! Worth saving for sure. The good news is that everything seems to move okay, including the spindle and motor.

IMG_0360.jpg\\

That's all for now. In the next update, we'll crack open the power supply!

 
Last edited by a moderator:

joshc

Well-known member
Wow, incredible progress so far. This is extremely satisfying to see. That board looks like it's come up extremely well considering. It's nice that your family get involved, this is really a team effort!


superjer2000

Well-known member
Two thoughts:

Evaporust is great stuff to remove rust from a Mac chassis like this.  And it's reusable.

When discharging the crt I think your only supposed to short to the top left monitor bolt/lug and not the chassis.  


Bendix

Well-known member
Fascinating story and many thanks for sharing. It's like a TV show and I am longing for more! I am even considering on sharing it with my wife (she is allowed to tell me the latest stuff from her boxer doggies and in return I can share things from the Classic Mac front).

Waiting for the next episode!


LaPorta

Well-known member
Evaporust is your friend here. Buy a gallon or two, submerge the rusty parts for 12-24 hours, and it will all vanish...no labor required.


Trash80toHP_Mini

NIGHT STALKER
I received a Macintosh SE FDHD from a friend that is in very rough condition. In this thread, I'll attempt to [SIZE=1.4rem]revive it! Normally, I title these threads as "Restorations", but I don't think that's appropriate here due to the condition of the machine.[/SIZE]
erm  .  .  .  best of luck in resurrecting that very long gone SE. :approve:


PotatoFi

Well-known member
Evaporust is great stuff to remove rust from a Mac chassis like this.  And it's reusable.
Evaporust is your friend here. Buy a gallon or two, submerge the rusty parts for 12-24 hours, and it will all vanish...no labor required.
Thanks for the recommendation! I'll either do this, or take it to my brother's house to sandblast it. Not sure yet.

 
When discharging the crt I think your only supposed to short to the top left monitor bolt/lug and not the chassis.  
Thanks for bringing this up; I think you're right. I don't know why I clipped there. The two are probably electrically connected, but I won't test that theory again. Additionally, if the tube did have a charge, you wouldn't want it taking the long way around past all of the electronics. The good news is either way, the tube didn't have a charge remaining when got my fingers under the anode cap.
For what it's worth, I've never, ever, ever heard even a tiny "pop" when discharging these. ¯\_(ツ)_/¯ But I still do, ever time.

Fascinating story and many thanks for sharing. It's like a TV show and I am longing for more! I am even considering on sharing it with my wife (she is allowed to tell me the latest stuff from her boxer doggies and in return I can share things from the Classic Mac front).

Waiting for the next episode!
I am happy to provide entertainment!

Evaporust is your friend here. Buy a gallon or two, submerge the rusty parts for 12-24 hours, and it will all vanish...no labor required.

erm  .  .  .  best of luck in resurrecting that very long gone SE.  :approve:
Revive, resurrect, whatever. ¯\_(ツ)_/¯

 
Last edited by a moderator:

Trash80toHP_Mini

NIGHT STALKER
LOL! How the heck did I get misquoted up there? :?:

An EMT "revives" a not quite entirely dead as yet patient in the field and hospital staff do the same for coders in house. Lazarus was entombed for four days and resurrected. That sucker's been dead so long you're documenting a Zombiethon  .  .  .  and I'm lovin' it! Go spud go! :lol:


PotatoFi

Well-known member
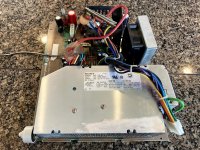
This evening, it was time to tackle the analog board and power supply. First, I cracked the lid on the power supply, which is a Sony model. Inside, it wasn't nearly as bad as it looked. The enclosure was rusted, but the board and components looked okay.

IMG_0366.jpg

I removed the plastic shield on the back of the analog board, and found that it looked okay. A bit of corrosion but nothing serious, I've seen worse from capacitor damage. I used my impact driver to remove the four Phillips screws holding the power supply to the analog board.

IMG_0367.jpg

With the power supply removed, I could see that the front of the analog board had some rust stuck to it.

IMG_0368.jpg

I took it to the kitchen sink to work on it. I started with soap and water and a toothbrush, and then I used baking soda on a wet paper towel to remove the last of it. I might try this on the edges of the logic board soon, which still have quite a bit of rust buildup on them.

IMG_0371.jpg

Since the analog board is out of the machine, I decided to clean up the brightness knob. In the past, my own SE FDHD had a faulty brightness knob that was erratic, and would only turn up to a certain brightness. I spent ages replacing parts on the board before finally just desoldering the knob, and rinsing the potentiometer with alcohol.

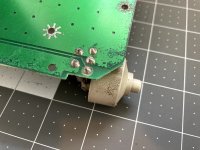
This one was literally under water, so I decided to do that here. Besides, it's super gross on the outside and needs external cleaning anyway. Here it is with the original solder joints.

IMG_0375.jpg

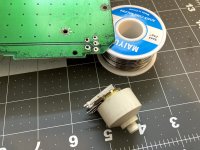
I heated my iron to 750°F, and attempted to heat one of the joints. No luck, so I tinned the tip with a bit of fresh solder, and instantly things started flowing. I used a cheap desoldering pump to remove the majority of the solder, then I followed up with a bit of desoldering braid to get the last bit. The knob popped right out.

IMG_0376.jpg

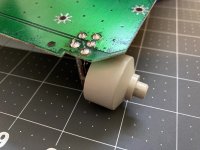
I didn't get photos of this part, but I went to the sink and scrubbed it with... you guessed it! Soap, water, and a toothbrush. When I was done cleaning the outside, I filled it up with alcohol, twisted it around a few times, and repeated once more. Then I took it back upstairs and reinstalled it.

IMG_0377.jpg

After that, the back of the logic board got a nice scrub with alcohol, and then a bunch of cleaning with the air compressor. I also used paper towels and alcohol to clean up the anode wire and cap. You'll see them in a bit, they look brand new!

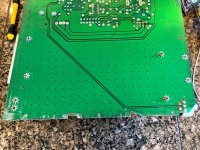
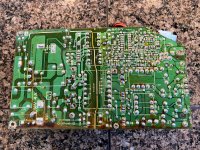
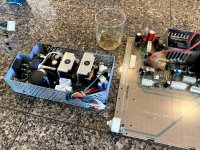
Next, I popped the power supply board out of it's case. I somehow didn't get an "after" photo, but here's what the back of the power supply board looked like at first. It's pretty easy to remove, just three Phillips screws, unclip the low voltage wire bundle, and sneak it out of the case. I've never recapped one of these because I was kinda afraid to get into it, but now I know that they're pretty simple inside. An LC power supply is a lot more complicated to take apart and put back together.

IMG_0369.jpg

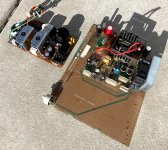
All of the gunk that you see on the back of the power supply doesn't seem to be rust or corrosion, it's all flux! I scrubbed at it with alcohol and a toothbrush, and in no time, my hands were super sticky! I ended up scrubbing it several times with alcohol, scrubbing it with soap and water to remove the last bit, and blowing all of the moisture with the air compressor. Then, I put both the power supply board and analog board out in the evening sun to dry.

IMG_0378.jpg

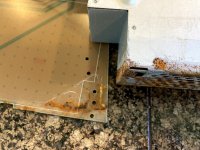
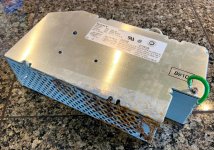
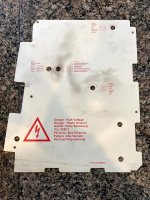
Next, I decided to work on removing the corrosion from the power supply case.

IMG_0379.jpg

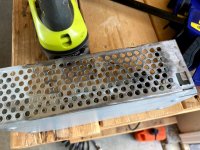
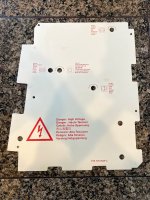
I took it out to the work bench, and used a couple of clamps to keep it still while I wire brushed it. It came out looking great.

IMG_0380.jpg

I might need to paint the part of it that is bare metal later, but for now, I decided to put it back together to get closer to testing. I know that looks like a glass of whiskey in the background, but it's just vinegar with some rusty screws in it.

IMG_0382.jpg

Power supply and logic board are reassembled!

IMG_0384.jpg

Tsk tsk tsk. This won't do.

IMG_0372.jpg

Windex fixes everything!

IMG_0373.jpg

I reassembled the Mac, and I gotta say... it looks pretty insanely different then when I took it apart.

IMG_0387.jpg

It's ready to test. I'm going to wait until tomorrow to give all of the components to dry out; I want to give this Mac every opportunity to start up on the first try. Here's a closer look at the internals:

IMG_0388.jpg

So, what's left?

  • See if this thing even works! I'll just use an external floppy drive for now.
  • Functionality test including all I/O ports
  • Clean, lubricate, install and test floppy drive
  • Install and test hard drive
  • Fix any analog board issues such as capacitors and screen adjustment
  • Tear down
  • Sandblast and paint chassis and brackets
  • Finish cleaning up case bucket
  • Retrobrite entire case
  • Reassemble


Thanks for following along!

 
Last edited by a moderator:
Top