Trash80toHP_Mini
NIGHT STALKER
For those who might be curious, this insanity started back in March of 2011 . . .
TWO SLOT IIsi Nubus Card hack . . . (SE/30 hacks)
. . . and I'm just recently getting back into it. :
Why cram two NuBus slots into a IIsi, you ask? Just because I think I can and it would be ever so sweet to have a really good VidCard sitting underneath the Radius Rocket 33/SCSI II DaughterCard combo up in the top slot of my SuperIIsiHack™
Suffice it to say the first go round was the expected failure, but important data was produced and I managed to keep the magic smoke contained wherever it was that it belonged!
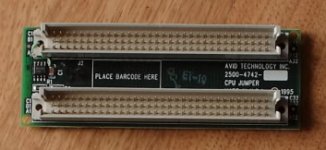
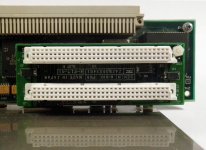
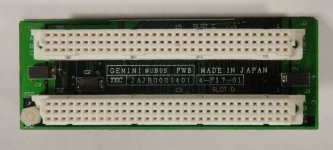
This is the DuoDock's Twin Slot "reversed riser" card that drops the Duo's NuBus Slots down and tucks them underneath the Dock's Logic Board. I'd been wondering about using what's apparently an almost passive NuBus backplane for some sort of hackage for quite some time.
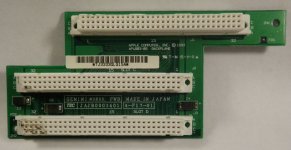
Back to that Data:
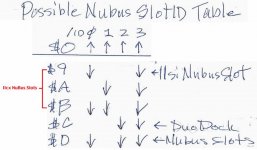
First off, the the lower Slot ID is coded as $D, which doesn't exist in the IIsi's hamstrung little world of mid-level Macdom: Hence, no problem booting up with the Radius VidCard installed in it, The IIsi's ROM doesn't give the Slot Manager a single clue that Slot $D exists in the upper echelons of the Macintosh pecking order.
The Top Slot ID is encoded as $C coming from the Gemini Card end of things and encoding signals for the IIsi's NuBus adapter are yelling at the NuBus Card that it's installed in Slot $9 at the same time!
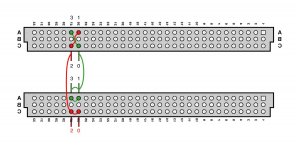
In this situation the pins for slot ID signals for /ID0 and /ID2 are being pulled both high and low at the same time. NOT GOOD! Hence the Unserviceable Slot Interrupt error message bleating out as the CPU throws its hands up in disgust.
Here's what's left of the Gemini Card after I lopped off the top section and its connections to the bass ackwards and upside down interboard connection to the Dock's Logic Board.
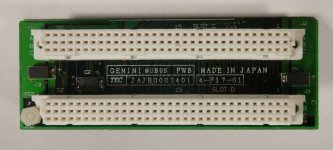
Here's the other side, showing a top view of the "Machine Pin Hack" inflicted upon the poor NuBus connector's soldertail cones:
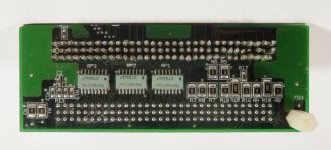
Here's an oblique view of this (quite effective) brutally inflicted mess, the remaining pins anyway:
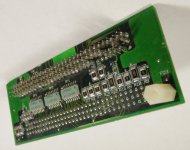
This shows the machine pin interface and the standoff resting comfortably upon the FPU.
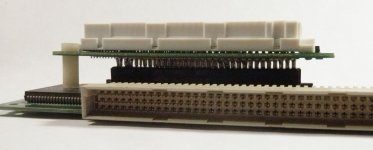
This shows layers exposed at the cut line during connector reduction surgery:
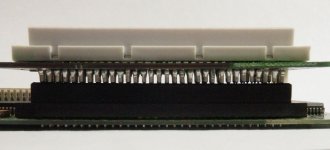
Top view of abbreviated Gemini Card installed in IIsi NuBus Adapter.
____________________________________________________________________________
That's enough for re-documenting photos from Take 1 of this hack that were lost in the great pixel robbery, so now down to the current iteration of the project. [ ] ]'>
] ]'>
An oblique pic of what I described at the end of the NuBus Slot ID Assignment Encoding thread:
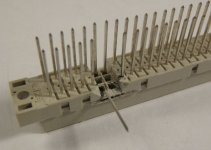
I'm using Wire Wrap Connectors for the final version for reliability, adding Machine Pins is good for down and dirty feasibility testing, but not something I want for any kind of general use. The above was my first experiment with the process using some 2x32 Wire Wrap connectors I got by mistake: Gotta try again when I'm not so friggin' tired! Bent one pin and broke it off trying to bend it back. :
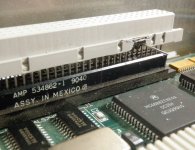
Here's a shot of the unbroken pin sticking straight out from the side of the NuBus connector, clearing the Gemini PCB (use your imagination!) without interfering with mounting a NuBus Card. Doing this decouples all four Slot ID signals: /ID0 through /ID3 of both slots from the IIsi side as well as the Gemini Card side. This allows me to snatch high and low signals right off the IIsi Adapter with jumper wires for properly encoding the Gemini Card's slots as IIsi friendly Slots $9 and $A.
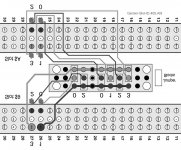
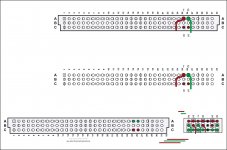
Now that you've seen the pics, maybe my diagrams will make things a little less murky . . . or not.
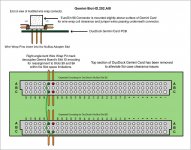
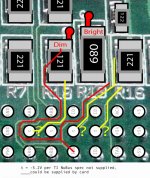
The down and dirty illustration of this Nastyhack shows the tapping of high and low signals fromthe empty connections (remember those bent pins!) and their use for encoding the Gemini Cards Slot IDs:
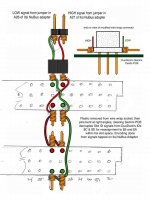
Confused yet? :lol:
TWO SLOT IIsi Nubus Card hack . . . (SE/30 hacks)
. . . and I'm just recently getting back into it. :
Why cram two NuBus slots into a IIsi, you ask? Just because I think I can and it would be ever so sweet to have a really good VidCard sitting underneath the Radius Rocket 33/SCSI II DaughterCard combo up in the top slot of my SuperIIsiHack™
Suffice it to say the first go round was the expected failure, but important data was produced and I managed to keep the magic smoke contained wherever it was that it belonged!
This is the DuoDock's Twin Slot "reversed riser" card that drops the Duo's NuBus Slots down and tucks them underneath the Dock's Logic Board. I'd been wondering about using what's apparently an almost passive NuBus backplane for some sort of hackage for quite some time.

Back to that Data:
A couple of interesting things here:There are three possible states when the hacked Gemini Card is inserted into the IIsi NuBus Adapter:
A - Radius Card installed in top slot - Unserviceable Slot Interrupt
B - No NuBus Card installed - boots normally
C - Radius Card installed in bottom slot - boots normally
First off, the the lower Slot ID is coded as $D, which doesn't exist in the IIsi's hamstrung little world of mid-level Macdom: Hence, no problem booting up with the Radius VidCard installed in it, The IIsi's ROM doesn't give the Slot Manager a single clue that Slot $D exists in the upper echelons of the Macintosh pecking order.
The Top Slot ID is encoded as $C coming from the Gemini Card end of things and encoding signals for the IIsi's NuBus adapter are yelling at the NuBus Card that it's installed in Slot $9 at the same time!
In this situation the pins for slot ID signals for /ID0 and /ID2 are being pulled both high and low at the same time. NOT GOOD! Hence the Unserviceable Slot Interrupt error message bleating out as the CPU throws its hands up in disgust.
Here's what's left of the Gemini Card after I lopped off the top section and its connections to the bass ackwards and upside down interboard connection to the Dock's Logic Board.

Here's the other side, showing a top view of the "Machine Pin Hack" inflicted upon the poor NuBus connector's soldertail cones:

Here's an oblique view of this (quite effective) brutally inflicted mess, the remaining pins anyway:

This shows the machine pin interface and the standoff resting comfortably upon the FPU.

This shows layers exposed at the cut line during connector reduction surgery:

Top view of abbreviated Gemini Card installed in IIsi NuBus Adapter.

____________________________________________________________________________
That's enough for re-documenting photos from Take 1 of this hack that were lost in the great pixel robbery, so now down to the current iteration of the project. [
An oblique pic of what I described at the end of the NuBus Slot ID Assignment Encoding thread:

I'm using Wire Wrap Connectors for the final version for reliability, adding Machine Pins is good for down and dirty feasibility testing, but not something I want for any kind of general use. The above was my first experiment with the process using some 2x32 Wire Wrap connectors I got by mistake: Gotta try again when I'm not so friggin' tired! Bent one pin and broke it off trying to bend it back. :
Here's a shot of the unbroken pin sticking straight out from the side of the NuBus connector, clearing the Gemini PCB (use your imagination!) without interfering with mounting a NuBus Card. Doing this decouples all four Slot ID signals: /ID0 through /ID3 of both slots from the IIsi side as well as the Gemini Card side. This allows me to snatch high and low signals right off the IIsi Adapter with jumper wires for properly encoding the Gemini Card's slots as IIsi friendly Slots $9 and $A.

Now that you've seen the pics, maybe my diagrams will make things a little less murky . . . or not.

The down and dirty illustration of this Nastyhack shows the tapping of high and low signals fromthe empty connections (remember those bent pins!) and their use for encoding the Gemini Cards Slot IDs:

Confused yet? :lol:

Last edited by a moderator:

