zigzagjoe
Well-known member
I've got a clamshell with a dying OEM battery, time to rebuild it. Turns out it's quite annoying to get 18650 cells with presoldered tabs, and I don't have a spot welder. Ugh.
So instead I had the thought: why not cannibalize some chinese laptop replacement batteries for those cells? It's likely not the best quality cells, but I just want *some* battery functionality rather than caring if it eeks out exact as-new battery life. I'll balance it a few times with my hobby lipo charger as I don't trust that it's been well-balanced beforehand; this is often why packs die prematurely. I'll also get to see just how much capacity these cells actually have.
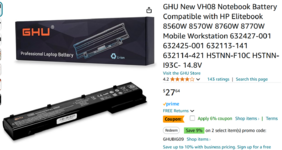
Taking it one step further: the Ibook battery is just a 2P4S (two cells in parallel x 4) pack .... a very common topology. Why not just get a chinese battery already in that configuration and skip needing to solder cells together at all? If that works out, I'll have a refurbished iBook battery for $30!
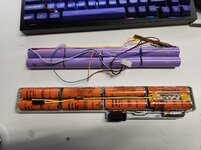
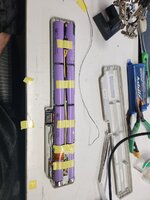
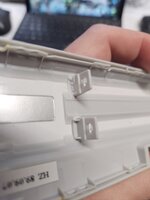
One chinese battery ordered, and promptly shucked. Here's what's inside. Plenty of flex on the solder tabs, I think it should drop right into the iBook with some kapton tape to insulate where needed. I've soldered a balance lead to the battery in the picture here.


It'll be a few days to discharge and balance it a few times before I install it into the pack, will update with results...
So instead I had the thought: why not cannibalize some chinese laptop replacement batteries for those cells? It's likely not the best quality cells, but I just want *some* battery functionality rather than caring if it eeks out exact as-new battery life. I'll balance it a few times with my hobby lipo charger as I don't trust that it's been well-balanced beforehand; this is often why packs die prematurely. I'll also get to see just how much capacity these cells actually have.
Taking it one step further: the Ibook battery is just a 2P4S (two cells in parallel x 4) pack .... a very common topology. Why not just get a chinese battery already in that configuration and skip needing to solder cells together at all? If that works out, I'll have a refurbished iBook battery for $30!
One chinese battery ordered, and promptly shucked. Here's what's inside. Plenty of flex on the solder tabs, I think it should drop right into the iBook with some kapton tape to insulate where needed. I've soldered a balance lead to the battery in the picture here.


It'll be a few days to discharge and balance it a few times before I install it into the pack, will update with results...


