• Updated 2023-07-12: Hello, Guest! Welcome back, and be sure to check out this follow-up post about our outage a week or so ago.

PowerBook 500 battery replacement

douglasgb

Member
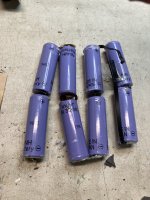
I got a pretty nice PowerBook 540c but of course the batteries were dead. After a lot of research and reading, I decided to try to make them work again. I did not relish trying to solder or epoxy batteries together. Given the advances in AA battery power, I decided I would try a ready-made pack of eight of them. I bought a 9.6v 2400mAh pack meant for R/C vehicles, which is already assembled in the proper order and even has a auto-reset fuse included (like the originals). I got this one: https://www.batteryspace.com/Custom-NiMH-Battery-9.6V-2200mAh-Battery-with-Polyswitch.aspx


douglasgb

Member
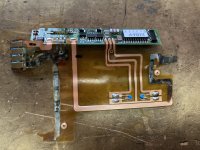
The battery I took apart had sadly been leaking, and after opening it I found the internal conductors were in bad shape.

IMG_3201.jpeg

IMG_3167.jpeg

 
Last edited by a moderator:

douglasgb

Member
Luckily the temperature sensors were in good shape, so I trimmed off the bad parts and left the good parts. This material is very easy to tear so be I was very careful on that interior corner.

IMG_3202.jpeg


douglasgb

Member
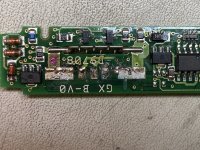
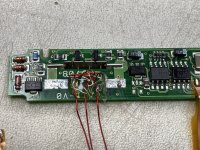
More bad luck: the corrosion had followed the copper all the way to the three small contacts on the EMM board itself. I desoldered that part and tried to clean it up, but two of the pads had been compromised. I was able to trace those two connections back to the nearest via, cleaned them out, and soldered small insulated wire to substitute for the ruined ribbon cabling. They cross over each other just so they exit the board in the same order as original. I hot glued them to the board for strain relief.IMG_3203.jpeg

IMG_3204.jpeg

 
Last edited by a moderator:

douglasgb

Member
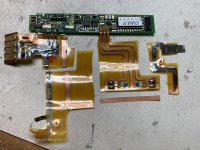
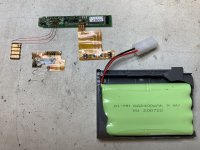
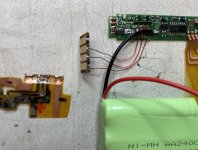
Here are the pieces laid out for assembly and the initial connections. Note that the lowest of the three small wires is attached to the bottom of the bottommost battery contact. That's because I wanted to leave the top empty for the final connection of the main positive lead from the battery.

IMG_3205.jpeg

IMG_3206.jpeg

 
Last edited by a moderator:

douglasgb

Member
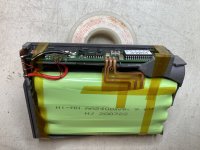
There is a short black wire from the EMM board terminal to the first of the battery contacts, and then finally the red wire was attached. I did that so the EMM board was unpowered until the very end. Next time I will achieve the same thing by connecting the black wire from the battery to the EMM board as the last step. I was able to slip the sensors inside the existing PVC jacket of the battery pack, and then temporarily (?) tape the parts in place for testing.

IMG_3208.jpeg


douglasgb

Member
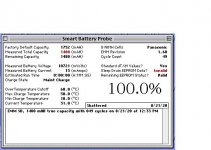
I have yet to calibrate the battery with a proper charge/discharge cycle, and may have trouble with the EMM that Lind/IBU/EMMPathy can't seem to fix. But the battery does run the computer and the computer does charge the battery!

Notes: this project would have been much easier if my battery had not destroyed its internal cabling. Also, as things are I cannot close up the battery because of the groove/bumps running across the battery case. I believe if I cut the jacket off of the battery pack then the groove would fit into the cavity between pairs of cells.

Picture 2.jpg

 
Last edited by a moderator:

sutekh

Well-known member
Nice work! I'd definitely cut away the outer heat shrink jacket. I suspect you'll find that the cells themselves are still individually insulated.


Byrd

Well-known member
Wow - Douglas, would you mind sharing your technique on the best way to crack open the OEM battery housing?  I'm in two minds to crack open in the middle seam or just one side.


douglasgb

Member
I'm not sure of the best way to open these - I tried to pry mine open at one of the gaps and it shattered as I did so. Maybe the leaking battery gasses also weakened the plastic? There are other threads here showing other people's attempts. When I get up the nerve to do my second battery I will post the process and results.


sutekh

Well-known member
I've opened a few Duo batteries and power adapters at this point, and the same technique I often use on other cemented plastic cases works well: Place on a hard surface seam up, and strike the seam quickly but gently with a soft-face or small ballpeen hammer working all the way around. The objective is to break the glue without shattering the plastic (although safety glasses are still a good idea!).

For stubborn areas, I place a 1/2" wide putty knife or dull chisel in the seam and give it a few strikes. Try to avoid prying the halves apart unless absolutely necessary though, as it always marks them up and often cracks them.

 
Last edited by a moderator:
Top