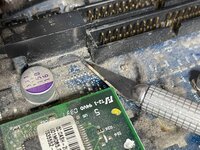
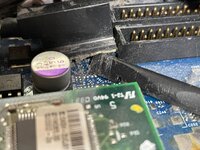
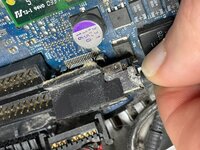
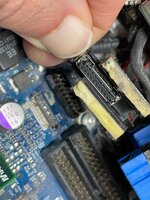
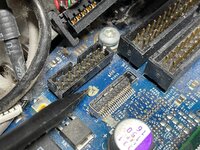
Without a reference photo of what the TDMS connector looked like, and being unable to see what was underneath that plastic connector, I spent the better part of 15 minutes surgically slicing through this gummy double-sided nonsense with an X-Acto knife, and gently prying up with a spudger, to finally lift the connector out of its housing.
This is from a 20" iMac G4 — a very recent acquisition of mine — that I recently disassembled in order to upgrade the internal memory module to 1GB. Once opened, it was so dusty that I decided to completely disconnect the bottom housing, take it out back and blow out the dust with a compressed air can. For the top half of the computer, I removed the drive cage and did the same.
The remaining components inside the computer were the speaker, fan, and neck assembly. Nothing particularly sensitive to ESD. So I grabbed my Dyson stick vac and vacuumed the interior of the dome while gently blasting the insides with compressed air. The vacuum helped to minimize the spread of dust in the room.