• Updated 2023-07-12: Hello, Guest! Welcome back, and be sure to check out this follow-up post about our outage a week or so ago.

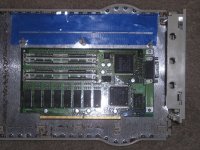
PM8100: all three NuBus slots free HPV install?

Trash80toHP_Mini

NIGHT STALKER
Subject came up when I mentioned the full three slots free installation of a 2/4 HPV card on the floor of my Radius 81/110 Big Metal Can

@jeremywork asked if the same might be done in his PowerMac 8100  .  .  .  we'll see!


View attachment 30453

Now you've gotten me curious! Is that the same case as the 840AV with a fourth "NuBus" slot panel for the PDS VidCard in place of the "AV panel? of the 840? If such is the case, we've got a good starting place. :approve:

View attachment 30454

Which G3 kit are you using, looks like the Sonnet setup from here? If so you may or may not have a tad less room than the NewerTech setup, but I've got a Sonnet Kit stored away somewhere as well.

Case modifications are required, rough outline of process:

  1 -  Disassemble case sections.

  2 -  Remove RFI shielding on the floor of the case. (figuring we'll need to bend the retaining teeth up to get it off the pins)

  4 -  Figure measurement from edge of router base to back, front and center of slot to be cut in case bottom

__________ add 1 1/2" to each measurement for screwing 1x2" guides for router base on top of template (from bottom)

__________ allow for another 3 1/2" on outboard side for clamps, allows use a piece of 1x4" as a jig for mounting 1x2" router guide on outboard side

  5 -  Place RFI shielding on top of a piece of 3/8" plywood at the offsets figured above.

  4 -  Mark centers of back six holes to be drilled in template/router jig for centering it up with router base offsets front back and outboard side

__________ and mark anything else that might need to be removed to prevent router jig from sitting flat on the baseplate section

  5 -  Drill six holes for registration of jig and drill out or cut away anything else that might be in the way.

  6 -  Clamp the three guides to jig and use screws from bottom side to hold them in place

  7 -  Clamp jig onto sacrificial material or use spacers to protect worktop

  8 -  Use router to cut away section of template covering slot to be cut in bottom of case using a bit wider than final PCB+ thickness of slot in case bottom.

  9 -  Clamp jig to base unit and set depth of router bit so it removes about half the thickness of the case bottom away

__________ reassemble case (less the RFI plate) to test for fitment

10 - Remove backplane plate from HPV card and have at it! [:D]

The Slot will have been set up to hold the card parallel to the MoBo over the NuBus cards at a height matched to cable adapter height. WAG is that the HPV Card/Cable extension assembly fit without going through the bottom of the case. The arrow PCB+ slot will hold it in place vertically. Cable may or may not be pushing that side of card up too high, dunno, may need hold downs attached to PSU support shelf? No biggie there if so.

Is the 8100 board significantly better than the 7100 board if at all different? Can I use my 7100 board, same form factor or at least the slot section matches?

 
Last edited by a moderator:

jeremywork

Well-known member
I'll try to take some side-by-sides of the 8100 and 840av for comparison. I have many tools available, but having a hard time picturing all of your steps visually. My PDS cable kit is a Sonnet unit, and I suppose some vertical space could be reclaimed with a shorter PDS slot soldered on the ribbon, but that sounds far more tedious than cutting some case plastic away :)

Pics to follow soon...


Trash80toHP_Mini

NIGHT STALKER
I'll try to take some side-by-sides of the 8100 and 840av for comparison.
Just measurements from the bottom of the PSU support shelf to the top of the RFI shielding of both cases will do. Can't imagine it's not the same  .  .  .  then again  .  .  .  Apple. ::)

I have many tools available, but having a hard time picturing all of your steps visually.
Cool, that means I won't have to try to describe them verbally. That's not something I do well or easily, typical shortcoming of visual thinkers.

.  .  .   but that sounds far more tedious than cutting some case plastic away :)
Modify that adapter? Just NO! I'll try to find my Sonnet Kit so we're looking at the same thing.

Offhand, does anyone know if a 7100 board fit the 840AV case? Thinking it's a different form factor, but wondering if its slots will line up well enough for rough trials?

edit: cases are the same, both based on the Quadra 800, per LEM anyway.

 
Last edited by a moderator:

Trash80toHP_Mini

NIGHT STALKER
Every time I touch this freakin' 840av case more plastic breaks off and parts fall out of it that crumbled away while it was sitting untouched! At any rate, 7100 is a no go as expected, missing one slot in the PCB. However the spare 81/110 board slots onto every point, but interference from its mismatched connectors with the port openings of the Quadra. Such keeps it from moving any closer to the backplane. So it's fine for testing HPV Card fitment. but for that setback.


Trash80toHP_Mini

NIGHT STALKER
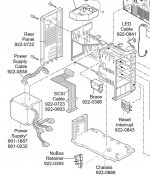
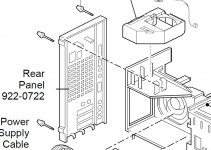
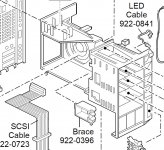
Belay the instructions above, should have looked at the exploded diagram first. The vertical structure makes that approach impossible.

Sploded-8100.JPG

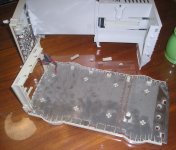
Looks like the only way to do this without the utter destruction pictured below might be to go all the way thru from the bottom.  I'd use a up-cut type metal cutting bit in the Roto-Zip. I'd pre-drill holes on either side of the structure of the foot along the cut line to stop the cut by feel. topside can be filed out or Dremeled to an appropriate depth at those points, retaining that structure intact to tie the sides of the cut together at that point.

And now for the Ugliness!  [}:)]   _________________________________________________________________________________________________

Decided to bust off a bunch of clips to have a good look. A couple of clips were already laying on the floor of the case and it bowed out on the back right corner already.

clips-be-gone.JPG

The case supports one side of the MacCoffeeTable so I couldn't care less about the need to bolt this <^%$#)> thing back together! :p

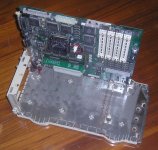
Good news it that I can position the the spare Radius 81/110 board in battery with the ass end removed..

Radius-Board-in-Battery.JPG

Potsition-Approximation.JPG

Had to torque things pretty good to get a slot approximation

HPV-Clearance-Slot.JPG

This G3 board has a bad passthru cable so I went ahead and used a hair dryer to bend it more into the proper curvature.

Here's the best of the shots of the clearance necessary to do the hack.

Clearance.JPG

Hole for the pins on the connector can be drilled in the PSU shelf from above or with a right angle drill from the bottom to hold the bottom of the card/cable in place. Looks like pins through the top mounting holes of the card will hold it up tight to the PSU shelf. That would allow for fairly easy installation/removal  .  .  . or likely not.

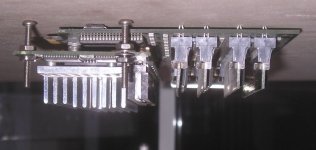
Hack's not really practical with these NewerTech cards. The Sonnet rig is a lot more flexible for this hack from what I recall. Having the longer, active component cable plug into a slot on the Crescendo/NuBus beats the shot, hardwired cable on the MAXpowr boards. The cables aren't all that reliable, having a tendency to fail as on this card from my hoard.

 
Last edited by a moderator:

jeremywork

Well-known member
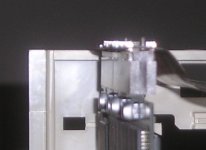
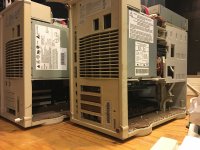
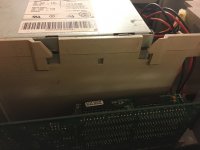
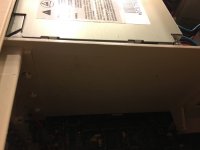
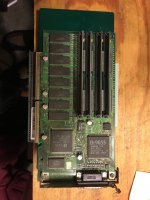
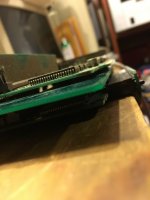
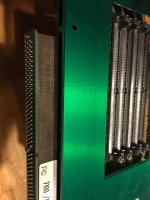
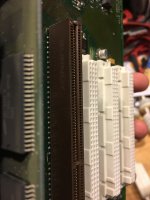
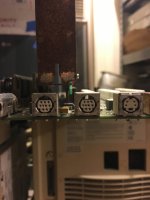
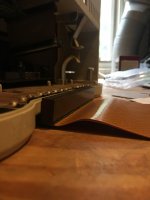
I finally got these two onto an open bench and they look like a nearly identical case, save for this little retaining clip structure on the 8100 that I can't discern the purpose of (perhaps more interesting are the presence of stabilizing arms that look like they hold a card in place in the 840AV, where there is no slot present on the motherboard. The right clip was retained on the 8100 to hold the PDS card, while the left clip was deleted to make way for the slot opening.) Despite this retaining plastic, the PDS card itself narrowly fits into both cases. It appears there's a pretty enormous waste of space in that female computerbus connector. There seems to be enough height between the case floor and the table beneath to carve out a slot to accommodate the top of the upside-down PDS card. Because of the video port position, this may mean sacrificing the lock port on the back, but there may still be a better way.

IMG_5142.jpg

IMG_5144.jpg

IMG_5145.jpg

IMG_5146.jpg

IMG_5148.jpg

IMG_5152.jpg

IMG_5154.jpg

IMG_5157.jpg

IMG_5158.jpg

IMG_5161.jpg


Trash80toHP_Mini

NIGHT STALKER
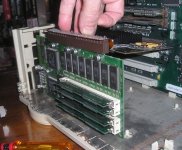
@jeremywork How much headroom is there between the bottom of the plastic PSU shelf and the top of the ROM DIMM in your 8100? I've got about 8.5mm between PSU and the top of the ROM DIMM in my 81/110. Your board's CPU shouldn't need its heatsink with the G3 card in place, no? If it needs it at all, it shouldn't really need the entire thing, no? [}:)]

8100 Riser - Forked Tongue Edition:

8100-Riser-Forked-Tongue-01.JPG

If you can fit the HPV card between the bottom of the plastic shelf and the top of the ROM Card as I've shown for my 81/110 you've got a solution, not as simple as the riser in the thread @BadGoldEagle started about using HPV in the 9150, but it might work out. without losing a NuBus slot. If it's to tall, grinding away some of the 601 heatsink's bits would be required. Do any other components come up to the level of the DIMM connector? I just tried the notion out in my 6100, looks like the heat sink clears the bottom VRAM SIMM such that the curl and firs couple of rows remain intact.

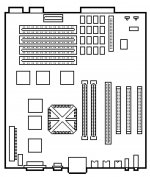
8100-Logic Board-01.JPG

I only see three NuBus slot covers, can the 8100 use the AV card, but not the HPV card? Very Strange.

8100-Rear-Panel-00.JPG

However the Service source appears to say that the second gen. a/o faster versions require AV or HPV to be installed. Yours has the fourth slot cover, so it's a later or high end model? Were the low end versions built using the three slot rear panel of the 840AV case? That way they couldn't compete with higher end 8100s by installing HPV without replacing the back panel it would seem? Not so strange that, really, really nasty, but that's Apple marketing for you. ::)

Dunno how the heck you'd get that plastic excuse for a case  back together with ROM SIMM and HPV in place? Alternately you'd need to find a way to install the ROM after finagling the HPV card over the top of the heatsink and DIMM slots with the case assembled. Good luck playing around with the 8100/HPV bits to see if you can get it to work. :grin:

By gosh I do really love that big metal can from Radius! :approve:  


Trash80toHP_Mini

NIGHT STALKER
I gave in and pulled the empty 8500 box out from under the MacCoffetable in the living room, there's no way I was gonna pull out and open up the self-crumbling 840AV from under the other side for this schiznit. ::)

This one depends upon how much headroom you have overtop standard height NuBus Cards in your 8100 case. Looks to be plenty once you break out that frimpinly stoopid stabilizer bar for the AV card would be under the HPV pic you showed me:

View attachment 30513

I was thinking about the 9150 riser and tightening up its slot spacing like so:

8100-Riser-Spacing-00.JPG

If limited by headroom, such would require flipping the orientation of the slots back to front. But there would be plenty of room on the riser for that, far more than the Cache Slot shenanigans required for the PowerCache adapter @Bolle came up with for the SE/30.

Per your pic and my playtime:

Something has to give to make it work.***** In these more conservation correct times, mayhaps a bit more civilized approach is required? A split level, two slot riser seems a fairly civilized approach and just just fit without slotted case bottom or bob-topped card.  It would still require a bit of internal plastic member removal, but nothing drastic. Making a cutout in the PSU shelf about an inch deep enough along the dotted lines and application of electrical tape to the bottom of the PSU.

8100-Sacrificial-Support Bridge-00.JPG

8100-Split-Level-Riser-Spacing-01.JPG

Even the placement pins of the slot part would fit, better holding the soldertails on the riser away from the electrical tape above.

Split Level Riser:

 || ___________

_||              |_____________________________________________________________________

 ||___________|                                                           ||     ||       ||     ||

 ||         ||__________                                                   ||     ||       ||     ||

_||         ||.            |____________________________________     ||     ||       ||     ||

 ||         ||__________|   |                        |   |          |       ||     ||       ||     ||

 ||         ||          ____| | |  | |  | |  | |  | |  | |   |          |       ||     ||       ||     ||

_||_______||        | |  | |  | |  | |  | |  | |  | |  | |   | _______|       ||     ||       ||     ||

_||_______||        | |  | |  | |  | |  | |  | |  | |  | |

_||_______||        | |  | |  | |  | |  | |  | |  | |  | |

           ||                                        ||  _____ Will Accelerator's heatsink clear top of a standard height NuBus Card in the loft space?

     /|\   ||                                        ||   

      |___||__ Headers between levels   ||

           ||   underneath connectors    ||

           ||   make connections so G3  ||

           ||   aligns with PDS and         ||

           ||   HPV wedges between      ||

           ||   PSU bottom and the        ||

           ||   RFI shielding below         ||

           ||   at level required             ||

           ||                                        ||

           ||                                        ||

           ||                                        ||

           ||                                        ||

           ||                                        ||

           ||                                        ||

           ||                                        ||

           ||                                        ||

           ||                                        ||

           ||                                        ||

           ||                                        ||

           ||                                        ||

      ____||____                      __________||

      |          |                      |.            |

      |          |                      |.            |

____ |________| _________________|__________|___________________|

ASCII art AND sketch time fun today! :approve:

*****  TLDR: Had I opted for an 8100 back in the day as opposed to my dream machine from Radius, all manner of nastiness might have ensued. I would have dropped the blade of my radial arm saw into the sheet metal and plastic of the floor of that horrid excuse for a case to make a slot in it for the top edge of the HPV card in a heartbeat. I'd have run the HPV card itself across the router table to trim the top edge of the board right down to the power/ground planes as well if necessary. Bodging an expansion bay outside the box to employ a cable kit would have been right up my alley for a production machine of the time. The times when anything went were good times indeed.  [}:)]  

Be that as it might have been, I skipped over the X100 generation entirely by using a 2300c as a stopgap workstation between the IIx I'd bought as a launch pad for the Rocket and a refurb 6360 I bought for later installation of a G3. The 81/110 was something I picked up for fun and much belated wish fulfillment. I don't think I missed out on anything, the whole 601/NuBus machine era was a great time to have skipped a generation.


Trash80toHP_Mini

NIGHT STALKER
@jeremywork I had tons of fun with your old project and the artwork sessions yesterday, but was ready to pack it in again unless you or someone else were really interested in doing it. That got me settled down again, so I'm not doing anything crazy for a while, I'm back to simple, practical woodworking projects I should get done and the "stuff" consolidation/reduction project which is imperative.

Mechanical type drawing: can't work, the ports on the back and the logic board mounting screw pylon interfere with that craziest of notion, but it was so good  for me to play with the tiny, portable, clipboard drafting table/tool set again.

ASCII art version: too complex and to much plastic removal. finding the right offset for the split level boards would be a nightmare, if it would fit/install all, but that got me back to cables again.  :rolleyes:

So, as I started packing the piles of junk away, looked at that cable notion for the split level contraption and accidentally noodle out a way to install everything in a non-destructive way. But for possible (almost certain) breakage of that dang brittle-ized plastic swingaway contraption in removal/re-installation the hack is ever so possibly reversible  ,  ,  ,   if using a heat gun to soften the blasted thing for removal might do the trick.

One custom riser PCB, two PCI female connectors, headers/IDC connectors and a pair of off those ordered on eBay cable based PCI risers required. The project is go again.

8100-OddAngleSolution.00.JPG

Dropping this assembly to the level of the shelf so the low side of the riser board all but clears the top of the 8500's bottom PCI slot backplane rplate even with the too wide PCI riser's edge card connector intact, it's still hung up on the protrusion of the drive support shelf into the card cage cubic.

8100-OddAngleSolution.01.JPG

Bits and pieces: as said, the cable thing's off the shelf PCI stuff. The slot part of the riser is lopped off along the blue line right from the start. One end of each edge card assembly is hacked away, reducing one end to the length of the wide side of the PDS, a PCI Slot. The wide part of the second cable is trimmed to match the narrow end of the PDS closer to the backplane. Dunno what that slot connector is called, but it's probably a standard part or should have been, but you know Apple.

I won't get into the option of using headers and IDC junk to avoid soldering the cable's wires directly to the board. It saves only about 3mm of the risers' edge card contacts if done that way. We'll go straight on to the more secure, less electrically hostile approach.

Given: lopping off the socket end, stripping and soldering all those cable wires straight into the custom adapter PCB is more tedious than soldering headers into the PCB and crimping the matching connectors onto cables. However, soldering wiring straight into the new adapter card saves a full 7mm, removing the edge card teeth all the way back to the red line and reducing the slant of the HPV card considerably.   

________________________________________________________________________________

:lol: OOPSIE!  I've been writing this post on and off a bit of the time since this afternoon as I packed stuff away. Thinking about buttoning my Coffee Table Support/8500 I took a look at the bottom and managed to break the front retaining clip holding the retention sockets of the swinging assembly off with a screwdriver from under there. That ludicrous swing arm contraption still works fine minus half of its front end socket! At any rate, that's definitely the tab to break off when heating it up for removal will likely fail as well. I'm just tossing that tab back onto the bottom of the case with the other Parts, bits, pieces and shards that have crumbled off all on their own since last time I had this thing open. Oh well!

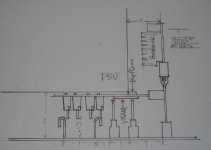
Long story short, given infernal contraption removal, this will very likely work. If anyone is interested in giving it a shot, chime in. I'll do a few more pics, flesh out some details and maybe do a freehand sketch of the parts in isometric to overlay the SCSI cable in the exploded diagram from the Service Source above. That'd be fun.

If not, we'll see this topic fade back into the depths of the hacks forum for another year or so again.

_________________________________________________________________________________

edit: forgot the pic above this is your 8100 with the Crescendo Kit? Tried it looks like it would work fine topside in my machine  .  .  .

View attachment 30454

.  .  .  down below it's a hellish mess that could never work with that PCB in just the wrong spot.

What's your floor to PSU shelf bottom measurement? Given the looks of your floorboards, are you up for slotting the PSU shelf to get a horizontal HPV fit?

 
Last edited by a moderator:
Top