• Updated 2023-07-12: Hello, Guest! Welcome back, and be sure to check out this follow-up post about our outage a week or so ago.

PB 5xx original AC adapter re-cap & modern replacement

3lectr1cPPC

Well-known member
Do you have the mouser part list still for the rest by any chance? Having the same caps to install in mine as you did in yours which works would be great.
 

3lectr1cPPC

Well-known member
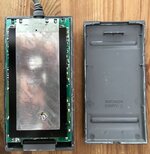
Thanks! I've already got the case open on mine. I took it, a 100 series adapter, and a 5300 series adapter to open up at a local workshop that had a vice. The 500 series charger put up the biggest fight of them all, had to pry at the darn think with a screwdriver in addition to the vice. Got it open though, even if the case is a bit chewed up.
 

croissantking

Well-known member
It’s funny. One of my 500 series adapters cracked open with the slightest of teasing with a flat bladed screwdriver. The other one put up a fight like yours, but I went round the seam with a Stanley knife blade, pushing hard, and it eventually came apart with minimal damage.
 

3lectr1cPPC

Well-known member
Yeah these things are a big ol' pain. On the other hand I wanted to open up the adapter for a WinBook laptop I have and it was four screws on the bottom and then it came right open. If only!
 

croissantking

Well-known member
I bought a massive bench vice to open my 100 series adapters. It was literally the only way. The amount of force I put into the sides of those things was massive and I was sure they were going to be destroyed, but it worked perfectly.

How do you usually seal them up again? I use hot glue, it works ok.
 

3lectr1cPPC

Well-known member
That one got all deformed and then still wouldn't pop open - then I reefed up on it a bit with a screwdriver and it popped right open and reformed itself.
 

MacUp72

Well-known member
my adapter was very stubborn, too..it would just not break, and I didnt want to throw it on the floor in fear of breaking components.
I just took a hobby saw and sawed into one edge near the power plug socket at the end..

IMG_1473.jpg

once there was a small hole I inserted a big screwdriver and popped it open along the edges.
and looking how close the actual board is to the plastic cover I'm glad I didnt use my dremel..
 

croissantking

Well-known member
my adapter was very stubborn, too..it would just not break, and I didnt want to throw it on the floor in fear of breaking components.
I just took a hobby saw and sawed into one edge near the plug at the end..

View attachment 58230

once there was a small hole I inserted a big screwdriver and popped it open along the edges.
and looking how close the actual board is to the plastic cover I'm glad I didnt use my dremel..
Good work! I’m glad you didn’t actually throw it on the floor :D
 

Fizzbinn

Well-known member
Hey @Fizzbinn! I'm going to purchase caps for my 5xx supply that's in need. Just a couple questions:

1. Are there any specific ESR or high-frequency requirements for these? I know some PSUs can be picky about that stuff, and this is my first time doing one.
2. For the two big ones, should I buy regular radial leaded, or the snap-in style?

Thanks!
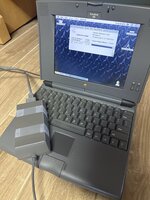
So... funny thing is I never got to actually replacing the caps 😬

In buying parts machines to fix up my 5xx PBs I ended up with a power supply with a mostly destroyed case. I ended up grafting its cord onto an adapter box for a new/modern 16v power supply I got off amazon.
 

3lectr1cPPC

Well-known member
I suppose a modern supply does best ol’ unreliable :)
I’m just too lazy to put the time in to build one. So I’m recapping the original instead which probably takes more time 😅
 

3lectr1cPPC

Well-known member
Does anyone have a photo of the bottom of their AC adapter? I’m not sure whether this pin of this capacitor is supposed to be bodged to this resistor. Forgot to take a photo of mine before I started :(
D230C3CE-B9C5-45F9-9DA8-D6ED8B9C7DC0.jpeg
Edit: the pads have continuity either way so I think I’m good.
 

3lectr1cPPC

Well-known member
Thanks. Went with that approach anyway already because of my multimeter tests and good news.
5441967F-C996-4C3B-BAF8-60691F7C1FFB.jpeg
We’re up and running! One cap had leaked a bit and some others showed the beginning signs but nothing too bad. I hate working on these though, it’s a cramped mess. Took me multiple hours for just those few caps. But the results are good! Both voltage rails are outputting about 16.5 volts which should be within spec. And the PowerBook seems happy. Definitely worth it!
 
Top