• Updated 2023-07-12: Hello, Guest! Welcome back, and be sure to check out this follow-up post about our outage a week or so ago.

Macintosh Portable 5126 1mb-->3mb Ram Card Hack

uniserver

Well-known member
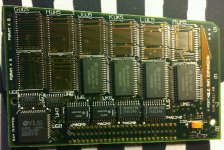
So far I have one dead 5126 board, i want to take the ram from it, and use it to add one more meg of ram on this card.

currently this card is just a 1 meg expansion card.

looks like right now there is 4 chips on each side. If I were to add 4 more on each side where do you think the chips should go, or do you think

it wouldn't matter?

or could all this be a waste of time, because the total ram size is set in the VLSI ram buffer I/C on there?

here are some photos.
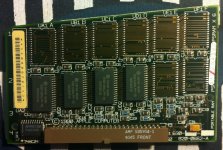
IMG_0750.jpg

IMG_0751.jpg


NJRoadfan

Well-known member
The card might be auto detecting. Usually there would be a jumper or resistor bridge to set various memory sizes, but there don't appear to be any open spots to indicate that. Don't see any differences between this card and a fully populated 3MB card either. The card was likely filled sequentially, finishing off the bottom row and than start on the top at UA1/UM5.


uniserver

Well-known member
yeah that is what i was thinking.

i am building up the courage to fire up the heat gun and populate this bad boy.


uniserver

Well-known member
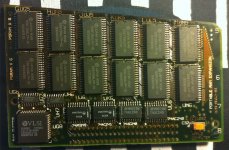
awesome!, Gentlemen we have success! I decided to just fill it up!

IMG_0754.JPG

IMG_0757.jpg

IMG_0755.jpg

not my best work ever, but hey it works!

very cool!


uniserver

Well-known member
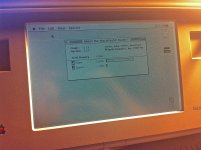
i couldn't run the version of tech tool pro because the version i have needs 4mbs of ram.

booted up 7.5.5, opened up apps till they refused to open due to memory being full.

and let it sit over night.

its solid.


genie_mac

Well-known member
Brilliant! :cool:

Any tips on how to solder / desolder SMD stuff with a heat gun?

Do you shield the component / components around the one you're working on? What temperatures / time frame are we talking about?


uniserver

Well-known member
i am finding its a bit like glass making

gotta develop a feel for it.

you have to be ultra careful, because if you are not the PCB will start poping. and bad things will happen.

i am very impatient so i always use the heat gun on HIGH.

FLUX helps me gage how hot the pcb is.

the flux goes through some stages, when it starts to blue smoke that tells you too hot! back off asap! but mainly with it on

high were talking about like 8-10 seconds, and about 4-6 inches of distance. but yeah i control my heat by distance between the pcb and the heatgun.

also i pre heat the component, while i am waiting for the pads to heat up, i learned that from tig welding, keeping the filler rod close so it says at temperature.

i only mask when i need to.

i suggest practicing on some junk pcb, i use flux to solder and de solder.

its nice when the pads are all fluxed, and melted, and you set the I/C on there and it floats and self centers :)


techknight

Well-known member
If you used solder with water-soluble flux, itll clean up super nice. I was at an assembly house last week and watched how the guy did it. He uses a solder bath for through hole, solder paste for SMD, and regular roll solder for touching up that had water-soluble flux.

kinda neat. Removing the flux just required washing with water, and it looked professional afterwords.


Byrd

Well-known member
Nice work uniserver - reminds me of when I pulled some jumpers off a 128MB RAM module made for a 3400 which then adjusted the CAS settings for it to work in a Kanga G3 :D

Also interested in your heat gun method - could we have more info. Eg. What do you use to pry up the chips/keep them steady, how do you keep your hands out of harm, and do you essentially repeat the process for soldering the pads onto the other board?


techknight

Well-known member
I usually hit the heatgun to the board for removal. never to remount.

Once the chip is removed, I wick up the solder with braid and use a soldering iron to tack down a corner of the IC for alignment reasons. Then solder the pins down. Or use solder paste and reflow it all back into place with the headgun.

But thats my 2 cents.


uniserver

Well-known member
yeah i was doing it that way, before… but way to time consuming when you have 16 ram chips to remove and then attach 16 chips.

what i found if you flux, it might be messy, yes but when the chip is preheated, and the pads are up to temp as well. Once you set the ram chip on

there most of the time it likes flow right into its natural spot. If not then i just back the heat off some and then aline it by giving it a little push in the right direction with my needle nose pliers.

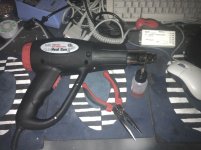
pretty much my tools for removal and install are needle nose pliers, lots of flux, and heat gun.

that is all.

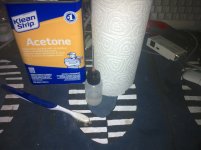
i clean up flux with acetone, tooth brush, paper towel.

IMG_0761.JPG

IMG_0762.JPG

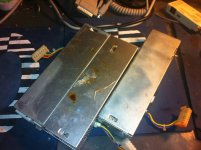
and here is my work surface when using the heat gun,(dead, dead LC PSU's) helps act as a heat sink for the chips on the bottom.

and keeps me from catching my mouse pads on fire. Macdrone hooked me up with these bad boys! IKEA mouse pad special :)

IMG_0763.JPG


aplmak

Well-known member
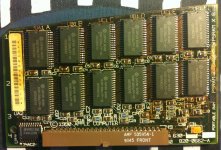
Ok so Hap and I got the lot in NJ!!!! Yayyy.... He's the one to strike the deals with.. I'm just the storage and shipper.. :) Anyhow.. Out of the two 5126's I got I found these cool PSI memory cards!!! So according to HAP we broke the upgrade for the 5126 backlit myth!!! I have a whopping 7MB running on the 5126 backlit.. it goes in the PDS slot.. Here are the ads I found with the units... These are so cool!!


aplmak

Well-known member
Nope... It has 1MB onboard and the PDS slot memory that is 6MB... I can go up to 9 if I add another board.. :) Myth broken.. :)

 
Top