alectrona6400
Well-known member
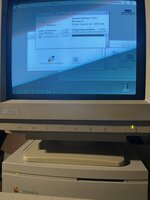
so i know a few people have talked about this, and i am also one of the 2 people who tried this recently. any IIsi owner knows these things: the power supplies LOVE to crap their guts out with ELNA caps if not recapped, the speakers drop occasionally because of a strange design, and... the computer has 1MB of onboard RAM that is shared with the computer and also used as VRAM. i'm not going to get into the whole "unused RAM is wasted RAM" thing because i really only did this out of curiosity, and as a test of the equipment i had, but also because i actually legitimately wanted to do this because the other sources don't talk much about what kind of RAM chips to use.
so... first you'll need a macintosh IIsi. you don't have to be me and overpay for an untested one in good condition from a local computer shop for $140 that i ended up recapping entirely (though it works great now), but they're fairly easy to find because its one of the less desirable macs out there, and they're fairly common anyway. speaking of recapping, if your IIsi hasn't been recapped, i would do it ASAP. the main filter caps (the big ones) aren't usually the ones that fail, but the smaller ones do, and ESPECIALLY the -(-- vent style because those are the infamous ELNA "LongLife" caps... pssh, maybe when they were new, but not now!! as for motherboard caps all the SMD ones are 47uf 16v and can be replaced with tantalums of that value (or electrolytic if thats your kind of thing... i don't judge). the axial caps on these can actually be subbed for SMD or radial (with bent legs) and are both 220uf 16v; those i would replace with good electrolytics, i pulled my 2 replacement caps from a dead optiplex 330 motherboard and those are both rubycons that are a fraction of the size of the original axials. i usually pull caps from salvage boards because i'm a bit cheap with my older equipment, but also its a good form of reuse if the caps are known good brands and will last long.
next, you'll need 4x1Mbit RAM chips (4x being "4-bit" since you have 8 chips to install adding to 32-bit for the IIsi's bank requirement, and each RAM chip is 512KB), which are thankfully easy to find new. https://www.ebay.com/itm/122895150641
this is for 30 chips, they have a 70ns speed, and they're new old stock. you could pull them from a double-sided, 16 chip 8MB 72-pin SIMM, but you should always make sure that works before doing that, or just buy the new old stock chips. tried this initially and i only got death chimes because some of the chips failed as i pulled them seemingly... or maybe its just me.
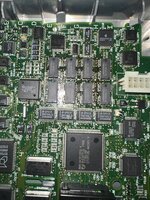
as for equipment... you could solder these by hand but you will get more consistent results with good solder paste and a hot air gun thats specifically for working on electronics. (do NOT use one of those paint stripping hot air guns, you WILL destroy your motherboard!!!!!). first you want to remove all of your RAM chips using hot air (which are 4bitx256Kbit, each chip is 128KB) and then clean up the solder with good quality solder wick. be sure you don't set your iron's temp too high (leaded solder melting point is usually ~183*C but the old solder could be troublesome for sure), because if you do, you will risk pulling off the solder pads on the board and then you'll have to deal with any vintage computing enthusiast's worth nightmare... trace repair. apply a reasonable amount of paste across the areas where the pads are (so every 5 pads just add a good line of paste to it), orient and align the new chips, and then apply hot air. if there are any bridges or "dry spots" you can use the iron to touch up the pads with drag soldering. clean up the board using flux remover or what have you... and you're done!!
soooo.... what do you get from this? nothing aside from an extra 3MB of RAM to spare, but depending on what chips your board had installed you have also just improved the speed of the onboard RAM to 70ns from 80/90/whatever... at least thats how i think it works. theres really not a noticeable speed improvement, and since the onboard memory now has more space for applications, your system could probably run slower since it still shares that with VRAM... but it has more headroom for sure. if you really wanna get more speed out of a crusty IIsi, you can swap the 40MHz oscillator with a 50MHz one and track down a nubus riser to get an FPU. you could also find a nubus video card which would definitely help video performance on the IIsi since that's easily the biggest weak point of that system.
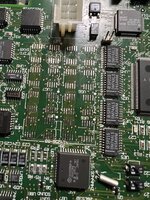
i'll post more pics soon when i get around to it, but i will give you this picture of a "cost reduced IIsi that completely omits onboard ram and comes straight from the factory without working video", aka a IIsi's motherboard stripped of its 8 128K ram chips. if only newer macs were this simple to upgrade onboard ram with... but yeah, tl;dr: its possible with the right chips, i can confirm it works. definitely not a practical thing to do for sure but its definitely possible. and if you bought 30 chips, you still have an extra 22 chips to use for making 2-chip 1MB SIMMs if thats your kind of thing! i know i'll be doing that since i have dead 1MB SIMMs i've had for yeaaars...


