You are using an out of date browser. It may not display this or other websites correctly.
You should upgrade or use an alternative browser.
You should upgrade or use an alternative browser.
How to Repair a G5 Quad Dual Pump LCS
- Thread starter 360alaska
- Start date
Mhm... yeah... are you sure about it? And then, why putting them at all?
(I found they are useless too. I mean, I cannot see their functionality)
Another thing, when putting the screws with the springs (the one that attach the CPU PCB to that metal plate behind the copper liquid thing) should I tighten them until the screws stop?
(I found they are useless too. I mean, I cannot see their functionality)
Another thing, when putting the screws with the springs (the one that attach the CPU PCB to that metal plate behind the copper liquid thing) should I tighten them until the screws stop?
BadGoldEagle
Well-known member
I think they're there to add a little more pressure onto the block but they serve no other function. As for the screws, you can go ahead and tighten them by hand (with a screwdriver of course). Don't over do/torque them though! It's not necessary as it doesn't support that much weight and you might strip them or worse damage the CPU! I tighten them in a crisscross manner to insure a good pressure repartition on the die.
I too attempted this repair. But unfortunately in my case it was a failure. I think my heat exchanger is clogged or something because I'm not seeing a lot of flow and it sometimes leaks when I turn the unit upside down. I haven't lost hope though. Next time i'll try to run it with some sort of temporary reservoir (i.e. a bucket).
I too attempted this repair. But unfortunately in my case it was a failure. I think my heat exchanger is clogged or something because I'm not seeing a lot of flow and it sometimes leaks when I turn the unit upside down. I haven't lost hope though. Next time i'll try to run it with some sort of temporary reservoir (i.e. a bucket).
Thank you @BadGoldEagle
Anyway I saw the screws have a "limit” (you cannot tighten them in infinite) and that’s the reason why I asked. I’m thinking maybe they were not tighten enough.
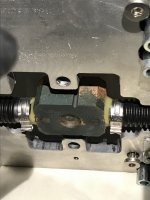
About the o-rings... yeah but the pressure is between the copper and the little aluminum plate. Which is "unusual”? Strange anyway. But I’m thinking LOL if they were put there for assembly only.
360alaska
Well-known member
I didn't say they had no use, I said it helps assembly when attaching the waterblock to the CPU.Mhm... yeah... are you sure about it? And then, why putting them at all?
(I found they are useless too. I mean, I cannot see their functionality)
Another thing, when putting the screws with the springs (the one that attach the CPU PCB to that metal plate behind the copper liquid thing) should I tighten them until the screws stop?
Yeah, sure... but I expected something more "important"...I didn't say they had no use, I said it helps assembly when attaching the waterblock to the CPU.
I’m going to replace them anyway though.
Just sent the same post two times... apparently I cannot delete it...
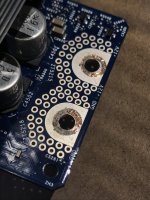
Since I am here... would someone explain me “what I have done” in the picture above? It was not me, but the old owner. I do not like it though. I am worried since it is the CPU PCB itself.
Since I am here... would someone explain me “what I have done” in the picture above? It was not me, but the old owner. I do not like it though. I am worried since it is the CPU PCB itself.
Guys, another thing... what can I do for these?
Ps:
do you suggest me to change the thermal compound on the North Bridge too? How can I check its temperature?
View attachment 30127
Last edited by a moderator:
Hello again... I wrote a long post until the page refreshed. I’m very frustrated now...
Anyway I made the disassembling.
What I have now is this:
• the liquid was like water, no color at all...
• there was little liquid inside
• no @BadGoldEagle orange little balls
• what kind of hoses they are? Seems very strong and made with two materials. The inside is something like plastic, and outside rubber.
• What kind of glue it is? I need the same glue.
That’s all...
Hi guys, is there anyone here located in Europe who would offer do a Quad LCS service+CPU repaste job by any chance? If so what would be the fee? I would have one Delphi and/or one Cooligy one (I guess more difficult).
Alternatively if anyone knows of a way to top up a Delphi system without having to take the pipes off? Can the port/valve covered by a plastic cap (which can be unscrewed) be used by any chance, and if so, with what other hole/opening (it would take two openings I gather)?
Am also asking about repasting because no matter how well I try, CPU B always ends up being basically unusable, if anyone has any tips, would be great!
Cheers,
Last edited:
Thanks a lot!Chris Edwards just put up a video about this with details on the refill. One gotcha is that one of the how-tos online had the wrong replacement o-ring size for the water blocks.
DarthNvader
Well-known member
What size is the new tubing I need?Flushing (with White Vinegar)
A. Place the LCS on its side.
B. Attach a 1ft tube to input port.
C. Mix a 50/50 solution of vinegar and hot tap water.
D. Pour the solution down the input port using a funnel.
E. Connect the end of the 1 foot tube to the output port.
F. Let stand until cool.
G. Turn the LCS upside down so the solution falls into the tube and then turn the LCS onto its side to send the solution the other way.
H. Apply heat to the water block with a heat gun or hot air tool.
I. Allow The LCS to cool.
J. Repeat steps C-I 2-3 times.
K. Disconnect the 1ft tube from the either port and attach another hose.
L. Connect the input port hose to your faucet via adapter and turn on the faucet (I used a flex tube bought at Advance Auto Parts.)
View attachment 2824
M. Turn off the faucet and repeat step K with the faucet connected to the output port.
N. Repeat steps K & L 2-3 times or until clear water can be seen.
O. Using a funnel, pour in 100% distilled water into the input port until it flows out the output port.
Refilling
Because all of the filling ports are crimped off (and have epoxy covering them) I have come up with a reliable alternate method of filling the system:
A. Go ahead and reattach the cooling pump assembly with the 6 screws.
B. Measure and cut a 3 inch piece of Vinyl tubing and attach it to the "Z” Tube. (Make sure you still have the restrictor!)
C. Slide two loose hose clamps over the Vinyl tubing and connect the tube to the pump.
D. Place a hose clamp on each side and tighten them down (The part with the screw should be down if you want to put your “G5” cover back on.)
E. Cut a 4.5 inch piece and attach it to the radiator fitting.
F. Place 1 foot piece of tubing on the pumps outlet port
G. Place the LCS in your sink with the radiator facing down.
View attachment 2825
H. Fill a spare container with 75% distilled water and 25% Dex-Cool and stir
View attachment 2827
I. Fill the system with the coolant you just made using the 4.5 inch hose connected to the radiator using a funnel, continue to pour coolant into the funnel until you see the coolant begin to flow out of the pumps output port. (The smaller hose should be completely full of coolant at this point. Also, if the coolant doesn’t flow on its own then use the hand vacuum pump on the pump’s output port.)
J. Place two hose clamps on the 4.5 inch hose.
K. Now, place your finger over the pump’s output port and fill the 4.5 inch hose up to the top.
L. Connect the hose to the pump and bench check the system
M. If the bench check passes then tighten the clamps
Bleeding
Bleeding isn’t always necessary, you may notice a small bubble in each tube after the filling procedure and that’s alright. But, if you have multiple bubbles or large bubbles or if the pump makes a grinding noise for longer than 30 seconds you need to bleed it.
A. Place The at 45 degree angle as pictured and either disconnect the 4.5 inch hose from the pump side or cut the hose with a razor and place a new hose on the radiator.
View attachment 2826
B. Now, place your finger over the pump’s output port and fill the 4.5 inch hose up to the top.
C. Connect the hose to the pump and bench check the system.
D. If the bench check passes then tighten the clamps.
For the G5 Quad.
Also, the picture doesn't show you need to remove the two Hex screws at top and bottom of the left hand edge of your diagram, and neither does the service manual.
I suppose the updated LCS's, not the Delphi's, but the Panasonics???? These two hex screws also hold it down and won't allow you to remove it without removing these two screws.
Last edited:
DarthNvader
Well-known member
I picked up two Quads on the cheap, but the LCS's need rebuilt.
Temp LED and #7 on.
No signs of leakage, pretty sure the flow is just restricted, I know for a fact it was on the one I already pulled a part.
The one I pulled already is the Dual Pump version, but the one still to be done is the single pump version.
I like the single pump, it has nominal hose clamps and what I assume is a fill port that looks like the High Side port on an AC unit.
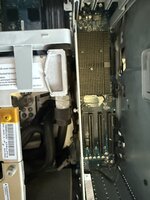
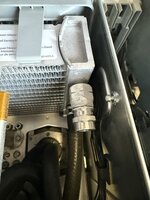
See pictures....View attachment IMG_0015.jpegView attachment IMG_0016.jpeg
 View attachment IMG_0016.jpegView attachment IMG_0015.jpeg
Temp LED and #7 on.
No signs of leakage, pretty sure the flow is just restricted, I know for a fact it was on the one I already pulled a part.
The one I pulled already is the Dual Pump version, but the one still to be done is the single pump version.
I like the single pump, it has nominal hose clamps and what I assume is a fill port that looks like the High Side port on an AC unit.
See pictures....View attachment IMG_0015.jpegView attachment IMG_0016.jpeg

 View attachment IMG_0016.jpegView attachment IMG_0015.jpeg
DarthNvader
Well-known member
Are those A211???Size 27 Orings (Viton preferred but not required)
Similar threads
- Replies
- 3
- Views
- 1K
- Replies
- 1
- Views
- 604
- Replies
- 3
- Views
- 1K


