• Updated 2023-07-12: Hello, Guest! Welcome back, and be sure to check out this follow-up post about our outage a week or so ago.

FPU and SCSI2SD for LC550

68krazy

Well-known member
I think you may be on to something Bunsen, I was poking around and it seems like the entire High Voltage area is making that sound.  Not just the HOT as I originally thought.

Maybe it is just the old age of the components?  I am happy to leave it the way it is, I just don't want something running way out of tolerance and eventually blowing.

 
Last edited by a moderator:

68krazy

Well-known member
Poked around more today, still can't figure out what component(s) are making the sound.  The computer IS very very quiet now that I am running it with a SCSI2SD and a Noctua fan.  Perhaps the noise is normal for the analog board, but you just could never notice it over the sounds of the original HDD and fan?  I have decided to leave well enough alone for now, because all the voltages are very stable and the machine is running great.

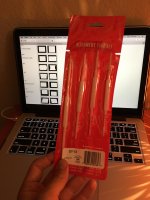
Moving on to some of the easier and more fun parts of the restoration, I finally got a set of plastic alignment tools:

IMG_0340.jpg

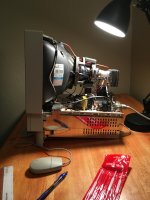
IMG_0336.jpg

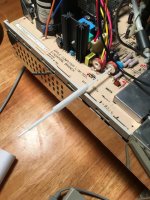
IMG_0342.jpg

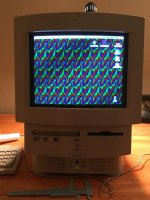
The screen was pretty off-center before, but now I've got it pretty close.  I downloaded the service manual for the 520/550/575 and set the screen height and width to original Apple specification (7"x9.25"):

IMG_0341.jpg

Progress  :)


omidimo

Well-known member
This has been an excellent and informative topic! Excellent photos and little tid bits. Looking forward to seeing how the restoration concludes! 


68krazy

Well-known member
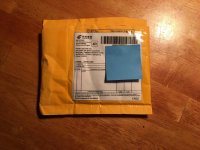
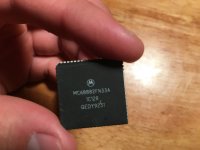
Got another package in the mail today:

IMG_0349.jpg

IMG_0353.jpg

IMG_0355.jpg

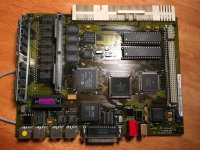
With that, the motherboard is completely restored and fully upgraded.  We've got a few things left to do on the Analog Board and then we'll be moving on to the final phase of restoration (drives and peripherals).

Almost done now.  Stay tuned  :)


68krazy

Well-known member
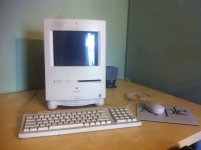
I haven't had time to continue the restoration and probably won't until next month, but I wanted to add another picture. (I love pictures, in case you couldn't tell):

image.jpeg

This is a crappy iPhone 4 picture of the Color Classic that I had about three years ago.

I don't mean to offend anyone, but I found the Color Classic to be extremely overrated. The tiny screen, weird resolution, and lack of a CD-ROM drive really ruined it for me.  I tried very hard to love that Mac and I couldn't. I ended up selling it for exactly what I paid for it, so no loss there!

To me, the LC5xx is like a color classic except better in every way!

 
Last edited by a moderator:

Macdrone

Well-known member
With a LC550 board in the color classic making it a color classic II and a 640X480 mod which it should have had to begin with, the CC becomes much more of what it should have been.  At this point its my bridge mac.  With Cd rom under and a zip drive and an apple external hard drive there is just about nothing it cant write to to make any disks or download from internet software I need  (if any anymore) for any of my macs.

macs.JPG


68krazy

Well-known member
For sure with some upgrades, the Color Classic can become a very versatile machine.  It just wasn't the Mac for me.

Nice TAM by the way  :)

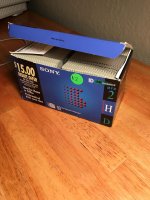
I got called off work today, so I decided to spend some time in the world of 90s Macintosh.  First I went to the e-waste place where I found the LC550 last year and came up on 50 unused floppy disks for $2:

IMG_0368.jpg

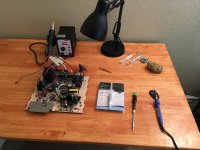
Then I pulled out the analog board again.  The very last thing I wanted to do to it was to replace the thermal paste on everything that is heatsinked.  I didn't take any pictures of the actual process, but I replaced the original thermal paste on everything but one heatsinked component that I wasn't able to desolder.  I don't know s*** about thermal paste but I heard Arctic Silver Ceramique is non-conductive so I used that:

IMG_0362.jpg

THE ANALOG BOARD IS DONE!!!!

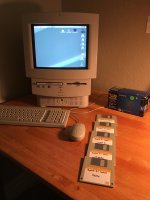
To celebrate, I decided to make a set of 7.1 install floppies.  I added the patched version of HD SD setup and the system enabler for the LC520/550 to the Disk Tools floppy.  Then I locked the disks.  I figure they are a good thing to have around, and I am considering buying and restoring a black & white compact Mac as my next project so chances are good that I will need them eventually:

IMG_0371.jpg

 
Last edited by a moderator:

tanaquil

Well-known member
That is looking very sweet! I just caught up on this topic, but I am super impressed with your dedication. My restoration projects usually involve begging Uniserver for help and ordering stuff off ebay. :)

I hope it runs beautifully for you. I have the exact same set of TV adjustment tools (ordered recently) but my width coil remains stubborn and I am on the hunt for a 5/32 metal hex key. Wish me luck. Otherwise my SE/30 is doing great, just the video screen is too wide.


Alex

Well-known member
This is a tour de force. Fantastic read and what a lesson. I have a color classic that is in pieces now. I am seriously considering a recap but am hesitant in a way but then again if one doesn't dive he will never get wet so I am going to investigate but this thread is first class!


Alex

Well-known member
Boys, I think it's time to relax:

Cheers!
Damn, what an amazing job!

68krazy, before you began, tell me honestly, how confident were you that you would succeed and in terms of soldering skills did you believe they were good enough before beginning? I have to say that this thread really inspired me. Just incredible work. Kudos and thank you for sharing it with the community.

By the way, did the high pitch noise disappear and did you replace those blue rectangular capacitors?

 
Last edited by a moderator:

68krazy

Well-known member
Damn, what an amazing job!

68krazy, before you began, tell me honestly, how confident were you that you would succeed and in terms of soldering skills did you believe they were good enough before beginning? I have to say that this thread really inspired me. Just incredible work. Kudos and thank you for sharing it with the community.

By the way, did the high pitch noise disappear and did you replace those blue rectangular capacitors?
I'm glad you enjoyed the thread  :)

I was only somewhat confident going in, but I learned a lot during this restoration!  Going slowly and doing a lot of preemptive research will go a long way.  The analog board is very forgiving, so as long as you go slow and treat it with respect, you should be fine.

When it comes to dealing with electronics, every hobbyist has his/her own style.  So, everyone will give you different advice.  But were the techniques and beliefs that worked well for me:

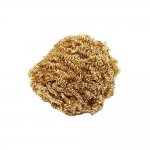
1: Invest in a good soldering iron with a good tip and clean the tip often.  I used a ~$30 Hakko soldering iron and cleaned the tip with this:
e4b5f71d-2883-4341-8103-aeb4a4d14ee8_1000.jpg

I would rub the tip of the iron in it every 3rd or 4th capacitor, and it made an enormous difference in helping me get through the analog board.

2: Use solder braid to remove all old solder, and make sure you use flux on every single new solder joint.  I bought flux in a syringe, and it was easy to apply and lead to nice, shiny joints.  Also, use 63/37 solder — I've read somewhere that for hobbyist use, it is easier to solder with than 60/40.

3: GO SLOW!  Constantly remind yourself that this is a very long, involved project.  In my opinion, when restoring a vintage computer, the journey is the destination, so.... go slow and enjoy the process! 

4: When it comes to removing the capacitors on the motherboard, you are going to get a lot of conflicting information.  Some people like to cut the caps, or twist them off the board.  I personally think both of those methods are pretty sketchy and can easily lead to lifted pads and damaged traces.  I believe in buying the correct tools and doing things right the first time.  In the US, SMD reflow stations are very cheap on eBay.  I bought one for $38 and it made recapping the motherboard a breeze.

http://www.ebay.com/itm/858D-Rework-Station-Hot-Air-Gun-Kit-SMD-Iron-Soldering-Solder-Holder-700W-/272428095142?hash=item3f6dfad6a6:g:Do0AAOSwHsRYDbVE

I hope this info helps, and I look forward to seeing how your Color Classic comes along  :)


68krazy

Well-known member
I did replace all of those blue capacitors, but the whining noise remained.  I have put a ton of hours on the machine since the restoration though, and everything has been rock solid.


olePigeon

Well-known member
Whining noise may never go away without replacing the flyback transformer, if you can somehow find a brand new one. You could try lining the inside of the case with noise dampening foam.


Alex

Well-known member
I hope this info helps, and I look forward to seeing how your Color Classic comes along  :)
Wow, thank you very much for your reply and sharing your experience and advice, I truly appreciate it. I especially like point 4. I prefer to use proper tools as well. In terms of research I've been watching old PACE videos on youtube. Invaluable reference for soldering.

 
I hate to resurrect a dead thread, BUT 68Krazy you wouldn't happen to have a list or BOM for all those caps you replaced on the analog board would you? I am trying to recap my Macintosh TV and it looks like the same analog board.


LaPorta

Well-known member
To add my 2 cents, having a sucker desoldering iron is helpful. It helps me a ton for desoldering through-hole mount components...really speeds things up.

 
yeha got that, a cheapo one from Amazon, but it works great, already recapped my VIC-20 and C64, just need the caps for the Mac and I can get it up and running.

 
Top