• Updated 2023-07-12: Hello, Guest! Welcome back, and be sure to check out this follow-up post about our outage a week or so ago.

FPU and SCSI2SD for LC550

olePigeon

Well-known member
You should get a little bit of solder paste.  I love that stuff.  It's basically little balls of solder suspended in a flux jelly.  Just put some goop on the pads, plop your cap in it, then heat the goop.  It evaporates the jelly and melts the solder all at once.  It makes soldering caps ridiculously easy, especially if you get tantalum caps that are a bit too big for the pads.


68krazy

Well-known member
That is a great idea!  I hadn't given much thought yet to how I am going to solder the new tantalums in but solder paste sounds ideal.  I'll be looking at picking some up soon.

I've gotta start thinking about the Analog Board too.  Will probably get started on recapping that as soon as the motherboard is done.


olePigeon

Well-known member
I ordered some about five years ago.  Supposedly you're supposed to keep it refrigerated, and that it goes "bad" after a few months.  I'm sure that's very true if you're a commercial business with machinery that needs a constant consistency for screening solder masks.  Mine, however, has been in my non-temperature controlled, non-ventilated garage for years, freezing and boiling.  The only thing that's happened is that it's become a little thicker and stickier.  I'm on my original tube going on five years with no special care, and it works fine. :)

For a hobbyist, this stuff seems to last forever, and works just as well even when it's thickened up.  Perfect solution for surface mount.

 
Last edited by a moderator:

68krazy

Well-known member
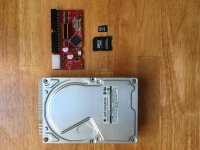
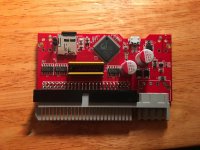
Just got a package in the mail. Dead Quantum pictured for comparison:

image.jpeg

I am still a few weeks away from being able to put it in (Analog Board gets priority over installing the SCSI2SD) but damn this is exciting! I've been waiting months to order this.

 
Last edited by a moderator:

68krazy

Well-known member
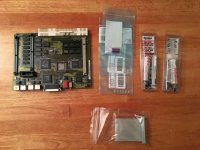
Alright gentlemen, let's get down to business:

IMG_0238.jpg

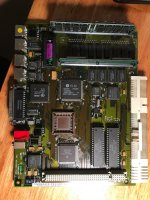
Placing the new tantalum caps was very easy.  I ended up not using the solder paste and instead went for the old-school method of flux and solder.  Here are the results:

IMG_0241.jpg

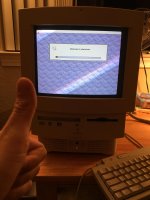
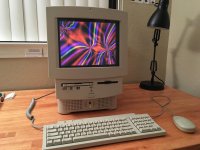
I am very happy with how it turned out!  I put the board back in the machine, crossed my fingers, and......

IMG_0242.jpg

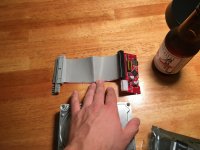
SHE LIVES!!!!!!  The startup chime came through nice and clear, ADB works, SCSI appears to be working.  I went ahead and modified my new SCSI2SD adapter by removing the upside-down molex connector:

IMG_0247.jpg

I then formatted the drive with HD SC Setup and installed 7.5 off the "Performa 500 Series Restore CD" that I downloaded off the Macintosh Garden.  I have decided to name this machine Phoenix, because it is the first old Mac I owned that I did real restoration work to.  She was on the verge of death, and thanks to all the great information on this forum I was able to help her rise back up from the ashes.

Next comes the analog board!


68krazy

Well-known member
Here's an idea that I tried that didn't really work:

IMG_0245.jpg

It was a lot clumsier in reality than how I had imagined it in my mind.  I decided to grow a pair and just modify the SCSI2SD instead!

 
Last edited by a moderator:

johnklos

Well-known member
I am amazed at how many SCSI replacement projects (Acard SCSI-IDE, Acard SCSI-SATA, SCSI2SD and so on) all have the power connector wrong. It's not like it's some big surprise - oh, wait! Every SCSI drive in the world has power THAT way! How'd that happen without me noticing? Oh, well!


68krazy

Well-known member
@johnklos: it doesn't really make sense to me either, but at the same time, I am just glad that we have such a nice replacement for all the aging SCSI drives out there.  I am thoroughly impressed with the SCSI2SD, it has been flawless.  The only thing I really, really miss is the sound of the hard drive heads seeking.

I have been running the machine for a few days now and the motherboard has been very stable.  I discovered that if I run the screen at minimum brightness the analog board doesn't make that nasty ringing sound, so....  I've been running it.  I really wanted to wait until it was fully restored before I put any serious hours on it, but I haven't been able to help myself hahaha.  I haven't owned a vintage mac for a few years so I'm really excited to have one again that is (mostly) up and running.

So guys, I need an opinion.  I am going to be ordering everything I need to restore the analog board this week.  Do you think I would benefit from replacing the stock NMB fan with something more modern (higher airflow)?  I was thinking about putting something like this in there:

http://www.amazon.com/Noctua-NF-A9-92mm-25mm-PWM/dp/B00NEMG5F0/ref=sr_1_1?ie=UTF8&qid=1456008771&sr=8-1&keywords=noctua+92mm


68krazy

Well-known member
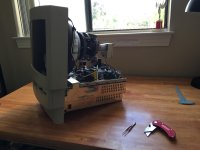
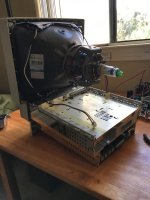
I woke up in a 90s Macintosh sort of mood today, so the LC came out for a little more progress.

IMG_0257.jpg

IMG_0263.jpg

IMG_0264.jpg

Will be ordering all new caps and a new fan soon.  Wish me luck!


techknight

Well-known member
Hey guys, there is a fairly loud ringing sound coming from around the flyback area.
The ringing is caused by a loose core in the flyback transformer. 

The core is glued in place, but heat and time especially from high usage, the glue cracks and the core gets loose. Only real fix is to chisel out the remaining glue, shim it and reglue it. 

 
Last edited by a moderator:

68krazy

Well-known member
Thank you for that info techknight, I'll look into that.  Is there any chance you could point out to me which part of the flyback is the core?  There are some small cracks on top of the flyback that I was going to seal with silicone.  If you look at the full-size picture of the Analog Board, you can see them.

I just finished ordering the caps from Digi-Key.  I got almost all Nichicon UPM capacitors.  The datasheet from Nichicon says they are "low impedance, high reliability" series.  I am by no means a capacitor expert, but that sounds good to me. 

I also put in an offer on eBay for a 1GB IBM hard drive.  Although the SCSI2SD is superior to a hard drive in many ways, the machine feels soul-less and weird without those old-skewl hard drive noises.  Nostalgia has overruled logic on this one for me.  I will pack away the SCSI2SD for the day when working SCSI drives become impossible to find.


68krazy

Well-known member
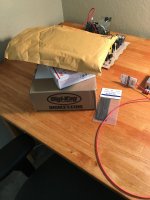
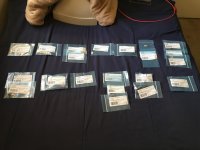
Today I received so much fresh electrolyte in the mail, that the mailman asked me if my name was Gatorade*:

*this may or may not have actually happened

IMG_0274.jpg

IMG_0276.jpg

Here is the patient just out of surgery sporting all new Nichicon capacitors:

IMG_0299.jpg

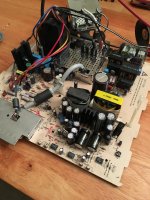
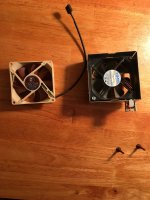
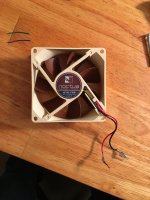
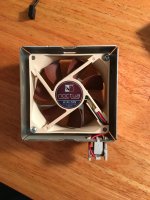
I also replaced the original fan with something a little quieter:

IMG_0301.jpg

IMG_0302.jpg

IMG_0303.jpg

I am happy to report that the patient is running great, and that Trinitron looks significantly sharper and more vivid than before the recap.

IMG_0306.jpg

 
Last edited by a moderator:

Powertrip

Well-known member
Very nice project and results are looking good!

I have never been a fan of the All In One Macs, but I very much enjoy watching a project someone is passionate about come to successful completion.

I hope you get much enjoyment out of your rejuvenated machine!


68krazy

Well-known member
Thank you for the kind words Powertrip!  I am very happy with how this project is going.  Recapping the analog board was an extremely tricky and nerve-wracking endeavor, so I am glad I got that over with.  It took seven hours straight (with a few breaks in between to clear my head.)

The ringing sound: It's not the flyback, it is the Horizontal Output Transistor.  It squeals very loudly if the screen is not either at full brightness or set very dim.  HV regulation still does not seem right either - the picture changes size whenever bright objects are shown on the screen.  I am going to try replacing those rectangular blue components next to the HOT, I think I remember reading somewhere that they can cause HV regulation issues.  I believe they are capacitors too? (just not electrolytic)  Also, there is a Rifa capacitor on the power supply side of the analog board that is cracked.  I will be replacing that very soon.

Techknight, if you could chime in, I would highly appreciate it.  I need your expertise.

If I can solve the HV/squealing issue, all that will be left to do will be to recap the CD-ROM, Floppy, Mouse, and Keyboard.  Then I will finally be all done!


Bunsen

Admin-Witchfinder-General
This has been a great build log to follow.  I'm especially enjoying your progress photos.


68krazy

Well-known member
Thanks guys, it means a lot.  I wasn't sure if anybody was following this thread haha.

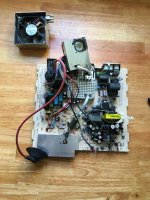
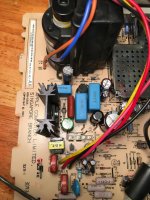
I need to get the analog board completely squared away before I move on to servicing drives and peripherals.  I've gotta get that squealing Horizontal Output Transistor (HOT) problem fixed, it's really bothering me.  This is the area of the analog board I am currently focusing on:

IMG_0321.jpg

From what I understand after reading this excellent thread on another forum (featuring our very own Techknight!):

https://www.thinkclassic.org/viewtopic.php?pid=2193#p2193

Those rectangular baby blue components are capacitors and they could be causing problems with high voltage (HV) regulation. If anybody knows how to read those codes and find suitable replacements on Digi-Key, please chime in!

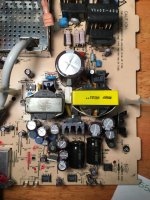
Over on the other side of the analog board, we have another pesky capacitor that needs to be replaced.  This one is a Rifa branded one and it is cracked.  It's the white rectangle under the filter capacitor, wedged between the two transformers:

IMG_0316.jpg

Any thoughts, comments, concerns, please let me know!  I am learning as I go on this project and all input helps  :)

 
Last edited by a moderator:

68krazy

Well-known member
@SE30_Neal,  Thanks man  :)

So, I replaced all of those film capacitors (all four around the HOT, and the filter cap in the power supply).  The HOT is still squealing!

Can anybody give me any suggestions?  I have no idea where to go from here.

 
Top