• Updated 2023-07-12: Hello, Guest! Welcome back, and be sure to check out this follow-up post about our outage a week or so ago.

Compu's Conquests

Elfen

Well-known member
I would disagree with the vinegar bath. Vinegar is an acid and putting battery acid on acid is going to compound the problem. If anything you need the opposite - baking soda. Baking soda and water bath will neutralize the battery acid and you can use a plastic brush (like a cheap hair brush) to scrub the corrosion off. Then rinse in warm water several times to get the baking soda out.

After that you can do part II - Cap Goo removal. I forgot who it was, but one forum member uses "Scrubbing Bubbles" spray liquid to remove cap goo and in looking into it, it does have ammonia salt liquids and ammonia does cut cap goo. If you go this route, you still need to rinse with water and chase with alcohol and acetone the tough areas.

 

CompuNurd

Well-known member
I put it in the sink with hot water and some ammonia mixed in and let it sit for a minute or two. Will be working on the caps and goo soon!


raoulduke

Well-known member
Elfen, I think that was me who recommended Scrubbing Bubbles, but ironically that suggestion originally came from Unity.  I agree with basically everything said here, except I would douse everything in Scrubbing Bubbles after desocketing the chips, then bathe in distilled water (to avoid the mineralization issue), then dry everything, wait a few days, resocket, test...  And, I am also curious whether it's a lost cause or not.  I think you'll get some response.

 
Last edited by a moderator:

CompuNurd

Well-known member
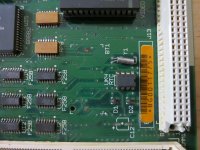
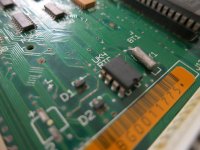
Some gentle scrubbing with a wire brush removed most of the grime. Capacitors should be here in a few days.

IMG_3547.JPG

IMG_3548.JPG

IMG_3550.JPG


Elfen

Well-known member
A wire brush? Not a plastic one? Damn!

Anyways, I see in the second pic some rotted traces and a couple VIAs in the space between the ICs (on the the left) and the RTC (on the right). You know the routine - check them with a multi-meter and fix the broken ones. With the VIA, throw in some flux and fresh solder to loose them them, desolder and resolder with fresh solder.

The ICs on the UJ section on the same pic looks like they need to be desoldered and their traces looked at and fixed as needed. Just take your time with it.

 
Last edited by a moderator:

CompuNurd

Well-known member
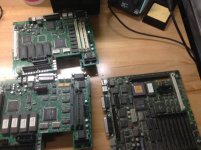
Just picked up 6 LC boards and an SE/30 board from tedhodges. They are mostly to get more experience with my hot air station, but I plan to pass on what I don't use.

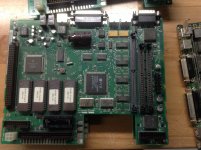
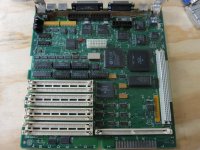
Anyway, one of the boards looks different from the rest.

image.jpg

No model labeling? Hmm...

image.jpg


CompuNurd

Well-known member
I finally was able to get the board out and tested a few hundred points of continuity tonight. I ran a few wires but haven't tested the board yet since the PSU has capacitor failure.

In the meantime, I thought of a few visual modifications to make inside the unit:

-paint frame black

-paint hard drive and floppy caddies black

-paint PSU outer casing black

-add cable sleeves to all cables

-paint inside silvery coating (color to be determined)

Basically, turning this thing into an SE/30 hot rod! What do you guys think? I am hesitant on painting the inner silvery coating on the case as I feel that might make it "less original" if anyone really cares about that.

 
Top