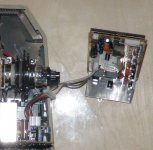
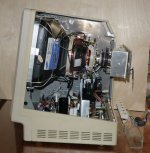
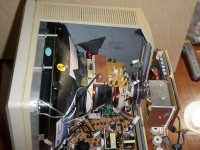
Trash80toHP_Mini
NIGHT STALKER
. . . retains Peripheral Correctness, even if the neck/board won't fit inside the Compact's bucket. If there's historical precedent and it fits in my carry bag, it's kosher. I cheat very neat. [ ] ]'>
] ]'>
I got tired of sitting on this one, so I thought I'd whack it together and share the concept in case someone else wants to give it a shot. This one's going on the back burner pending other developments.
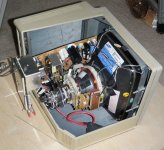
Neck Board offset PCB will be required to fit everything into the available cubic. As you can see, while the ceramic nipple will fit the rest of the neck board needs to be dropped and offset to fit in the case extension.
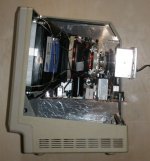
This would be the Peripherally Correct part:
View attachment 14221
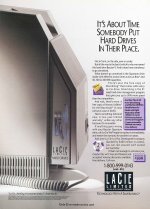
The parts for what appears to be this generic HDD enclosure are fairly large, but modeling and printing them ought to be possible. I'll probably wind up going the clear plexi route as has been the plan for the "visible" ZipMacPLUS™ i've been hacking away at yet again.
Started with the spare SE/30 bezel in combination with the visible bucket, but realized that the HUGE CRT would likely block vertical expansion options.
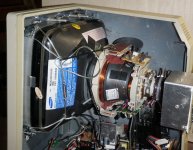
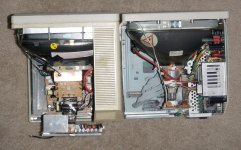
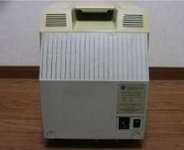
Moving the SE/30 board to the Mac Plus puts the FDD much higher, the fact that the FDD opening has already been modified for a stealthy Zip drive installation makes it all the better!
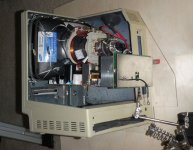
There should be plenty of room to do a shielded, three level build with proper cooling. Zip drive and HDD will be on a mezzanine level located between the CRT's A/B and the CPU cavern below that you can see in the first couple of pics. Moving the A/B backward into the "shed" provides more clearance between it and the CRT.
Expansion for the SE/30 will be done IIsi style. A IIsi oriented TriSlot version of the ProtoCache1 DevBoard should fit with no problems.
Haven't tested the Monitor with Radius Color Pivot II/IIsi output yet. I'll get an enclosure built with an extension grafted onto the shed roof of the BacPack extension for using the rig as a monitor for the time being. It doesn't claim to be an AutoSync monitor, but the different resolutions at various frequencies the manual says it auto-detects and locks onto give me some hope that 640x480 from the whacky world of early Mac video incompatibilities might just pan out.
If not, NuBus on SE/30 and VGA outputs beckon. :
edit: BTW, the depth of the plexi form for the Bacster extension is not to scale. Depth isn't the limiting factor, keeping the neck bits within the Bucket matched angle of its shed roof has always been the goal and I appear to have gotten there at long last! [ ] ]'>
] ]'>
I got tired of sitting on this one, so I thought I'd whack it together and share the concept in case someone else wants to give it a shot. This one's going on the back burner pending other developments.

Neck Board offset PCB will be required to fit everything into the available cubic. As you can see, while the ceramic nipple will fit the rest of the neck board needs to be dropped and offset to fit in the case extension.

This would be the Peripherally Correct part:

View attachment 14221

The parts for what appears to be this generic HDD enclosure are fairly large, but modeling and printing them ought to be possible. I'll probably wind up going the clear plexi route as has been the plan for the "visible" ZipMacPLUS™ i've been hacking away at yet again.
Started with the spare SE/30 bezel in combination with the visible bucket, but realized that the HUGE CRT would likely block vertical expansion options.


Moving the SE/30 board to the Mac Plus puts the FDD much higher, the fact that the FDD opening has already been modified for a stealthy Zip drive installation makes it all the better!

There should be plenty of room to do a shielded, three level build with proper cooling. Zip drive and HDD will be on a mezzanine level located between the CRT's A/B and the CPU cavern below that you can see in the first couple of pics. Moving the A/B backward into the "shed" provides more clearance between it and the CRT.
Expansion for the SE/30 will be done IIsi style. A IIsi oriented TriSlot version of the ProtoCache1 DevBoard should fit with no problems.
Haven't tested the Monitor with Radius Color Pivot II/IIsi output yet. I'll get an enclosure built with an extension grafted onto the shed roof of the BacPack extension for using the rig as a monitor for the time being. It doesn't claim to be an AutoSync monitor, but the different resolutions at various frequencies the manual says it auto-detects and locks onto give me some hope that 640x480 from the whacky world of early Mac video incompatibilities might just pan out.
If not, NuBus on SE/30 and VGA outputs beckon. :
edit: BTW, the depth of the plexi form for the Bacster extension is not to scale. Depth isn't the limiting factor, keeping the neck bits within the Bucket matched angle of its shed roof has always been the goal and I appear to have gotten there at long last! [
Last edited by a moderator:

