jdcurry
Well-known member
Thank you for the clarification!256k Bits, not bytes. Each chip is 32kByte, not 256kByte.
With respect to this machine, he misremembered")
Thank you for the clarification!256k Bits, not bytes. Each chip is 32kByte, not 256kByte.
With respect to this machine, he misremembered
But in my defense, that was a pretty good incorrect guess.Thank you for the clarification!
It isn't instant. Did you scrub the contacts as well?Had to head out to the pharmacy so I stopped by the nearby hardware store and picked up contact solution. Sprayed the cards and let them dry. Unfortunately still displaying the same issue. View attachment 56148View attachment 56149
That looks a little better!I took the RAM back out and did a second cleaning including light Brillo scrubbing. I also sprayed in the slots as well. The result is now different, but still not resolved.
Here is a quick video:
Okay, I'll give it a go a third time. I honestly wasn't sure if I was making good progress or making things worse.That looks a little better!
In the words of the tellytubbies...
Again Again Again!
Okay, I just sprayed them and set a timer for 30 minutes. Is there any benefit of removing the ROM chip and spraying it on its own or is it best to leave it socketed? (sorry for the newbie questions) I also sprayed and scrubbed the RAM and got a different result on the screen but still a garbled mess at the moment.Might be worth spraying some on the ROM chips, SWIM and BBU while you're at it. Basically any socketed chips, and the big 14 pin molex connector, then leave it a half hour to dry.
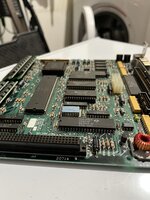
Highlighted parts :
View attachment 56150
At this point, leave things in their sockets. Disturbing things is always a slight risk, so if it can be fixed without, it's better.Okay, I just sprayed them and set a timer for 30 minutes. Is there any benefit of removing the ROM chip and spraying it on its own or is it best to leave it socketed? (sorry for the newbie questions) I also sprayed and scrubbed the RAM and got a different result on the screen but still a garbled mess at the moment.
The silver lining is one out of the two machines is functional at least.At this point, leave things in their sockets. Disturbing things is always a slight risk, so if it can be fixed without, it's better.
I don't think you're a million miles from a working machine to be honest.
The sad news is if high level tests don't find it you are going to need to go at it much more meticulously and that is going to take time.
Yes, I swapped the RAM just a minute ago, and then both SEs displayed black bars and wouldn't boot. Made sure everything was marked so I was able to successfully put the RAM back in the working board and it booted just fine. It appears the resistors are set properly for 1MB of storage. It was cut on one board (the working board) (the resistor is still attached on one side and cut from the other side) and on the non-functioning board the resistor was completely removed.The last RAM thing to test then is to swap the RAM from the other machine. How are the two resistors set on the working board?
If that doesn't fix it, I'd remove the two ROM chips (one at a time), spray contact cleaner into the sockets, put the chips back, wait a few minutes then try again.

I have a number of tools, but I have never removed a ROM chip. Can you provide some advice so that I can do it as safely as possible?The last RAM thing to test then is to swap the RAM from the other machine. How are the two resistors set on the working board?
If that doesn't fix it, I'd remove the two ROM chips (one at a time), spray contact cleaner into the sockets, put the chips back, wait a few minutes then try again.
To test the RAM from the working machine in the non-working machine, you need to make the resistors match, I.e. cut one side of the resistor and bend it away a little so it doesn't touch.The result of the non functioning board with different RAM: