agent_js03
Well-known member
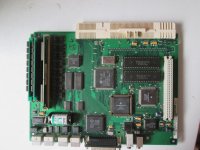
So about two weeks ago (or so) I bought a Macintosh Color Classic from a lady on Craigslist. She told me that it worked, and poor, gullible me believed her. She met me outside to make the deal and it looked like a shady part of town so I was reluctant to ask her to test it. I guess I should have figured from how eager she was to sell it for a price way lower than she asked for it. Oh well... to make a long story short, I brought it home, plugged it in, plugged the keyboard and pressed the power button. Nothing. I ran through the usual list of things you are supposed to do: cleaned the contacts on the front of the board, cleaned the board itself (I used a compressed air can and some cotton swab tips with 90 percent rubbing alcohol). I looked online and found out that the number one reason these things fail is bad capacitors. I looked at the caps on the logic board and sure enough, there was leakage galore. That must be it. So I ordered tantalum capacitors from mouser electronics to replace them.
I want to mention that in the meantime I was able to turn the computer on without the logic board in; the fan turned on, the hard drive spun up, and the power light came on, but nothing more. I also tried plugging in the board while the machine was in this state. Nothing happened except a faint high pitch noise.
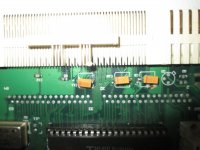
Two weeks later (today) my capacitors finally arrive in the mail. Man those things are tiny! I solder them in place where the old capacitors used to be. Did one last dust blast from the air can, plugged in the board, plugged in the keyboard, pressed the power button. Nothing. I took out the motherboard again, powered on the machine, then plugged the board in. This time, I heard a sort of coughing sound from the speakers, and I could hear the floppy drive whirring up and down repetitively. Something is different obviously...
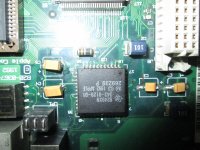
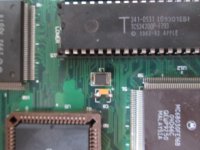
I will be hopefully posting pictures later. I am wanting to know if there is anything else that I might be missing. On capacitor C3, I noticed some darkness in the copper underneath the green silicon layer; these are the leads that you can see very clearly if you look at a picture of a color classic board, one leading to the 103490 chip and one leading to the blue 101 thing below it. It is possible that the capacitor leakage had caused some corrosion and broken those leads, but I am unsure. Down by C9 some of the green film had chipped away; I glued down as much of it as I could find, but I don't think that it necessarily disturbed any of the underlying leads, just exposed them.
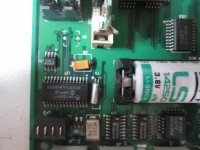
I am wondering if there is anything else I could be missing. Perhaps I have bad solder joints on some of the capacitors. Perhaps there is something I need to do with the PRAM battery. Perhaps there is something wrong on the analog board. I don't think any of the pads lifted when I was desoldering, at least not that I could tell. I cleaned that board as best I could too.
Any tips would be appreciated; I will do my best to provide photos of my work.

