• Updated 2023-07-12: Hello, Guest! Welcome back, and be sure to check out this follow-up post about our outage a week or so ago.

G3DT Zip Bay I/O Hack . . . for the MetalMiniTower™

Trash80toHP_Mini

NIGHT STALKER
I guess this should stand on its own, there are a few related threads. Whatever, I'll explain/link later, I've got a couple of questions first.
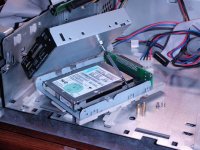
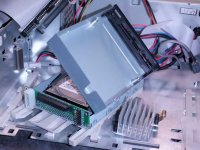
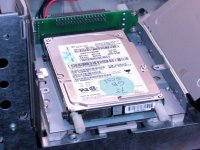
SavvioDetail.2p.jpg

TailDetail.2p.jpg

Standoffs.2p.jpg

ButtonedUp.2p.jpg

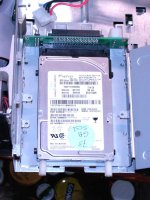
The questions are heat related, these little Savvios run HOT!

I've got a couple or three options for keeping it cool.

1) It's already sitting on a good heat spreader and as the plan goes another will be in goo contact with it above.

2) For better heat transference, I'm thinking about removing the sticker on top of the drive so I have straight metal to metal contact.

3) I'm thinking in terms of adding a heat sink, possibly one with a fan to the heat spreader/chassis sitting on top of it.

4) The heat sink in the piccie as a stand-in isn't really too tall, if I use it, it'll be a subterranean heatsucker.

I'm leaning toward taking a goodly sized hole saw to the floor pan of tilting tray and the plastic drive sled. I can mod the runners and sled for a short run liftoff or swap 'em out entirely. That way I can arctic Goop the heatsink to to the bottom of the tray where it'll sit next to the internal HDD bay in the basement.

5) The east attractive of prospect of all would be to hack it up to have a fan with airflow all around the little Savvio with it standoffed to the chassis without that patented Apple Sliding PlastiCrap.

I really wanna have it set up so that I can bolt up a pull bar to the mounting holes on front of the cute little drives...

. . . so I can cold swap them in and out just by pulling the RFI shielding off the front. [}:)] ]'>

Comments? How might each heat transfer scenario work out and do you have any other suggestions?

. . . this is the kind of thing that happens when I've got Thanksgiving all to my lonesome after bachin' it for a few days. [:)] ]'>


Trash80toHP_Mini

NIGHT STALKER
I uploaded those pics above at lunch, decided they didn't give a good enough notion of what I'm up to, soooo!

FLUnderneath.02p.jpg

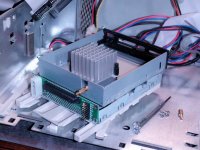
This shows what it will look like with the RFI shielding off. I screwed a pair of (too long) nylon standoffs into the threaded front mounting holes to give an approximation of what I'd like to do.

TopView.2p.jpg

This is a better view of just how much too long they are, but I only need to use a pair of short mounting bolts to hold on some kind of angled bracket that I can snag with a pair of pliers and yank the little Savvio straight out of the SCA connector on the adapter so I can stick a replacement in there. Yes, the system will be powered down at the time. [:)] ]'> For a swap-out implementation, I can't have any kind of ArcticGoop applied to the drive or the drive side of the metal plates, above or below the drives.

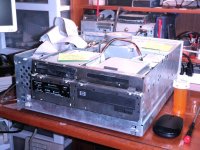
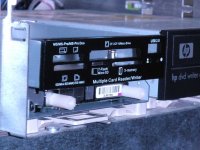
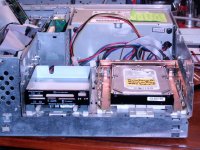
I've used the bottom halves of two different 3.5" Card Readers. There's great contact onto the bottom tray from just from the heavy weight of the drive. There will be adequate contact with the pan (now in hood popped mode) that sits on top of the Savvio. It will act as the top limit/guide for interchanging drives and as well as a second heat spreader . . . but I don't know how well those dang stickers transfer heat.

Now I just need to figure out how best to pull the heat off the pans, preferably without needing to scrape the stickers off the top of the drives.

I checked the PlastiCrap rail/sled and it works with only about an inch of throw. Cutting a hole in the sled is no problem at all and using a hole saw to make four holes for the corners and maybe a larger one in the center to hog out most of the waste before I go at the thing with tin snips to complete the slot in the chassis.

I'll then be able to ArcticGoop (made that one up I think, but you know what I mean) a passive or fan powered heat sink to the bottom of the bottom pan directly under the drive. It'll be offset a tad away from the HDD under there in the basement, but close enough to dead-on I think.

FrontLftOblique.2p.jpg

I threw this one in to show how the sides of the bottom pan are bent in a tad to hold the adapter upright. There's a low lip running across the bottom of the pan. That's one reason I'm using two of them, the other is that I don't need the case for my application for the second Card Reader PCB anyway. [}:)] ]'> the adapter PCB is exactly the width of the pan, so all I had to do was trim a slot on the ends of the sides for a tight fit of the PCB. It doesn't move right or left because I trimmed a slot in the MOLEX connector to get it halfway down to the bottom of the pan and I filed notch in the lip so the PCB slips right down to the bottom of the pan with the MOLEX dado fitting into the dado I filed in the lip so they fit together kinda like Lincoln Logs. The adapter can't slip left or right, it can't move backward because of the lip and it can't tilt forward because of the two sides bent in to brace it

I can probably get away with just tapping the mounting holes at the top of the adapter card and screwing the standoffs into the PCB so they abut the back of the pan that sits on top of the drive. That way they'll resist the force of plugging the cable in from the back better than just the bent in sides would.

That adapter card ain't goin' nowhere! If I need to do a popped hood process for drive swaps, that's how it will be. If I can go the slide in-n-out route, I'll drill and tap the backside of the top pan where you can see the little engraved circles in the pics up in the first post. Then bolts screwed into the standoffs through the adapter PCB will really hold that adapter in place.

Okay that's the play book as best as I can describe it. Which way might work best, adequately is good enough, for cooling the drive?

....


uniserver

Well-known member
they only feel hot to the touch when they are sitting there baking with no ventilation.

as long as there is some airflow across them, they stay warm, not hot.

these drives are bad ass!

The production disk drive shall achieve an AFR of 0.55% (MTBF of 1,600,000 hours) when operated in an environment that ensures the HDA case temperatures do not exceed the values specified
The current algorithm implements two temperature trip points. The first trip point is set at 65°C which is the maximum temperature limit according to the drive specification. The second trip point is user-selectable using the Log Select command.
so yeah don't worry about these drives they are built like tanks.

the drive meets all specifications over a 41°F to 131°F (5°C to 55°C) drive ambient temperature range with a maximum temperature gradient of 20°C per hou
r.
 

Trash80toHP_Mini

NIGHT STALKER
Cool, so to speak [;)] ]'> thanks uni. HOT is a relative term. I don't want to scare anyone about using them. These things are built like tanks. I've still got five of my batch of ten still wrapped up, one is already filled with backup data, one is in the SuperIIsi™ and three are floating around in different project boxen, I love 'em, I couldn't imagine living in a 68k MacWorld or in my little OS9 bubble of surreality without 'em now at this point. [:)] ]'>

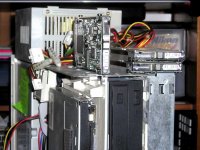
I'll post pics of the hot swap enclosure I've got for four 3.5" Server drives. That's what had me wondering about how I'm sandwiching the is particular cold swap Savvio hack between two metal plates. But I just hunted it down and now that I've examined it more closely, there's really just the one muffin fan to cool four drive trays stacked almost as closely as pancakes.

I'll just finish canning up the first drive and check the temperature of the metal on the top side pan. There will be airflow across the sides of the drive and the pans that act as heat spreaders/radiators already.

I can worry about adding more cooling onto the chassis pan/heat spreaders only if they feel too warm to the touch when I do the next 25MB+- backup run of the data on the drive from the QS'02. I jumbled the boot blocks by setting it up in the G3DT without knowing about the partition limitations. I'll just rock and roll with the setup as it stands for a couple of sessions.


uniserver

Well-known member
Yeah, its great we came across this solution, its about the least expensive in town.

yeah with that flash adaptor thingie you got going there… once the case is on should allow some decent air flow.

even the IIcx/ci/si/q700 the Cooling is sufficient.

i get just slightly concerned for the pizza boxes but it seems there is enough cooling with those as well,

i think as long as a monitor is not placed ontop of it.


Trash80toHP_Mini

NIGHT STALKER
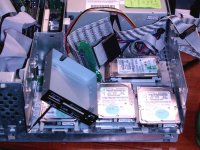
The first backup I did from PortaDrive to a Savvio had SCSI, ATA and power cables and extensions littered all across the top of the horizontal mode MetalMiniTowerG3™ along with the two drives stacked haphazardly upon the PSU.

THIS, should be somewhat more civilized:

BackupSetup.2p.jpg

This is my idea of taking the hack to the next level:

RaidArray-SlotLoader.2p.jpg

Anybody got suggestions for a SoftRaid Level 5 or 6 solution for OS9? :?:

Heh! [}:)] ]'>


uniserver

Well-known member
i think you would need more space to fit all those SCA adaptor cards…

maybe you could get a HS / back plane from an IBM eServer??????????????????????????

and just adapt that to 50 pin scsi. fab it up that box to fit in your case.


Trash80toHP_Mini

NIGHT STALKER
A back plane I've got, I could figure out how to mount the 2.5" drives to the 3.5 " hot-swap carriers, but getting it to fit on a optical drive's chassis plate (preferably within the CD sheet metal case ducting for active cooling) is the fun part. Besides I'm not all that confident I can get a full version of a software package that will do the job under OS9 or in my ability to get it to run. This is a convenient way to keep a redundant pair of three (possibly four) drive backup units stored away for occasional use.

I've already got those high quality terminated cables and I'd much rather save the server box for a speed RAID Level hack

It's the physical packaging challenge that's irresistible to me, especially so with the additional complexity of fitting an adapted laptop slot loader to fit above the Drive assembly within in the available cubic with the proposed RAID hack. This is a MetalMiniTower after all. Tray loaders aren't all that great in vertical mode, even when designed to to so.

Add in in trimming the ends off the adapters and hard-wiring a power/ground line loom and SCSI ID settings to the bobbed PCB's.

There's also the aux PSU and cooling to be added to the available cubic behind the I/O bay and RAID 5 hack challenge to be considered. ;D

Quixotic hardware hack # . . . dunno, I've lost count. ::)

. . . and we'll have fun, fun, fun 'til the grlf takes the hardware away! :approve:


Trash80toHP_Mini

NIGHT STALKER
Without Plan B, how good could an action movie plot be?

Think the beginning of Live Free or Die Hard, not Charlie's Angels:Full Throttle. :p

Plan B . . . drafting around the corner right on the tail of Plan A . . .

Savvio_AT_Attic_Array.2p.jpg

. . . The temptation of building an penthouse mount, clear Plexi cold swap unit with an AT PSU is really beginning to grow on me. That way I can pack the labeled redundant backup drive sets in antistatic bags within bubble wrapped cocoons packed inside a pair of my matched mailing box storage stack containers. The unmodified adapters are just a tad taller than the PSU and there's plenty of room for active cooling of just the drives if I so choose. Putting dados in Quarter inch Plexi for the side nubbins on the drives would be easily accomplished on the makeshift router table. Rabbets for glueing up the inch side plates would be duck soup as bell. [:)] ]'>

That will leave the cubic under the adapted slot loader open for aether the faster ATA bus on the Tempo Trio or a choice of a Ultra SCSI or fast SCSII Adapted SCA 3.5" drive setup underneath the Adapted Laptop Slot Loader running off the second ATA channel on the Trio.

No fuss, no muss, and no RAID complications for the backups, just one more pair of the inexpensive server drives per redundant pair of backup sets.

For a really good action plot, add in Plan C . . .

Savvio_7100_Array.2p.jpg

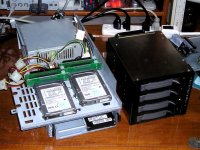
. . . the metal Drive/PSU chassis from the donor 7100 of the top removable bay'FDD bay RFI shielding has already been modded a bit for a rear facing auxiliary I/O unit for the Pet IIfx, I decided that Plexi worked better for that as well, but for a down and dirty third option it works, especially with the butt ugly industrial junker sheet metal look. [}:)] ]'>

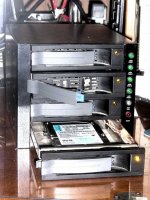
Same AT PSU, gotta love that on-off switch that actually works vs. the overly complicated ATX spec for this kind of hack. That's the Quad 3.5" SCA drive hot swap server module sitting next to it.

Here are the detail pics . . .

Quad_Server_Box_Front.2p.jpg

. . . drive trays with the 2.5" Savvio there in the bottom tray . . .

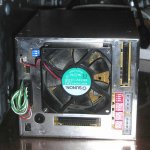
Quad_Server_Box_Back.02.jpg

. . . and the back end.

So many toys and projects and so little time . . .

. . . whatever, you just gotta do what you can for retro-tech playtime! [:D] ]'>

 
Top