• Hello MLAers! We've re-enabled auto-approval for accounts. If you are still waiting on account approval, please check this thread for more information.

Struggling to remove SE/30 axial capacitors old leads - any tips?

djc6

6502
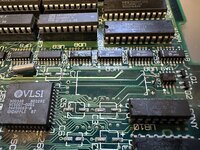
I am recapping an SE/30 and having a hard time desoldering the old leads of the axial capacitors. I probably spent 30 minutes removing just the one in the photo.

First thing I did was cut the lead flush with the board, thinking it was an issue with thermal mass.

I tried flux, adding fresh solder (kester lead free) to both sides of the board. I have a desoldering station, Zhongdi ZD-985 that I've used for many commodore repairs successfully. I also tried solder braid.

I eventually got the remaining piece of the lead out with the desoldering station, after several fresh solder applications and using solder braid on both sides. I had to run desoldering station and my soldering iron at 370C which seems high.

I have a KSGER (Quicko) T12 soldering iron with a variety of tips, using Kester lead free solder, Chemtronics solder wick, MG Chemtronics flux pen.

I noticed new solder stuck poorly to the old solder - this seems to be the main issue, I can easily get the new solder off the old solder :) Any tips? Thanks!
 

Attachments

  • IMG_5979.JPG
    IMG_5979.JPG
    2.7 MB · Views: 18
Last edited:
what works for me:

if the caps had leaked at all i find that using a fiber brush pen on the solder joints before i apply fresh solder helps alot

then i add fresh/extra solder before i either use some desolder brainf or my desolder gun

sometimes for through hole parts it helps to used s hot air gun to warm up the surrounding area beforehand. the ground planes on those old boards are great head sinks

lastly while im not famular with you soldering iron i can tell you that i use a 80w JBC station and it handles everything i throw at it.
 
if the caps had leaked at all i find that using a fiber brush pen on the solder joints before i apply fresh solder helps alot
caps have definitely leaked - solder joints and chip legs aren't badly corroded, but nothing in that area of the board is "shiny" like other areas.

I like the idea of a fiber brush pen, ordered one. Thanks!
 
Two tips (one is a physical tip):

1. Get a thicker solder iron tip if using wick as the larger thermal mass helps when dealing with ground planes that suck away heat.

2. Where I'm still having issues I throw in some chipquik (low melting point solder used for smd removal generally). Adding chipquik easily addresses stubborn through hole parts.
 
I've only done one logic board so far, an SE, but the Hakko FR-301 set at ([EDIT] 500°C not 800°C), pulled each axial cap out in less than 10 seconds (of total heat time). The higher temps are what made it easier for me, 750°C wasn't hot enough in my case. Did not cut the caps, removed them whole.
 
Last edited:
Applying some fresh leaded solder will lower the melting point. Alternatively as @superjer2000 mentioned, some low melt solder will make quick work of stubborn spots. Especially if they're attached to the ground plane. You just need to be extra careful and make sure to remove all the low melt solder.
 
I've only done one logic board so far, an SE, but the Hakko FR-301 set at 800°C, pulled each axial cap out in less than 10 seconds (of total heat time). The higher temps are what made it easier for me, 750°C wasn't hot enough in my case. Did not cut the caps, removed them whole.
Did you really mean °C ? Mine seems to max out at 450°C

800°F is around 425°C
 
Sorry for the confusion, my eyes seem to be getting worse, my Hakko station goes to 899°F, my FR-301, 500°C, which is what I was using.
20241106_104834.jpg
20241106_104840.jpg
 
Last edited:
@djc6 Just FYI: a little bit goes a long way. It's also very brittle. You may be tempted to straighten the solder out before using, but be careful.
 
Applying some fresh leaded solder will lower the melting point. Alternatively as @superjer2000 mentioned, some low melt solder will make quick work of stubborn spots. Especially if they're attached to the ground plane. You just need to be extra careful and make sure to remove all the low melt solder.

That's a good point on removing the low melt solder. I am also very careful to make sure I've fully cleaned my soldering irons tip (sometimes using a different rag/wire cleaner to ensure I don't have any chipquik on the tip when I go back in to resolder the replacement parts as I'm sure a bit of chipquik mixed in would leave a less then ideal joint.

OP: You ordered the right stuff. Good luck!
 
Back
Top