Performa 6200 — ADB power-on works but no keyboard/mouse input

Hi all,

I've got a Performa 6200 where the keyboard power-on button works perfectly every time — Mac chimes and boots to the desktop. But once booted, there's zero response from keyboard or mouse. No key presses, no mouse movement. It was working perfectly for months since I replaced the power supply.

I've tried multiple known-working ADB keyboards and mice, same result. Pressed the reset button, pulled and removed/reconnected the battery (a new one soldered to the original header), no change. Board looks clean with no visible cap leakage or corrosion.

Multimeter readings on the ADB port while powered on and booted:
  • GND to +5V pin: 4.9V
  • GND to DATA pin: 4.9V
So I think the port looks electrically healthy. PSW line obviously works since the keyboard powers on the machine. From googling it might be something about a Cuda chip? I didn't think to remove the stick on heat sinks from this machine but wondered if they might do more harm than good. Is there anything else I could try? The machine works perfectly other than this (luckily launches the Retro68 Application Launcher and Rumpus FTP on boot) and it seemed to happen overnight while I left it copying files to the drive.

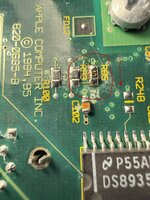
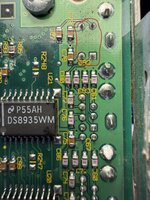
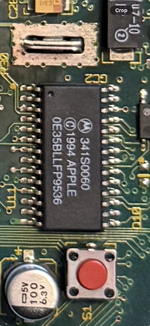
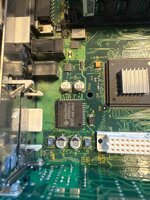
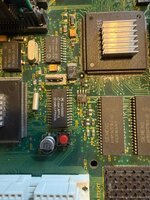
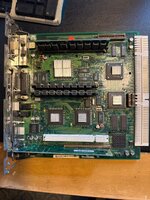
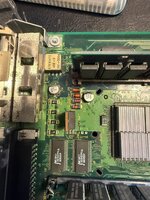
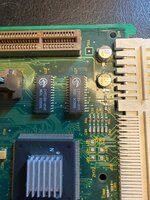
Few shots included, can't see any caps that look bad, none have been replaced as far as I know.
 

Attachments

  • IMG_4513.JPEG
    IMG_4513.JPEG
    659.3 KB · Views: 5
  • IMG_4514.JPEG
    IMG_4514.JPEG
    748.4 KB · Views: 3
  • IMG_4515.JPEG
    IMG_4515.JPEG
    762.6 KB · Views: 3
  • IMG_4516.JPEG
    IMG_4516.JPEG
    681 KB · Views: 3
  • IMG_4517.JPEG
    IMG_4517.JPEG
    664.5 KB · Views: 4
Last edited:
ADB power on is a separate thing to data - it has its own pin. There is no commonality so one working is unrelated to the other.

First thing I'd suspect is the port. Check for dry solder joints and spray deoxit in the port.

Everything after that will be more difficult, and your board does look like it is reasonable condition regarding capacitors.
So lifting up that RF shield over the port connectors and checking there for solder cracks? I'll get some deoxit as well. Thanks!
 
So lifting up that RF shield over the port connectors and checking there for solder cracks?
They'll be on the underside of the board, I don't think the shield needs removing, but I could be wrong.

Dry / cracked solder joints can be hard to see - you might see it by wiggling the port a little to see if part of the solder moves separately to the board, but really it's easier to just reflow it with a dab of no clean flux and a touch of a soldering iron.
So I looked under the board, I can re-flow the joints on the first picture... but then on deeper inspection I noticed something that doesn't look very.. factory like with R85 reckon that looks..normal?
:)
 

Attachments

  • IMG_4523.JPEG
    IMG_4523.JPEG
    436.1 KB · Views: 4
  • IMG_4520.JPEG
    IMG_4520.JPEG
    434.9 KB · Views: 4
Mine has the same value but no rework, so is probably isn't the issue, but it is a bad sign because someone has been poking around the area before.

1000033941.jpg
 
oh wow, yeah someone has obviously been at the underside of my one! I think anything further is probably beyond my electrical skills... I've contacted retropassion.co.uk since they do Performa 6100 recaps and maybe they could look at this for me. Although their site seems to be up and down today... thanks for taking a look at your end, really appreciate you getting out the board!
 
oh wow, yeah someone has obviously been at the underside of my one! I think anything further is probably beyond my electrical skills... I've contacted retropassion.co.uk since they do Performa 6100 recaps and maybe they could look at this for me. Although their site seems to be up and down today... thanks for taking a look at your end, really appreciate you getting out the board!
Looking at your photos, they've previously resoldered a few other things in the area as well.

Let me know how it goes with retropassion - I've spotted their site and if you have a good experience we can point other people at them.
 
If I replaces
Looking at your photos, they've previously resoldered a few other things in the area as well.

Let me know how it goes with retropassion - I've spotted their site and if you have a good experience we can point other people at them.
will do. If they don’t come through, I did some further reading, I could reflow the 341S0060 chip. Which might be the culprit? I’ve also found a possible source to buy them online https://www.utsource.net/itm/p/4055651.html

I’ve drag soldered similar size chips onto original Xbox’s successfully in the past.
 

Attachments

  • Chip.png
    Chip.png
    4.3 MB · Views: 2
If I replaces

will do. If they don’t come through, I did some further reading, I could reflow the 341S0060 chip. Which might be the culprit? I’ve also found a possible source to buy them online https://www.utsource.net/itm/p/4055651.html

I’ve drag soldered similar size chips onto original Xbox’s successfully in the past.
Yeah, that's the CUDA chip, it manages the ADB.

They do sometimes fail (they're actually a... 68HC05 variant). Sometimes bitrot sets in and the internal ROM with the software running in it fails apparently, but I've never personally seen it. Other, probably more often, times, it is a dry solder joint on a pin or a break in a trace.

Given other stuff like soft power works, which is also managed by the CUDA chip, it won't be bitrot (soft power wouldn't work).

How much soldering experience do you have? I'd only poke it if you feel confident doing so, because it might add a new problem. But it depends on your skills and tools / materials.

I'd actually probably trace out the circuit between it and the port and visually inspect for damage. On my machines most issues seem to be physical damage from liquids, capacitors, batteries or... Sigh. Physical impacts from previous owners knocking parts off the board! You'd be surprised 🤣
I’ve done a fair amount of through hole soldering building 3 Amiga 500++ boards, recapped my MacSE board and power supply. SMD work has been building a few RGB2HDMI boards and adding RAM to an OG Xbox. I’ve got the kit like a magnifier, solder braid and a decent iron etc but yeah good shout on tracing the pins out to the port first. I assume just mapping out expected continuity from pins on the chip to the port. It’s the bit beyond that like using an oscilloscope I’m not skilled with. I’ll have a look for a pinout for that chip to the ADB port. I guess it’s the same for any type of Mac that has ADB.

Just wish I hadn’t left it on over night now copying files to it!
I would expect it to be similar, but not identical to this (also the component labels will be different) :

1000033968.jpg

At least we know the fuse is good as you already confirmed you see 5v on pin 3.
 
Do you have continuity between pin 1 on the ADB port, and pin 20 on the CUDA chip?

Then work out what the equivalent of R60 and R62 are on your board (they'll almost certainly have different labels) and check continuity between them, the chip, the transistor and the port.
 
Back
Top