Hey everyone,
I’ve repaired a lot of Apple hardware over the years (PowerBooks, iBooks, iMacs, Intel Macs, etc.). Over the last couple of months I’ve been doing at least one repair per week, even if it’s just something minor, so I’m usually not afraid of taking things apart.
That said, I’ve now run into my personal CRT fear.
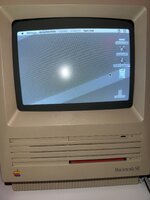
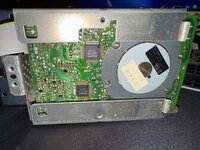
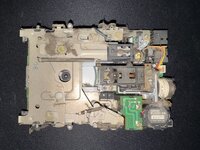
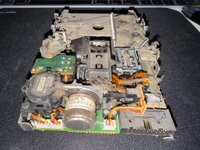
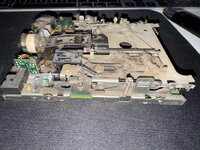
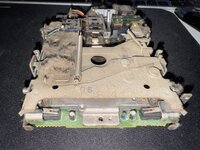
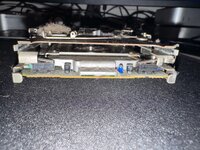
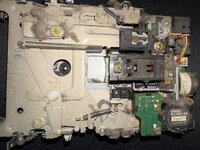
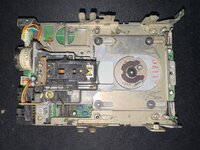
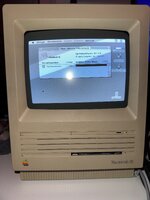
I recently picked up a Macintosh SE with a failing floppy drive. The drive initially worked: it accepted a disk and I was able to eject it twice. On the third eject attempt however the disk got stuck while the eject motor kept spinning continuously. I had to use a paperclip to remove the disk, and since then the eject mechanism seems to run nonstop.
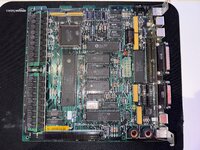
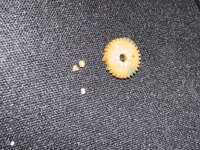
I’d like to open the SE and remove the floppy drive so I can clean and repair the mechanism (my replacement gears arrived today). However, the CRT and high voltage area make me a bit nervous. I’ve watched several teardown videos and I know where the dangerous parts are (flyback, anode cap, rear of the CRT, analog board), but I want to be 100% sure before proceeding.
Is it safe to open the SE and remove only the floppy drive if I stay on the left side and avoid touching the CRT, flyback, and analog board entirely?
I do not plan to go anywhere near the CRT or the analog board.
As far as I understand, discharging the CRT shouldn’t be necessary unless I actually need to work near it. The SE has been unplugged for about two months, so unless the bleeder resistor has failed, it should already be discharged. I’m also hesitant to discharge the CRT myself, so I’d appreciate confirmation on whether this is sufficient.
Is this approach completely safe, or is there anything specific I should still be careful about?
Any advice or reassurance from people who have done this before would be greatly appreciated.
Thanks in advance!
I’ve repaired a lot of Apple hardware over the years (PowerBooks, iBooks, iMacs, Intel Macs, etc.). Over the last couple of months I’ve been doing at least one repair per week, even if it’s just something minor, so I’m usually not afraid of taking things apart.
That said, I’ve now run into my personal CRT fear.
I recently picked up a Macintosh SE with a failing floppy drive. The drive initially worked: it accepted a disk and I was able to eject it twice. On the third eject attempt however the disk got stuck while the eject motor kept spinning continuously. I had to use a paperclip to remove the disk, and since then the eject mechanism seems to run nonstop.
I’d like to open the SE and remove the floppy drive so I can clean and repair the mechanism (my replacement gears arrived today). However, the CRT and high voltage area make me a bit nervous. I’ve watched several teardown videos and I know where the dangerous parts are (flyback, anode cap, rear of the CRT, analog board), but I want to be 100% sure before proceeding.
Is it safe to open the SE and remove only the floppy drive if I stay on the left side and avoid touching the CRT, flyback, and analog board entirely?
I do not plan to go anywhere near the CRT or the analog board.
As far as I understand, discharging the CRT shouldn’t be necessary unless I actually need to work near it. The SE has been unplugged for about two months, so unless the bleeder resistor has failed, it should already be discharged. I’m also hesitant to discharge the CRT myself, so I’d appreciate confirmation on whether this is sufficient.
Is this approach completely safe, or is there anything specific I should still be careful about?
Any advice or reassurance from people who have done this before would be greatly appreciated.
Thanks in advance!


")
 .
.