
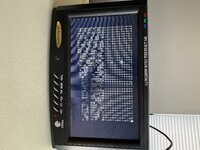
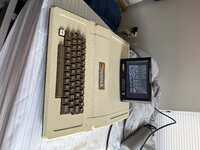
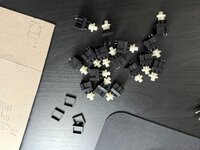
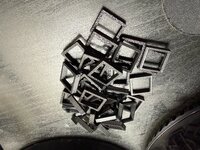
I finally took the time to figure out how to repair the Datanetics DC-51 keyswitches in my original Apple II. After many hours of research on how to fix my Apple II's keyboard, it seemed like I was left with two choices- try and fix the Datanetics switches, or rebuild the keyboard with Cherry MX switches and 3D printed adapters. Since my Apple II is a very nice example of an earlier II in the 22k serial range (although with a IIe PSU), I really did not want to remove the original Datanetics switches, as awful as they are. I decided I would give cracking them open a try, so here was my method for repair:
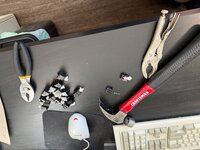
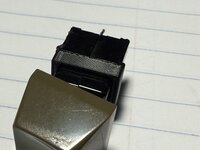
- Tap both sides of the switch where the seams are with a hammer a few times (not hard enough to smash the switch, but just to weaken the plastic weld)
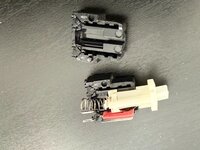
- Pop the switch apart with two pairs of pliers (this should be really easy to do once the hammer has weakened the welds, sometimes a tiny screwdriver bit was necessary to use as a wedge to separate the two halves though) NOTE: DO NOT open the switch very wide during this step- you WILL launch the springs (a small bent piece of metal and a large spring). Don't ask me how I know.
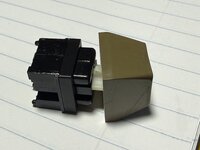
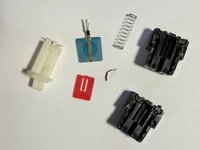
- Once the switch is open, carefully remove the two springs (be careful while opening it of course) and remove the plunger and red plate. I slipped a very fine set of tweezers between the layers and scraped the metal contacts a bit, and cleaned with Deoxit.
- Reassemble the switch, and test continuity with a multimeter. Any greater than 1 ohm of resistance when in the closed position should be addressed- often times by pressing the switch many times or opening it up and scraping the contacts clean with the tweezers again. Any tiny bit of debris will cause the switch to not work, or be unreliable.
- Once your switch reads 0 ohms, slip the plastic retainer onto the housing- it is press fit and no glue is required. It can always be removed for when the switch fails again!
Attachments
-
 IMG_9955.jpeg2.1 MB · Views: 0
 -
 IMG_9954.jpeg2.9 MB · Views: 0
 -
 IMG_9946.jpeg2.9 MB · Views: 0
 -
 IMG_9942.jpeg2.4 MB · Views: 0
 -
 IMG_9903.jpeg2.8 MB · Views: 0
 -
 IMG_9891.jpeg880.7 KB · Views: 0
 -
 IMG_9890.jpeg804.6 KB · Views: 0
 -
 IMG_9889.jpeg1.2 MB · Views: 0
 -
 IMG_9941.jpeg1.6 MB · Views: 0
 -
dataneticsrepair.stl.zip969 bytes · Views: 0