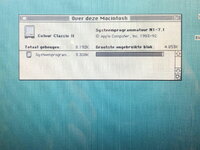
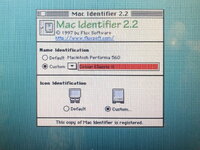
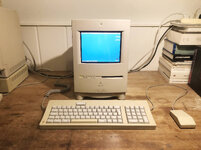
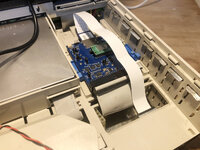
Last december I bought a bunch of macs, including a Colour Classic in working state. I upgraded the RAM to 10Mb, put a BlueSCSI V2 Wifi in the machine with a flat cable extension that the SD card is right behind the back panel, I upgraded the VRAM and last februari I finally put in a Motorola 68882 25Mhz FPU. It runs System 7.1 in the dutch version.
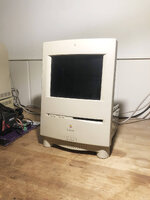
Just a few weeks later when I want to start it up again, the machine wont start. No power on light, no short buzzing when putting the switch to “On“. Allthough the logic board was recapped, the analog board was not. Facing a analog board recap, I put it aside for a while.
Some weeks ago, an article appeared about a project for upgrading a Colour Classic to use an LCD screen by @pizzigri and @daanvdl . I contacted pizzigri and was able to sell a set for a regular Colour Classic. More about this can be found here:
Macintosh Color Classic Analog Board and LCD Replacement Kit!:
It's here: the Color Classic LCD Project is complete!:
The Color Classic LCD Project.:
This week the set arrived and I started working. Took out the analog board and the CRT (about the heaviest part of a Colour Classic), cleaned the frame some more than I did when I bought it.
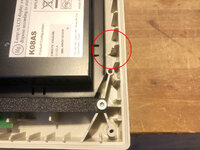
First thing to do was testfitting the new LCD screen. It comes with an acrilic front plate that curved around the mounting bracket to mimic the original screen. I didn‘t notice it was a little too long, so on all 4 corners a little piece broke off. But after the final fitting, it was not visable on the outside. I recomment to connect the blue VGA-cable to the LCD screen first before mounting it to the front plate. Another thing I had to do was cutting of a little piece at the inside, otherwise the LCD screen wont fit properly. On the back of the LCD are buttons to adjust the screen. That can only be done with the case taken off.
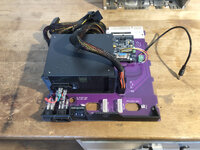
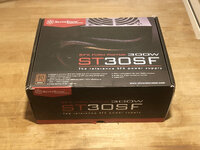
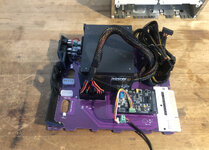
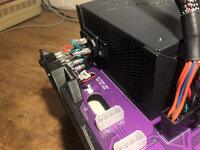
The board itself comes without the PSU. I bought the recommend 'SilverStone SST-ST30SF v2' on Amazon for €64,- and it fits perfect with the bracket that comes with this set. I hand drilled the skrew holes in the bracket a little bit extra with a 4mm metal drill, because 3 of the 4 skrews wont reach the PSU. These skrews are short, I assume to prevent sticking in the PSU too far. The PSU bracket need to be skrewed to the locig board first and then skrew the PSU in place. For the bottom skrews you need a skrewdriver with an extension that can bend, otherise you can't reach these skrews. Only one cable is needed from the PSU (the widest one), I have bind the remaining cables together. Important: the PSU should be switched on (it is also mentioned on the board).
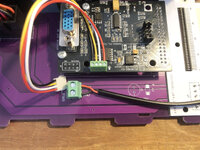
Next thing to do is connecting the power cables for the LCD screen and the microphone (see one of the photos for the right way of connecting). Both cables are part of the set, but were not connected. With these cables connected, the board can be shove in. The LCD power cable can be put in at the bottom side of the LCD screen, the microphone cable can be connected and the VGA cable can now be connected to the board.
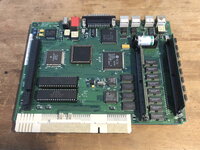
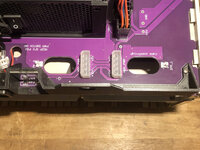
On the back side of the new board are 3 holes for cables and 4 connectors. 2 standard molex connectors for running hard drives and 2 connectors for speakers. This board is prepared for stereo, so no need for a stereo mod. I recommend to put the right speaker cable through the little round hole. I noticed also the my Colour Classic has a speaker with a connector that not fit in the connector on the board. I need to replace the connector for a standard 2.54 spacing pin connector.
I want to put in a second speaker to have stereo sound. I am on the bid for a second speaker that have the right connector. Still it is recommend to buy 2 new speakers (between 4 to 16 ohm) to be sure to have identical ones on left and right side for proper stereo sound. So this speaker thing is still on pending.
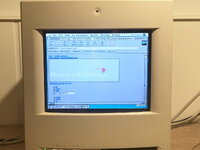
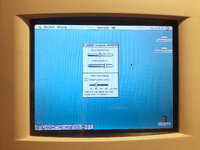
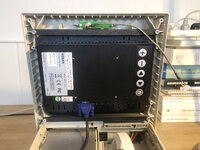
Next thing to do is shove in the Colour Classic board and do a test startup. I connected a headset to have some sound. Startup works the same as with the original logic board. Put on the back side the switch to “On“ and press the power button on the keyboard. It need mentioning that a startup after some time being out of power, it can take time before the LCD screen turns on. Sometimes half way the startup, but it can happen even after startup. At a restart or a short time off, the screen turns on right away and the whole startup can be seen.
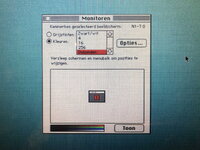
From the buttons on the front, only the sound buttons functioning properly. The brightness buttons do something in the control panel 'Screen' (on my Colour Classic called 'Scherm'): it moves the contrast setting. But both the brightness and the contrast setting in this control panel don‘t change anything on the LCD screen. The brightness and contrast settings can only be set with the buttons on the back of the LCD screen when the case is taken off. I don‘t see that as a problem, ones set, I barely change these setting.
Last thing to mention: the acrilic screen is sensitive for dust. Cleaning it must be done only with a cloth for camera lenses or a bellows. When the screen is on, dust is mostly not visable. It is also sensitive for scratches. But they are simply replaceble. You can find them on Amazon here: https://www.amazon.nl/Taiyeestar-Professional-Transparent-Exhibition-Painting/dp/B0BX5GY1CT/?th=1
Don‘t forget to make it fit. With a sharp knive you can make a cut and than just break it off over the cutted line.
This AB/LCD upgrade set is great. The benefits of this upgrade are:
- a modern logic board (no chance of leaking caps)
- 640x480 screen (was 512x384)
- stereo prepared
- the machine weights much less
This is part 1. In part 2, I discribe the conversion to a Colour Classic II.
Just a few weeks later when I want to start it up again, the machine wont start. No power on light, no short buzzing when putting the switch to “On“. Allthough the logic board was recapped, the analog board was not. Facing a analog board recap, I put it aside for a while.
Some weeks ago, an article appeared about a project for upgrading a Colour Classic to use an LCD screen by @pizzigri and @daanvdl . I contacted pizzigri and was able to sell a set for a regular Colour Classic. More about this can be found here:
Macintosh Color Classic Analog Board and LCD Replacement Kit!:
It's here: the Color Classic LCD Project is complete!:
The Color Classic LCD Project.:
This week the set arrived and I started working. Took out the analog board and the CRT (about the heaviest part of a Colour Classic), cleaned the frame some more than I did when I bought it.
First thing to do was testfitting the new LCD screen. It comes with an acrilic front plate that curved around the mounting bracket to mimic the original screen. I didn‘t notice it was a little too long, so on all 4 corners a little piece broke off. But after the final fitting, it was not visable on the outside. I recomment to connect the blue VGA-cable to the LCD screen first before mounting it to the front plate. Another thing I had to do was cutting of a little piece at the inside, otherwise the LCD screen wont fit properly. On the back of the LCD are buttons to adjust the screen. That can only be done with the case taken off.
The board itself comes without the PSU. I bought the recommend 'SilverStone SST-ST30SF v2' on Amazon for €64,- and it fits perfect with the bracket that comes with this set. I hand drilled the skrew holes in the bracket a little bit extra with a 4mm metal drill, because 3 of the 4 skrews wont reach the PSU. These skrews are short, I assume to prevent sticking in the PSU too far. The PSU bracket need to be skrewed to the locig board first and then skrew the PSU in place. For the bottom skrews you need a skrewdriver with an extension that can bend, otherise you can't reach these skrews. Only one cable is needed from the PSU (the widest one), I have bind the remaining cables together. Important: the PSU should be switched on (it is also mentioned on the board).
Next thing to do is connecting the power cables for the LCD screen and the microphone (see one of the photos for the right way of connecting). Both cables are part of the set, but were not connected. With these cables connected, the board can be shove in. The LCD power cable can be put in at the bottom side of the LCD screen, the microphone cable can be connected and the VGA cable can now be connected to the board.
On the back side of the new board are 3 holes for cables and 4 connectors. 2 standard molex connectors for running hard drives and 2 connectors for speakers. This board is prepared for stereo, so no need for a stereo mod. I recommend to put the right speaker cable through the little round hole. I noticed also the my Colour Classic has a speaker with a connector that not fit in the connector on the board. I need to replace the connector for a standard 2.54 spacing pin connector.
I want to put in a second speaker to have stereo sound. I am on the bid for a second speaker that have the right connector. Still it is recommend to buy 2 new speakers (between 4 to 16 ohm) to be sure to have identical ones on left and right side for proper stereo sound. So this speaker thing is still on pending.
Next thing to do is shove in the Colour Classic board and do a test startup. I connected a headset to have some sound. Startup works the same as with the original logic board. Put on the back side the switch to “On“ and press the power button on the keyboard. It need mentioning that a startup after some time being out of power, it can take time before the LCD screen turns on. Sometimes half way the startup, but it can happen even after startup. At a restart or a short time off, the screen turns on right away and the whole startup can be seen.
From the buttons on the front, only the sound buttons functioning properly. The brightness buttons do something in the control panel 'Screen' (on my Colour Classic called 'Scherm'): it moves the contrast setting. But both the brightness and the contrast setting in this control panel don‘t change anything on the LCD screen. The brightness and contrast settings can only be set with the buttons on the back of the LCD screen when the case is taken off. I don‘t see that as a problem, ones set, I barely change these setting.
Last thing to mention: the acrilic screen is sensitive for dust. Cleaning it must be done only with a cloth for camera lenses or a bellows. When the screen is on, dust is mostly not visable. It is also sensitive for scratches. But they are simply replaceble. You can find them on Amazon here: https://www.amazon.nl/Taiyeestar-Professional-Transparent-Exhibition-Painting/dp/B0BX5GY1CT/?th=1
Don‘t forget to make it fit. With a sharp knive you can make a cut and than just break it off over the cutted line.
This AB/LCD upgrade set is great. The benefits of this upgrade are:
- a modern logic board (no chance of leaking caps)
- 640x480 screen (was 512x384)
- stereo prepared
- the machine weights much less
This is part 1. In part 2, I discribe the conversion to a Colour Classic II.
Attachments
-
 01_LB-board_1.jpg382.2 KB · Views: 91
 -
 15_CC_2.jpg378.1 KB · Views: 84
 -
 14_CC_1.jpg274.6 KB · Views: 79
 -
 13_Card_extender.jpg240.7 KB · Views: 71
 -
 12_BlueSCSI.jpg314.9 KB · Views: 68
 -
 11_PSU.jpg304.7 KB · Views: 67
 -
 10_LCD_3.jpg230.9 KB · Views: 64
 -
 09_LCD_2.jpg330.8 KB · Views: 66
 -
 08_LCD_1.jpg308.2 KB · Views: 62
 -
 02_LB-board_2.jpg368.1 KB · Views: 59
 -
 03_LB-board_3.jpg265.9 KB · Views: 59
 -
 04_LB-board_4.jpg365.8 KB · Views: 56
 -
 05_LB-board_5.jpg278.7 KB · Views: 55
 -
 06_LB-board_6.jpg321.4 KB · Views: 54
 -
 07_LB-board_7.jpg431.2 KB · Views: 65