demik
Well-known member
Hello,
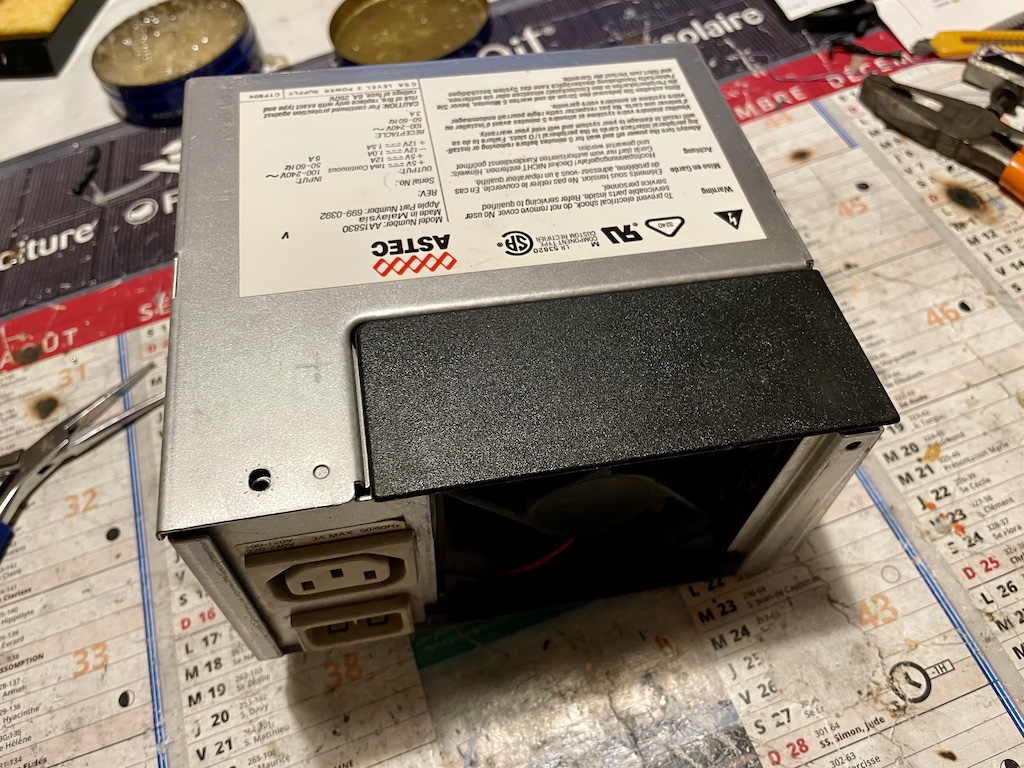
I've been asked to post this here on IRC so there it is. A lot of PSUs from this era are bad quality and difficult to repair (if possible at all). One of the worsts is the Astec AA15830 (Apple P/ 699-0392)
One of the solution is to use the excellent adapter board by @blusnowkitty and @Compgeke (thread here)
I didn't want to use a full ATX PSU and wanted to keep the plug & play part of the original PSU.
Here is a quick teardown on how to do it:
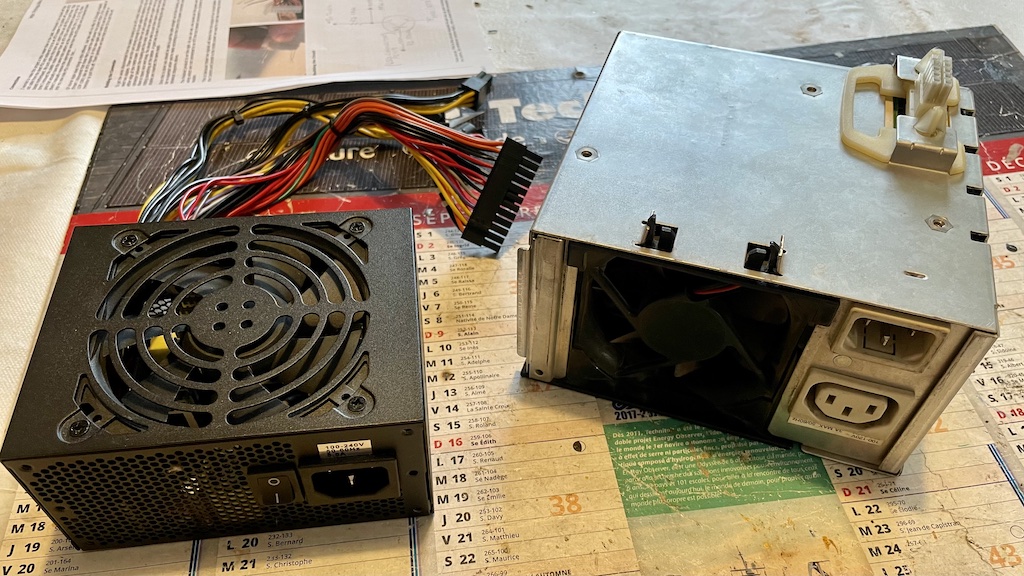
You need a SFX PSU, a lot of heat shrink tube and an axle grinder or something to cut PSU cases. Here is what you start with:
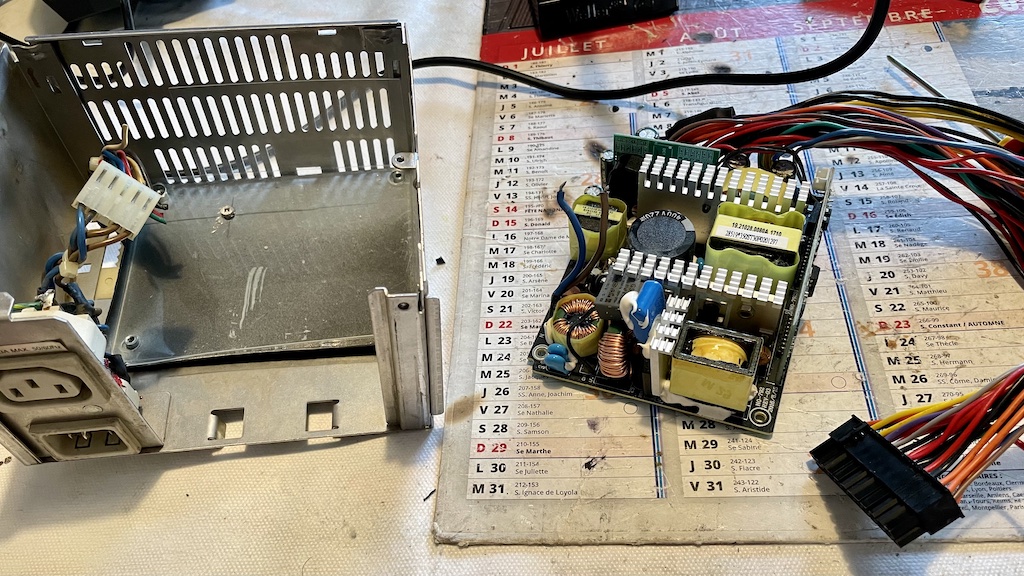
Next you have to gut the old PSU. Keep the Motherboard and wall connectors with the maximum possible wire length:
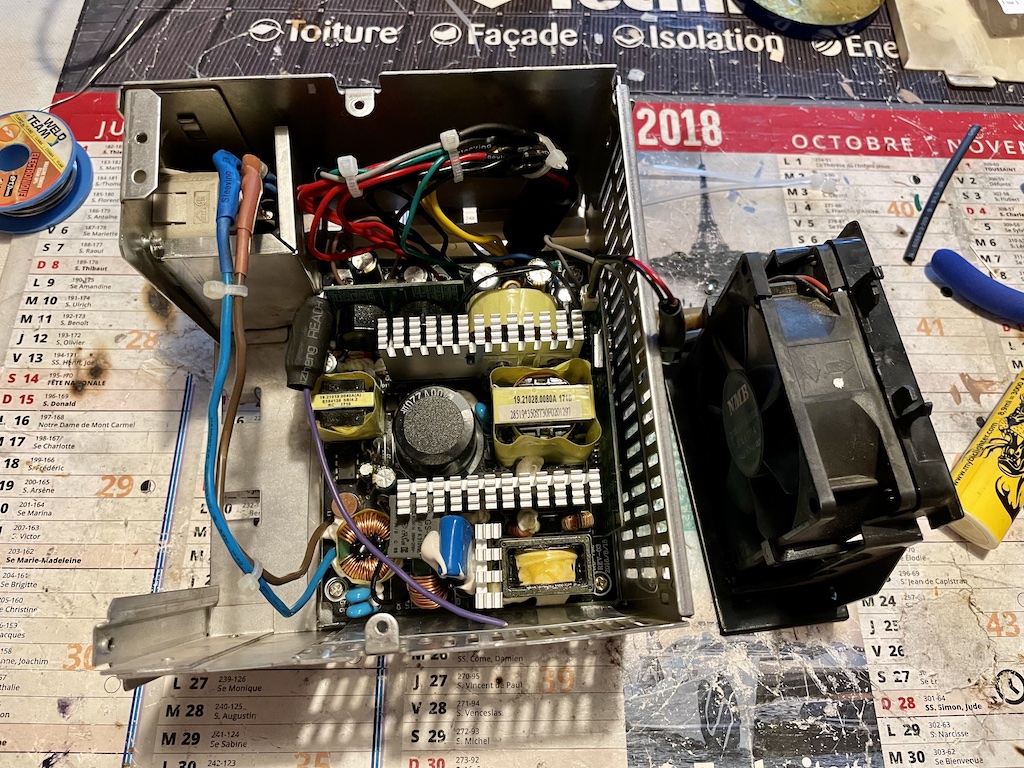
Also remove the new PSU board from its enclosure. You need to cut the bottom of the NEW cpu and screw it inside the OLD PSU like this:
Next thing to do is to connect all wires from the new PCB to the old connector. It's helpful to remove unused cables from the new PSU as well.
For the power on circuit, you need to build the same circuit as Eric Bylenga described on his blog
The relevant part is this one:
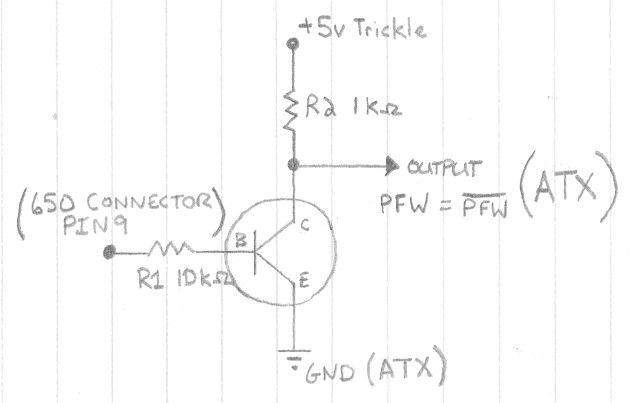
It's easy to do without a PCB, just weld both resistors to the NPN Transistor, head wrap everything and you are good to go.
You can now close everything and nobody can guess what's inside
The old fan is wired to new PCB fan header, so now the fan is temp controlled as a bonus
Hope this is helpful to somebody !
I've been asked to post this here on IRC so there it is. A lot of PSUs from this era are bad quality and difficult to repair (if possible at all). One of the worsts is the Astec AA15830 (Apple P/ 699-0392)
One of the solution is to use the excellent adapter board by @blusnowkitty and @Compgeke (thread here)
I didn't want to use a full ATX PSU and wanted to keep the plug & play part of the original PSU.
Here is a quick teardown on how to do it:
You need a SFX PSU, a lot of heat shrink tube and an axle grinder or something to cut PSU cases. Here is what you start with:
Next you have to gut the old PSU. Keep the Motherboard and wall connectors with the maximum possible wire length:
Also remove the new PSU board from its enclosure. You need to cut the bottom of the NEW cpu and screw it inside the OLD PSU like this:
Next thing to do is to connect all wires from the new PCB to the old connector. It's helpful to remove unused cables from the new PSU as well.
For the power on circuit, you need to build the same circuit as Eric Bylenga described on his blog
The relevant part is this one:
It's easy to do without a PCB, just weld both resistors to the NPN Transistor, head wrap everything and you are good to go.
You can now close everything and nobody can guess what's inside
The old fan is wired to new PCB fan header, so now the fan is temp controlled as a bonus
Hope this is helpful to somebody !

 I can see X / Y class caps on that board, which are absent from the Astec housing.


