• Updated 2023-07-12: Hello, Guest! Welcome back, and be sure to check out this follow-up post about our outage a week or so ago.

Stealth Macintosh IIcx/IIvx style SFX PSU rebuild

demik

Well-known member
Hello,

I've been asked to post this here on IRC so there it is. A lot of PSUs from this era are bad quality and difficult to repair (if possible at all). One of the worsts is the Astec AA15830 (Apple P/ 699-0392)

One of the solution is to use the excellent adapter board by @blusnowkitty and @Compgeke (thread here)

I didn't want to use a full ATX PSU and wanted to keep the plug & play part of the original PSU.
Here is a quick teardown on how to do it:

You need a SFX PSU, a lot of heat shrink tube and an axle grinder or something to cut PSU cases. Here is what you start with:
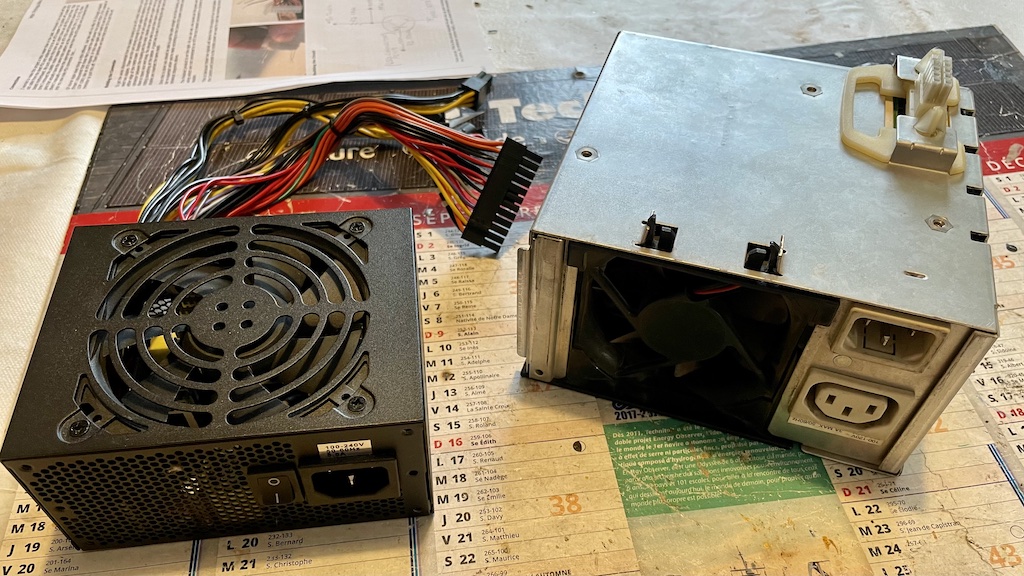
stealth_PSU_1.jpeg


Next you have to gut the old PSU. Keep the Motherboard and wall connectors with the maximum possible wire length:
Also remove the new PSU board from its enclosure. You need to cut the bottom of the NEW cpu and screw it inside the OLD PSU like this:
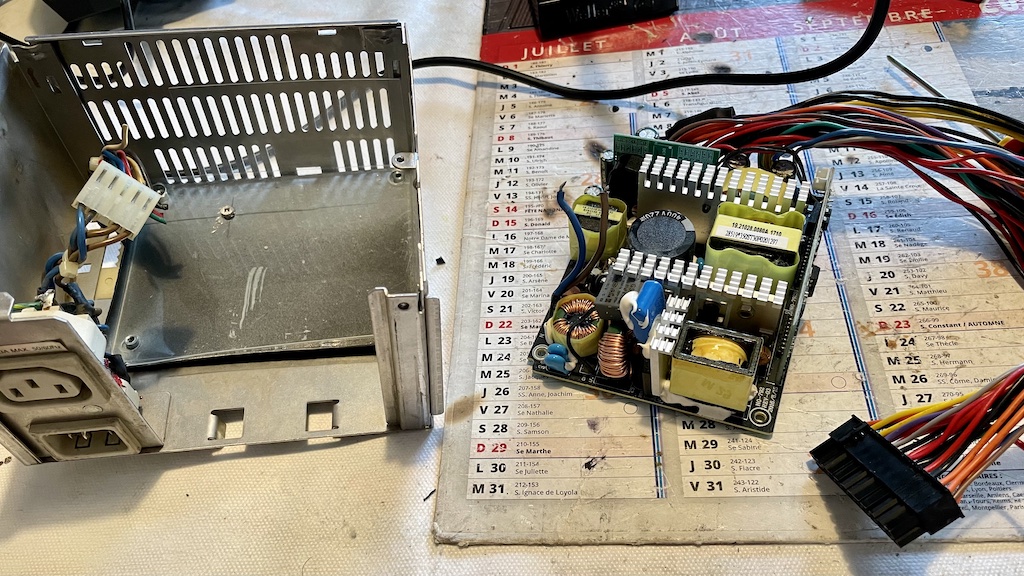
stealth_PSU_2.jpeg


Next thing to do is to connect all wires from the new PCB to the old connector. It's helpful to remove unused cables from the new PSU as well.
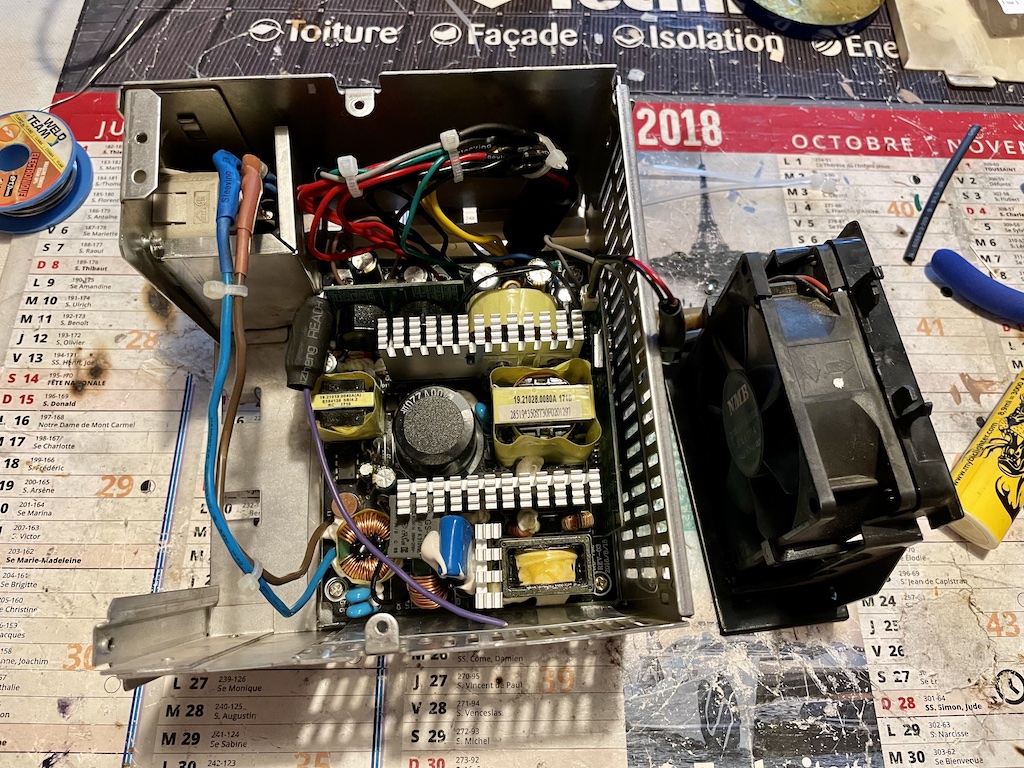
stealth_PSU_3.jpeg


For the power on circuit, you need to build the same circuit as Eric Bylenga described on his blog
The relevant part is this one:
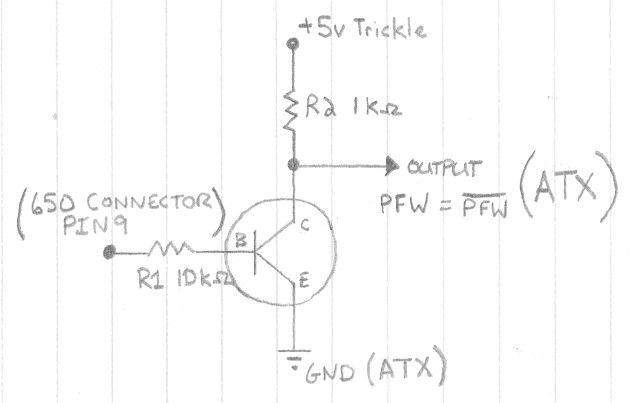
circuit640bw.jpg


It's easy to do without a PCB, just weld both resistors to the NPN Transistor, head wrap everything and you are good to go.
You can now close everything and nobody can guess what's inside
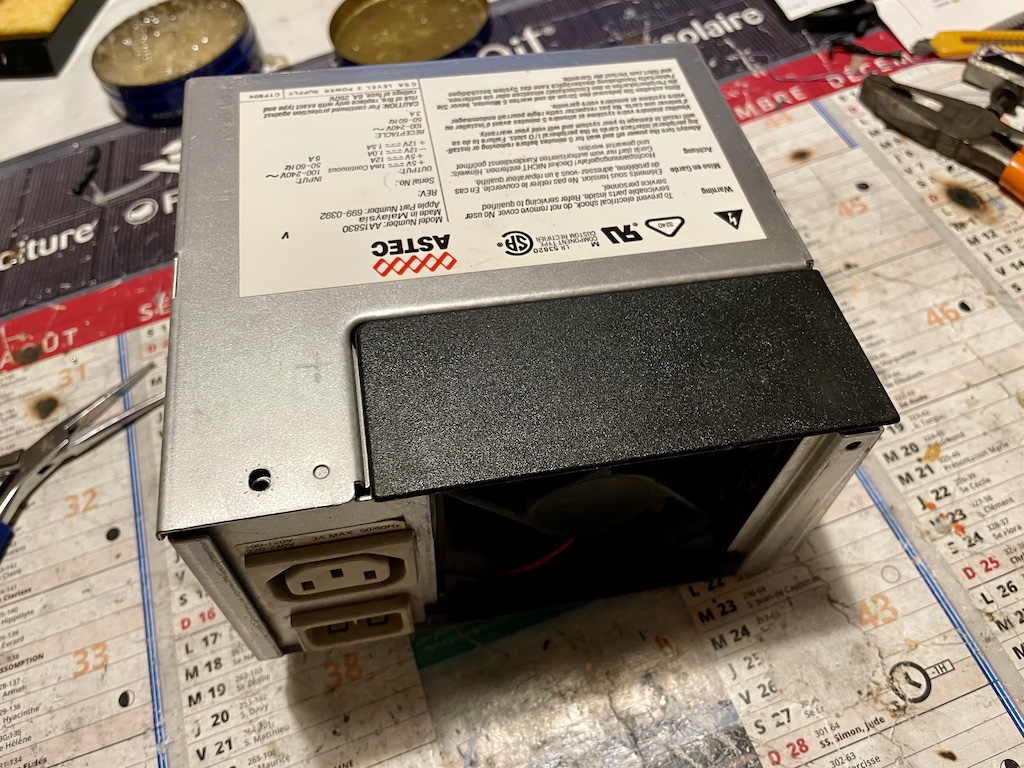
stealth_PSU_4.jpeg


The old fan is wired to new PCB fan header, so now the fan is temp controlled as a bonus

Hope this is helpful to somebody !
 

jessenator

Well-known member
Nice! Yeah, I'm certain the recapping of the originals is buying only a few more years, perhaps, so it's nice to know there are some drop-in solutions for the original. @Fizzbinn and I were making up re-cap diagrams for this series of (varied designs…) compact-desktop PSUs

Personally, if anything beyond just caps start to go, I'm definitely going to go with your route @demik of dropping in a budget ATX's guts and call it a day. Thanks for that!
 

joshc

Well-known member
@demik This looks great, but I do have one question about the implementation.

How do you deal with the input filtering on the high voltage side if the PSU manufacturer attached components to the AC socket rather than the PCB. Would you move the components over to the socket on the original PSU?

I cannot remember if the original Astec PSU has some filtering components attached on that end already.

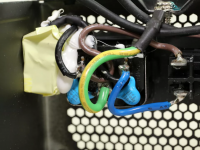
Example photo of what I'm talking about, from a Silverstone PSU:

1626422366264.png
 

joshc

Well-known member
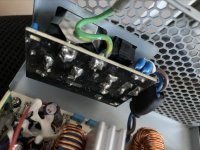
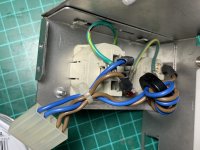
The Seasonic I was planning to use for a conversion is even worse, it uses a whole mini PCB on the back of the AC socket which doesn't look like the easiest thing to move across. :unsure: I can see X / Y class caps on that board, which are absent from the Astec housing.

54F44500-0861-4F50-AA70-6764062E9639_1_105_c.jpeg

Astec side:


31199BC7-FB19-4372-9F8F-BC4130876745_1_105_c.jpeg
 

demik

Well-known member
Hello @joshc

Both circuits (SilverStone and Seasonic ones) are passives Power Factor Correction circuits. Long story short, it helps having a better efficiency but isn't part of the PSU per see. It's more off an helper circuit for non linear loads.

PFC is mandatory since 2001 in EU, but even after that, a lot of low quality PSUs were shipped without a PFC circuit. A lot of our old PSUs were shipped without any PFC circuity.

Your PSU will do fine without. It's just better of you can keep it. If not, not a big deal for a vintage equipment which probably didn't come with one.
 

joshc

Well-known member
I started my stealth PSU project ages ago (around July last year) and only just finished it.

I built it because the original Astec in my IIci has always been dodgy, even after a recap, and I was fed up of the soft power not working correctly.

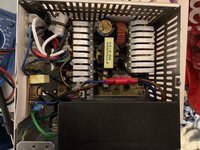
I used a Seasonic 250W PSU, using the PCB and fan from the Seasonic, the case was not reused. Drilled new mounting points into the Astec case. Moved the new AC socket and filtering PCB from the Seasonic over to the Astec case.

Finally got it all wired up and installed and it works nicely. I haven't done a long test yet but so far it seems reliable.

9A5EE598-9004-4D52-9D7A-28916F0C6642_1_201_a.jpeg

I even moved the Seasonic sticker over so it looks somewhat stock...

1641921014373.png
 

Johnnya101

Well-known member
I started my stealth PSU project ages ago (around July last year) and only just finished it.

I built it because the original Astec in my IIci has always been dodgy, even after a recap, and I was fed up of the soft power not working correctly.

I used a Seasonic 250W PSU, using the PCB and fan from the Seasonic, the case was not reused. Drilled new mounting points into the Astec case. Moved the new AC socket and filtering PCB from the Seasonic over to the Astec case.

Finally got it all wired up and installed and it works nicely. I haven't done a long test yet but so far it seems reliable.

View attachment 37420

I even moved the Seasonic sticker over so it looks somewhat stock...

View attachment 37419
or @demik, Would you have any interest in doing any for other members? I have a Quadra 700, which I think uses the same PSU? as the IIci, and the PSU works fine, but I am seeing more and more fail. I and probably a few others would be interested in a retrofit like what you did.
 

joshc

Well-known member
The Quadra 700 uses the same pinout, yes.

I wouldn't build one for anybody else, primarily because of the safety factor and the responsibility that comes with dealing with PSUs. But I'm sure there's someone out there who would do it for you, maybe ask in a Trading post?

I'd be happy to help with advice/tips if you wanted to have a go at it yourself.
 

LazarusNine

Well-known member
Finally got it all wired up and installed and it works nicely. I haven't done a long test yet but so far it seems reliable.
If you ever have a moment, would it be possible to explain (or show) how to match up the wires between the Seasonic and the original adapter the plugs into the motherboard on the IIci/Q700? I’m still unsure how to do the matching. Thanks, and great work!
 

LazarusNine

Well-known member
Thanks for the reply! I’m good up until the point of the circuit, and then I’m a bit lost, as I have no electrical engineering experience. My ability sadly ends at recapping and soldering. Will have a friend look at it and tell me exactly what I need to do.
It's easy to do without a PCB, just weld both resistors to the NPN Transistor, head wrap everything and you are good to go.
For instance, I wish this made total sense! If it was a matter of following a diagram/image of where to place surface mounted or through-hole components onto a PCB, I’d be fine. Following a circuit diagram doesn’t make much intuitive sense to me - perhaps something else to learn! Thanks again.
 

joshc

Well-known member
I've attempted this twice now, and I've never gotten the soft power circuit to work. :/
If you post what you made here I could attempt to work out why.

My ability sadly ends at recapping and soldering.
That's actually all you need to know, really.

The wiring up is just matching up the right wire to the right pin on the Mac side. Which bit are you unclear on?

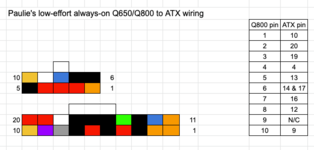
You may find this guide courtsey of @Paulie easier to follow.

1652716722021.png

If it was a matter of following a diagram/image of where to place surface mounted or through-hole components onto a PCB, I’d be fine.
Firstly, you can build an ATX conversion without the soft power functionality - your Mac would just power on as soon as the PSU is powered on (either as soon as it's plugged in, or as soon as you flip a switch if you install a power toggle switch).

This can be done with through-hole components and you don't even need a PCB, it's easier than that. Again, it is a case of matching up the right pin of the transistor with the right resistor connected to the right wires of the PSU.

Any small signal NPN transistor should work (2N2222, 2N3904, BC848, 2N5551, etc).
 

LazarusNine

Well-known member
Thanks for that extra info, @joshc. I’m in the process of getting the parts ordered and will have a go using the resources (and parts numbers!) you have provided. The Seasonic PSU has already arrived. If I’m successful, I’ll try to post here as well.
 

LazarusNine

Well-known member
How'd you get on?
Thanks for checking in! I still have a few parts to pick up. I’m also a little hesitant, because if I mess up the original PSU, I’ll essentially have an unusable IIci. So, just doing a bit more homework.
 

jmacz

Well-known member
I did this ATX conversion for my Quadra 700 which worked great but I punted on the pass through monitor power port - I wired it directly in parallel to the main socket so the monitor port works but is always hot.

I am doing another conversion this time for my IIci and want to get the monitor power port working with the soft power so that it’s only hot when the IIci is on.

Has anyone gotten this to work?

The stock supply (this time a GE as opposed to an Astec) has a module on the monitor power port which seems to control connectivity of one of the two hot power wires. This module has a two wire connector coming out of it. One of these is ground. The other one I am still trying to trace. My guess is it’s probably going to the same +5v high that controls soft power for the power supply but just a guess.
 

jmacz

Well-known member
Leaving an update here for future readers.

For the monitor power port on the power supply (GE in this case) - the monitor power port has a circuit attached to it which controls whether the monitor power port is hot or not. The actual power delivery wires (red specifically), you can tie to one of the power wires for the main power port. If you look at the main power supply circuit board, you will see which one as they are bridged. For the control, you'll find that the circuit attached to the monitor power port has two additional (smaller) wires coming out of it. One is ground. As for the other, I traced it to pin 9 (white wire) on the PS to motherboard connector, which is the soft power line (as shown earlier in this thread). It looks like I can send that signal from the motherboard via pin 9 to this circuit, in parallel to sending pin 9 to the circuit described earlier which inverts the signal for the ATX.

So Mac motherboard -> 10 pin connector -> pin 9 soft power signal -> circuit on the monitor power port.

Pin 9 also needs to go to the inverter circuit (mentioned earlier in this thread) which activates soft power for the ATX power supply.

Haven't tried this yet but hopefully this works.
 

jmacz

Well-known member
So Mac motherboard -> 10 pin connector -> pin 9 soft power signal -> circuit on the monitor power port.

Pin 9 also needs to go to the inverter circuit (mentioned earlier in this thread) which activates soft power for the ATX power supply.

The above wasn't correct. I have both an Astec and a GE power supply and the wire colors are different so I confused myself.

On the GE, the monitor power port is controlled by a relay that closes based on +12V. So it's not pin 9 (soft power signal) that this relay should be connected to but rather the 12V line from the power supply which won't be powered until the soft power has triggered the power supply on.
 

jmacz

Well-known member
Quick follow up. It was indeed +12v that the relay needs. Once soft power starts the power supply, the 12v gets power, which then activates the relay providing power to the monitor pass through power port. I got it working on my GE power supply on my IIci. The Astec is probably similar although I can’t test it since I can’t find the relay for that power supply - it’s probably in an old box somewhere in my garage. So ignore post #18 above. My post #19 is the correct one.
 
Top