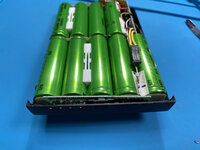
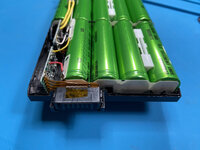
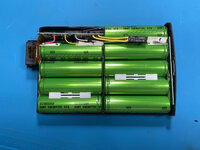
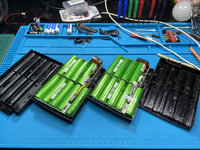
Rebuilding a Pismo battery

gw280

Member
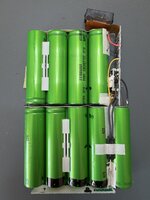
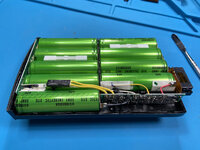
So I have a Pismo which had a completely busted battery. Taking it apart, three of the cells were leaking and pressing the charge indicator button wouldn't show any signs of life. Occasionally it'd show maybe 1 flashing light but most of the time it'd show nothing. The computer didn't recognise the battery either, I'd plug it in and it'd show the expansion bay as empty (except when it would show one flashing light, in which case it'd show a battery with a red X through it).

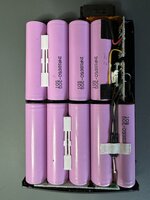
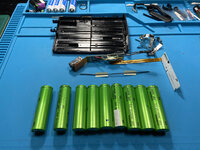
I took it apart and replaced the cells with Panasonic NCR18650 cells connected in the same configuration as the original ones. Before spot welding the cells together, I measured the voltage across each cell at around 3.15V. I'm seeing around 10V across the output pins and the battery actually powers the machine for a little while when I unplug the power. However, I cannot for the life of me get the machine to charge the battery.

I've tried a PMU reset using the button on the back of the machine, I've also tried booting into OpenFirmware and doing the reset-nvram, set-defaults, reset-all dance to no avail.

Does anyone have any experience with rebuilding these packs and know how to get them to charge after a cell swap?
 

gw280

Member
Quick update: after some sleuthing I’m now reasonably sure the Pismo’s charger board is broken. OS X’s System Profiler shows the dreaded “AC adapter cannot charge battery: Yes” message, and says it’s a 26W power supply. I’ve ordered a replacement power board, and will tear the machine down tomorrow to see whether there’s anything visible going on. Hopefully it’s just a brittle solder joint that needs to be reflowed.
 

gw280

Member
Replaced the DC input board and the charger board today. I'm reasonably sure it was just the DC input board but I ordered both anyway. The battery is now charging as it should, and I'll report back here with the results of the cell swap. My estimate is that it should have a working capacity of around 9000-10,000mAh, which would be a substantial upgrade from the OEM battery.
 

gw280

Member
So after replacing the board, it showed a capacity of around 3800mAh, which is presumably what the old cells were at before the battery died. When I charged it, it hit "100%" relatively quickly, but continued to charge for several hours after that. I then ran a full discharge and a full charge again and now the battery is showing as 7600mAh - a little lower than I expected but still a huge improvement over OEM. With the screen brightness down and an SSD instead of a spinning HDD, I get around 7-9 hours of battery life.

One interesting source of information was this forum thread, where they identify the 26W charger issue and isolate it to a short-circuited zener diode on the DC input board: https://forums.macrumors.com/threads/blueberry-ibook-clamshell-1st-gen.2087119/. Testing the diode labelled DZ1 on my DC input board shows it as faulty, so I'm reasonably sure that's what happened in my case.
 

beachycove

Well-known member
7600mah is superb. I'd love to be able to do this myself. What kind of spot welder is right/ best for this sort of battery rebuilding work?
 

gw280

Member
I used this one: https://www.amazon.com/dp/B08B4RJ58B?psc=1&ref=ppx_yo2_dt_b_product_details, and used these nickel strips: https://www.amazon.com/dp/B08RHP8NDD?psc=1&ref=ppx_yo2_dt_b_product_details

Be warned, this is a very very dangerous project, so be prepared for that. I made sure I had a fire extinguisher on hand for the entire duration and handled everything very carefully.

Here are some instructions I found very helpful for the project: http://fweb.wallawalla.edu/~frohro/Powerbook/Pismo/Battery/
 

surfer150

Active member
I rebuilt the battery of my Pismo too but the battery life is the same as it was before, it is only enough to get the Pismo to sleep once I remove the AC Adapter. The system profiler shows 38 mAh left before and after the rebuild. Has anyone an idea to reset the BMS so that it gathers the true capacity of the brand new 18650 cells?
 

cgp

Well-known member
So, my Pismo battery was a third party replacement I'd got back in 2003! It now managed to hold charge for perhaps only 10 minutes .. so I needed to do something.

On eBay, I picked up some dead batteries for a few backs each so that I could play around taking cracked opne. I got 2 Apple branded originals and 2 from BTI. Typically they're firmly glued shut and old glue turns to cement. Firstly I tried hot-air to encourage the glue to give way but the plastic of the case would bend or split before the glue gave way!

My second method was to soak the battery in a bath of nearly boiling water before attempting to prize it open. You can start to prize at the plug end and then work towards the front (where the charge status LEDs are located). Most cases have snap-clips at a few locations around the case edge and some additionally have a couple columns between cells that snap between the top and bottom (see white plastic strips in photo below).

Using the hot water method, I was able to crack open an Apple M7318 battery with little or no cosmetic damage. I opened a BTI unit with minimal damage, but the other battery cases ended up partly shredded.

Electrically, each battery was different. Each used a different 18650 Lithium-Ion cell type/manufacturer with a different version of BMS electronics - although all used the bp2040 chip. The 3p3s arrangement of cells (i.e. 3 grouped in parallel and 3 groups in series) also varied: one row of 5 cells plus another row of 4 cells with one parallel group of 3 cells being split between rows. Neighboring cells were interconnected with welded nickel strips.

I decided to re-build the Apple battery the for best look. The original Sony US18650 G2H (1500mAh) cells looked like this:
IMG_2230.jpeg

Not wanting to fuss with welding, I decided that I could solder together replacement cells fitted with tabs and get them to fit into the tight space available. I found a set of 10 tabbed cells on Amazon from a Chinese supplier but with a Samsung part number INR18650-30Q. These have twice the capacity of the originals but cost only around $40 for 10.

The installation was pretty straightforward and the new cells fit in the case fine and it snapped back together with no gluing required:
IMG_2438.jpeg

The rebuilt battery immediately took a charge when plugged back in the Pismo. After charging overnight it provided a couple of hours life. But that wasn't delivering the expected capacity. The hitch is that BMS is programmed for the original 4500mAh rating. The bq2040 initializes from an EEPROM with this default set. Apparently it takes a few full cycles for the chip to recalibrate to the actual capacity (which should be more like 9000mAh). But no EEPROM reprogramming should be necessary.
 

Joe Smith

Member
Wow, this is a lot of work, but great final product! Congrats!

I still have a few Apple and NuPower batteries with decent charge, good for now...it's amazing how long the original cells lasted, with a bit of babying.
 

GorfTheChosen

Well-known member
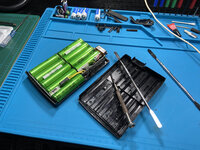
My first attempt at cracking open a Pismo battery went pretty well.

Took my time and worked at it slowly to try and minimize damage to the plastic outer case.

Used a large(r) sized jeweler's screwdriver and metal spatula spudger:

IMG_3604 copy.jpg

The adhesive was still tacky.

IMG_3605 copy.jpg
IMG_3607 copy.jpg

IMG_3606 copy.jpg

IMG_3608 copy.jpg

Some of the little plastic clips that hold the two halves of the case together got chewed up a bit or destroyed, almost impossible to avoid if you don't know where they are.

Some type of black adhesive was used to hold the halves together, was still pliable.

Next step is to remove the cell pack from the half of the outer case it's still stuck to and see how the cells are wired together.

Have not ordered cells yet, considering using these Panasonic cells from these guys:

3.7 Volt Panasonic 18650 Lithium Ion Battery (3400 mAh) with Tabs
 

GorfTheChosen

Well-known member
Second battery pack cracked open and split.

At first glance they appear pretty similar.

Both Apple M7318's, the one on the left is circa 1999, the one on the right 2000:

IMG_3613 copy.jpg

Second one should provide a good visual reference when reassembling the first.
 

GorfTheChosen

Well-known member
Found out a little more as to why when looking for Sony batteries I wasn't finding much ... Sony sold their battery business to Murata back in 2016:

Murata Manufacturing and Sony Sign Definitive Agreement for the Transfer of Battery Business | Murata Manufacturing Co., Ltd.

Have started to attempt to split open the TruePower Extended Life Battery.

This one is likely going to be a lot more difficult than the Apple 7318 battery packs:

1. The plastics seems a lot more brittle.

2. While it is possible to insert the metal spudger in the seam on the long side between the two halves and break it loose there, it seems much more "tamper-proof" ... with the corners and the ends secured very, very well.

3. While there is a slight gap on the front (that end is very well secured), there is literally no gap on the rear of the battery to gain any purchase with a tool to pry it open.

The fit and finish on this pack is so good it's kind of hard to tell what is a seam and what isn't.
 

GorfTheChosen

Well-known member
In my quest to discover what all might be involved in rebuilding the battery packs for the Pismo I ran across this guy who has produced a series of 5 or 6 short (<10 min) videos covering some of the general basics regarding 18650 batteries and building battery packs:


Although it isn't specific to the Pismo, I found it useful.
 

adespoton

Well-known member
What I ended up doing on some of the more secure battery packs is using my soldering iron with a cutting blade, and just cutting the top off, then re-gluing when I was done. Has to be done carefully, of course, so you don't touch the batteries inside.
 

GorfTheChosen

Well-known member
Referencing these from another thread since this is probably the more relevant thread:

Got 18 Sony/Murata VTC6 18650 cells ordered ... which is enough to redo two Pismo batteries. Got the tracking number ... they are on the way and should be here tomorrow.

Seesii battery welder has been charging since the day after it was delivered (delivered last Wednesday) ... the charging light is still flashing. Per their documentation it should stop and show solid bars once fully charged ... so I kind of suspect I may have gotten a bad one. I mean 5 days to recharge a battery seems a little impractical.

Contacted them and they offered a replacement or refund. Told them a replacement would be fine ... assuming it actually functions as it should.

What did you do to your Apple/Mac today?

s_pupp said:
If having trouble with the battery spot welders, consider a capacitor based one. It takes about 5 minutes to charge, and doesn’t become useless if not used for several months from battery over-discharge.

Thanks for the insights/info ... (y)

I went with this particular unit as I read of another member (either here or on another Mac forum) using it successfully to rebuild some battery packs ... and because the price seemed ... not outrageous. ($60)

Quite frankly, I really have no idea whether the unit I received functions or not ... since it didn't perform as outlined in the documentation in terms of charging, I contacted the seller and asked them what they wanted to do.

They offered replacement or refund and I selected the first ... for now.

Now since it appears they are willing to send me another one, I'll go ahead and give it shot and see how it performs.

Who knows ... maybe with some use, the battery will "awaken" (the seller claimed the battery might have "gone to sleep" and wouldn't "awaken") and start charging normally. It uses NiMH batteries apparently.

The listing on Amazon does claim that it should charge up in 3 - 5 hours.

s_pupp said:
I’m looking forward to hearing how it goes. I have a Wallstreet battery and a TiBook battery I want to refurbish.

Will be my first experience with this type of "spot-welding" ... although I have some experience with other types of welding.

What did you do to your Apple/Mac today?

After some back and forth with the seller (having to do with where the replacement welder would be shipped from and how - stateside warehouse, not China and not via China Post) I've gone ahead and given them my address to ship the replacement unit to. The LED on the unit I have here is still flashing, indicating (supposedly) it is still not "fully charged". There has been no discussion of returning the first unit ... at least thus far.

FWIW, they do offer several capacitor-based battery spot welders ... the cheapest one I noticed was a little more than double the price.

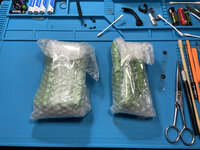
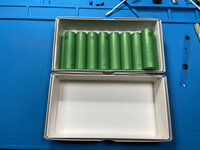
The 18650 cells for the Pismo battery backs were delivered yesterday by UPS. They were shipped "loose" but securely wrapped in plastic, negative end to negative end with the positive ends facing out:

IMG_3630 copy.jpg

Got them unpacked and had a look.

IMG_3631 copy.jpg

They have a QR code on them which I think can be scanned ... which should provide some info ? (build date maybe ?, etc.) Thus far have not been able to get my phone to recognize it.

Bunch of other printing on the sleeves as well which might reveal something.

Checked one of them with the meter and it read around 3.45v.

Need to go through all of them and see what state they are in.

I do have a charger that I can charge the individual cells in and a local friend has a battery tester that may work to check them.

I would assume that when welding and building battery packs that having the cells discharged would be preferable but I don't really know. And with a discharge floor of ~2.5v I'm not sure how much that really gets you.

Clearly this is going to require some further research ...
 

GorfTheChosen

Well-known member
Have checked initial voltage on all of 18 cells. They all pretty much read 3.48v as delivered with a couple flicking up to 3.49v, or down to 3.47v, for a moment before coming back to 3.48v.

All cells were sequentially numbered and marked with a Sharpie with their initial voltages.

The cells should be charged up, tested for capacity, potentially 'balanced' and matched as close as possible ... before being incorporated into battery packs.

How To Test A Battery's Capacity

How To Balance A Lithium Batteries and Cells

Reason being, mismatched cells will degrade the overall performance of the pack, with the poorer performing cells pulling the better performing ones down to their level. Obviously, this is probably far more critical to do if you are using salvaged (used) cells.

At this point all 18 cells have been charged up to 4.22v. I used a Keenstone 18650 4 Bay Universal Battery Charger to charge them up.

Next step will be to test them for capacity by discharging and then fully recharging them.

For that I have a Tenergy TN456 4 Bay Universal Battery Charger on order which is due in Monday. It provides two functions the Keenstone does not:

1. The ability to "test" a cell and measure its capacity by discharging and then recharging it.

2. The ability to measure a lithium cell's internal resistance.

OTOH, the Keenstone charger provides one capability that the Tenergy does not:

1. Ability to charge LiFePO

4​
batteries.

While the last two cells were charging up I went ahead and desoldered the circuit board and wires and tore the cells in the first battery pack apart using a pair of lineman's pliers to peel off the nickel strips holding the cells together:

IMG_3639 copy.jpg

Each cell had been spot-welded at 4 points on each end.

All cells read 0.0v and are probably junk at this point.

But I may take a shot at seeing if any of them can be revived.
 

GorfTheChosen

Well-known member
Replacement battery welder showed up the other day, thought it was something else and didn't bother to open the package until today. It's now on the charger.

Tenergy Battery charger showed up today. It's now running a capacity test on the first four 18650 cells.
 

GorfTheChosen

Well-known member
Started capacity testing cells numbers 13 - 16 this morning.

A bit of a slow process as the default charge/discharge rate is only 300mA.

Previously charged batteries do indeed show some variation ... both in capacity and internal resistance.

The replacement Seesii battery spot welder has been on the charger since the evening of the 21st and the LED is still blinking (indicating not fully charged)

Obviously not happy with that.

Next up will be to see if they will actually power on and then try to do a full RESET on the units and see if they will charge up after that.
 

GorfTheChosen

Well-known member
Capacity testing and internal resistance check on eighteen 18650 cells completed:

aH ___ IR
2.89, 0.020
2.90, 0.010
2.90, 0.012
2.91, 0.015
3.05, 0.016
3.05, 0.030
3.05, 0.032
3.06, 0.010
3.06, 0.016
3.06, 0.028
3.06, 0.033
3.07, 0.010
3.07, 0.027
3.14, 0.010
3.15, 0.026
3.16, 0.015
3.16, 0.025
3.16, 0.027

Wish the Tenergy Charger/Tester gave the capacity in mA for a little more accuracy.
 
Top