PotatoFi
Well-known member
Epilogue! It's time to finish the keyboard. And not just any keyboard... this is a beautiful Apple Extended Keyboard with ALPS mechanical switches. Not quite my personal favorite (that would be the M0116 with orange ALPS), but close.
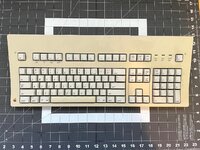
Everything is in good shape...
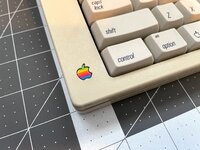
But it does need a good cleaning, some Retrobrite, and a keycap repair.
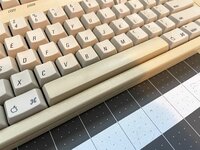
First, I popped off the front cover.
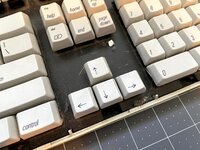
Now to pop the Apple logo out before Retrobri- wait, what is this?!
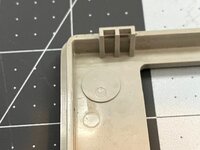
Where there's normally a small hole to pop out the Apple logo from the back, there's nothing. Awesome. I didn't want to risk leaving the logo in there, as I've found that heat + hydrogen peroxide tens to bleach the red out of the logo. I don't have any spares of these either, so I need to not mess this one up.
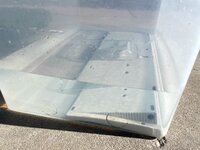
In the meantime, I scrubbed the bottom keyboard housing down with Dawn and a toothbrush, and submerged it in shallow Hydrogen Peroxide and water. I used a small pyrex dish to weigh it down (visible).
Next, I very slowly drilled into the back of where the Apple badge was. If I drilled too far, I would go through through the back of the logo and instantly mess it up, so I took my time and was extra careful.
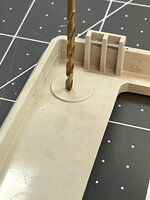
Ok. not quite far enough...
And then disaster struck.
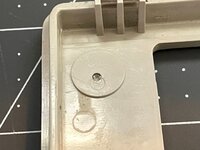
Nah JK. I took it slow, and checked the status of the hole super often. Once I could see the back of the badge, I stopped drilling and tried to pop it out - success!
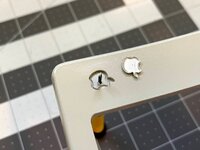
Such hole! So depth. Such light. Amaze. Wow.
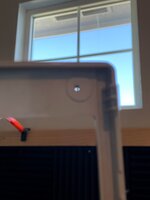
Next, time for a scrub. You know the drill... Dawn dishwasher detergent, toothbrush. The usual.
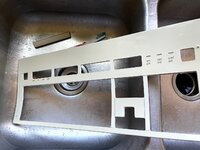
While I was taking apart the keyboard, this little shrimp thing fell out of it. I checked with the owner of the keyboard - he didn't seem interested in saving it.
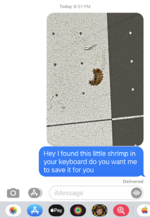
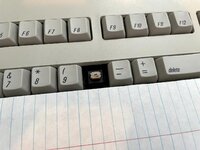
At this point, I had retrobrited the back and front, cleaned all of the keys, and reassembled the whole thing. All that was left was to fix the "0" key, which sadly had broken off at some point.
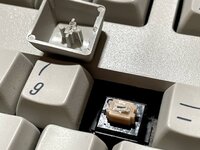
I considered trying to exact the post from the switch stem... but it had already been superglued in. It looks like I'm not the first to try to fix this problem!
I decided to take advantage of the hollow space inside the stem, and 3D print a small insert to go in it. Then, I'd superglue everything together.
The 3D print took like... 10 seconds.
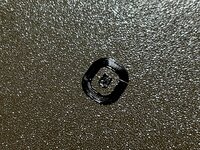
It took a couple of revisions to get the size right, but when I was gone, I had a tiny plastic piece that slotted into the keycap post/stem perfectly.
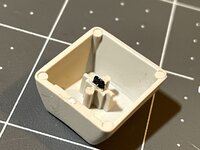
Next, it was just a matter of adding a drop of glue, lining up the plastic "key" that I made, and pressing the key into place.
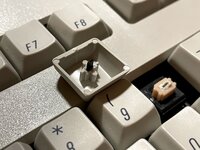
Now in the past, I got a drop of superglue on the FRONT of one of my M0116's... never again. I used a piece of paper to shield everything from the unrelenting drippiness and stickiness of super glue.
By the way... totally unrelated, but if anyone has a spare M0116 spacebar, I'd love to chat!
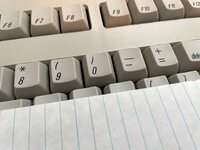
And here's the key installed!
And that really, truly is the end of the project. I didn't get a good shot of the keyboard before it went out, but my friend Ferney did a nice video when he received the keyboard.

Everything is in good shape...

But it does need a good cleaning, some Retrobrite, and a keycap repair.

First, I popped off the front cover.

Now to pop the Apple logo out before Retrobri- wait, what is this?!

Where there's normally a small hole to pop out the Apple logo from the back, there's nothing. Awesome. I didn't want to risk leaving the logo in there, as I've found that heat + hydrogen peroxide tens to bleach the red out of the logo. I don't have any spares of these either, so I need to not mess this one up.
In the meantime, I scrubbed the bottom keyboard housing down with Dawn and a toothbrush, and submerged it in shallow Hydrogen Peroxide and water. I used a small pyrex dish to weigh it down (visible).

Next, I very slowly drilled into the back of where the Apple badge was. If I drilled too far, I would go through through the back of the logo and instantly mess it up, so I took my time and was extra careful.

Ok. not quite far enough...
And then disaster struck.

Nah JK. I took it slow, and checked the status of the hole super often. Once I could see the back of the badge, I stopped drilling and tried to pop it out - success!

Such hole! So depth. Such light. Amaze. Wow.

Next, time for a scrub. You know the drill... Dawn dishwasher detergent, toothbrush. The usual.

While I was taking apart the keyboard, this little shrimp thing fell out of it. I checked with the owner of the keyboard - he didn't seem interested in saving it.

At this point, I had retrobrited the back and front, cleaned all of the keys, and reassembled the whole thing. All that was left was to fix the "0" key, which sadly had broken off at some point.

I considered trying to exact the post from the switch stem... but it had already been superglued in. It looks like I'm not the first to try to fix this problem!
I decided to take advantage of the hollow space inside the stem, and 3D print a small insert to go in it. Then, I'd superglue everything together.
The 3D print took like... 10 seconds.

It took a couple of revisions to get the size right, but when I was gone, I had a tiny plastic piece that slotted into the keycap post/stem perfectly.

Next, it was just a matter of adding a drop of glue, lining up the plastic "key" that I made, and pressing the key into place.

Now in the past, I got a drop of superglue on the FRONT of one of my M0116's... never again. I used a piece of paper to shield everything from the unrelenting drippiness and stickiness of super glue.
By the way... totally unrelated, but if anyone has a spare M0116 spacebar, I'd love to chat!

And here's the key installed!

And that really, truly is the end of the project. I didn't get a good shot of the keyboard before it went out, but my friend Ferney did a nice video when he received the keyboard.
