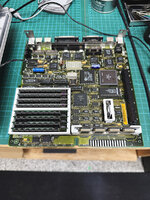
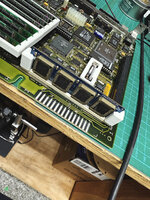
Macintosh SE/30 Upgrades (Early Christmas)

jmacz

Well-known member
Last time I had posted about my Macintosh SE/30, I had just fixed some boot and sound issues which were the result of capacitor leakage. In addition, I had an issue with the floppy drive which was caused by a faulty UH7 chip. I had worked around this by bypassing part of UH7 and introducing my own external inverter which was an ugly hack but worked:

IMG_6992.JPG

and then with some fixing of the case, I had a fully functional SE/30 which was great!

IMG_6466.JPG IMG_6689.JPG


Recently I decided to give my SE/30 some more love and an early Christmas present. :cool: 🎄 🎅


First upgrade was something I picked up from @tt. Although the stock factory power supply was working fine, I had received this fancy new modern one as part of a trade so I decided to install it. Board looks so nice, it sucks it's never seen buried inside the enclosure!

IMG_8905.JPG IMG_8906.JPG

Second was to revisit that ugly hack inverter job I performed last time. It's awesome we have folks like @Bolle. His SE/30 board recreation also included dumps of various chips including the UH7 chip I needed. So flashed a new one, added a socket, and installed it.

IMG_8931.JPG

Although floppy is ok, and ethernet also is ok, I wanted something built in to copy files faster. Yes I could use my external Zip drive. Or I could have made the SD card installed into my ZuluSCSI easier to access but that wouldn't be fun. So the third upgrade was to bust out the 3D printer and see if I can get something more unique installed.

IMG_8934.JPG

Drive bracket made to work in place of the usual floppy drive bracket. And what's going inside?

IMG_8935.JPG IMG_8938.JPG IMG_8936.JPG

Fujitsu Magneto Optical 640MB Drive 👍 The discs barely fit through the existing floppy slot (similar to the mod I did for my IIfx) but it functions and is clean. Above picture with a LaserByte 230MB disc I got from @olePigeon. Now I can transfer bulk files in style! Well, maybe partial style... I don't have a dye sublimation printer like @MrFahrenheit so no cool labels on my MO disks. 🤣

And now for some even bigger upgrades. :cool:

I was chatting with Mr. @Bolle and procured his SE/30 Combo Card Riser with Ethernet:

IMG_8966.JPG

So the fourth upgrade was installing this combo card and then installing a Daystar 50MHz 68030 PowerCache.

IMG_7659.JPG IMG_8988.JPG

My IIci is crying but sorry, I wanted the SE/30 to be faster. So now my SE/30 is a 50MHz 68030 beast. I'll have to find another accelerator for my IIci at some point.

Ok, but still not done!!

Not only did I procure the combo card but I got an additional little something as well.

IMG_8963.JPG IMG_8965.JPG

Yup... it's @Bolle's GrayCake grayscale card! :cool:

IMG_8994.JPG

So far everything is running great!!! Time to take a break...
 

nathall

Well-known member
What did you use for the nameplate label on this? I’ve begun painting some of my collection, and have been extremely impressed with the results so far. One thing I haven’t been able to work out is what to do about machines that don’t have recessed nameplates that are easy to mask, like the SE/30.
 

jmacz

Well-known member
What did you use for the nameplate label on this? I’ve begun painting some of my collection, and have been extremely impressed with the results so far. One thing I haven’t been able to work out is what to do about machines that don’t have recessed nameplates that are easy to mask, like the SE/30.

Waterslide decals. :cool:
 

olePigeon

Well-known member
@jmacz I don't know why, but I really like the support brackets. Makes it look more "premium." Like if Apple had done it originally, you'd 've thought their engineers went out of their way to make sure all the SIMMs and batteries stay put no matter what.
 

jmacz

Well-known member
I do have STLs for it but I designed it specifically to fit tightly around my simms. Not sure what the fit might be like for other modules. I will upload when I get home.
 

Daniël

Well-known member
I do have STLs for it but I designed it specifically to fit tightly around my simms. Not sure what the fit might be like for other modules. I will upload when I get home.

Could you upload the MO drive bracket STL as well? I got an SE front for my SE/30 so I can mount both a floppy drive and MO drive, so it would be most useful for that project :D
 

jmacz

Well-known member
@jmacz Do you have an stl for those RAM slot supports? I’ve not seen that before…

I have attached the STL for the simm supports to this message. As I mentioned, I designed these for my particular SIMMs so not sure if it's more general purpose. The overall concept came from another member on this forum (I can't remember who) but there's been several designs and I think they are up on thingiverse or printables. But I ended up designing something from scratch with a similar concept for my use. Anyhow, will attach the STL.

The ROM clips are not mine. Those I got off printables.

Could you upload the MO drive bracket STL as well? I got an SE front for my SE/30 so I can mount both a floppy drive and MO drive, so it would be most useful for that project :D

So this may or may not work. The bracket I made was specifically to be used as a single bracket on an SE/30. The general floppy brackets are the same across the SE, SE/30, II, IIfx, etc but the reason the one I made is specific for a single drive use case is that the little clip feet on the bracket normally is sheet metal but since we're 3D printing it, it has to be thicker (for strength), and since they are thicker, they won't fit into the slots as the bottom drive on an SE or SE/30 (it interferes with the front of the case). So instead, I removed those clips and ensured there were 4 screw positions to bolt it to the standard screw positions on an SE or SE/30 chassis. You need to put in some 3mm brass inserts into the 3d printed model (the STL is designed to hold M3 * 4mm * 5mm brass inserts ... the 4mm is the exterior opening size and the 5mm is the height).

For use with in a double drive scenario (floppy drive on the bottom, MO drive on the top), I did make a design that still has the little clip feet, as well as two guide posts and the rear screw positions to couple the two brackets together. But I have not tested it as I ended up not using it.

I will attach both STLs if you want to try it.

I see your battery holder clip is specially designed to work with the MeowToast. Did you design it yourself?

Yup, it's designed specifically for the MeowToast because the stock clip that comes with the MeowToast allows it to move around and keep coming loose. So this one has a brace to better secure it. I had uploaded it previously on another thread but I have attached it below.
 

Attachments

  • simmbrace.zip
    1.5 KB · Views: 1
  • mobrackets.zip
    53.3 KB · Views: 4
  • meowtoast.zip
    9.8 KB · Views: 3

croissantking

Well-known member
Yup, it's designed specifically for the MeowToast because the stock clip that comes with the MeowToast allows it to move around and keep coming loose. So this one has a brace to better secure it. I had uploaded it previously on another thread but I have attached it below.
Nice one. Yes, I found the same problem and had to use hot glue to stop it moving around.
 

marchie

Well-known member
The simm supports are genius. It will put the ram in the right spot even if the clips are broken?
 

jmacz

Well-known member
The simm supports are genius. It will put the ram in the right spot even if the clips are broken?

That is correct.

I can’t take credit for this though. Multiple folks already had the same design. Like I mentioned, I just tweaked the design a bit for my use case.
 

tt

Well-known member
@jmacz That's an epic SE/30 build! Thanks for the shout-out and the trade, it's cool to see the power supply board out in the wild. Your machine features so many hardware projects from different builders in the community.

I have the same compact homebrew ZuluSCSI, and I am of similar mind about wanting it installed and out of the way, so the MO drive mod is an interesting take. I recently added the DAC Attack CD audio module to the Zulu which I think is an interesting add-on. I haven't been following developments closely lately, but one thing sort of holding me back from a more permanent internal install is wanting to have the ability to totally configure the drive while installed in the machine, like edit the ini text file from the host machine, etc. But it's good to know that it's possible to cleanly install an MO drive without hacking the case.
 

jmacz

Well-known member
Well, I am running into a problem.

Looks like I get a crash on startup during a cold boot (system has been off for 15+ minutes). Happens at different points during start up . But after the very first boot, it's good after that. I can restart it, power it off for a few seconds and turn it back on, and it's all good. Only happens on cold boot but happens almost every time. Highly reproducible. The crashes are at random instructions too, nothing consistent.

After trying some combinations (stock ROM, SMC ROM, etc), I've found that I cannot reproduce if I remove the Daystar PowerCache. This PowerCache was working fine in my IIci. But if I put it in, I get a crash on cold boot.

Thought it might be too much power? So disconnected the MO drive but that didn't help. Might try the stock PSU to see if there's any difference. Could be the PowerCache as it's not the newer "universal" type. It's an original P31?
 

jmacz

Well-known member
Saw some notes about the rominator not working with the DayStar Powercaches due to ROM patching it does. But it wasn't working for me with the stock SE/30 ROM either -- although I didn't have Mode32 installed so maybe I need to try that. I guess I should also try swapping out the memory modules, maybe it's being picky.
 

jmacz

Well-known member
Stock ROM with Mode 32 didn't help. Ruled out the ROM. Swapped out memory, didn't help. Only thing that prevents that initial crash is removing the DayStar. Not sure what else it could be. This is an early PowerCache. Not that big a deal but just my OCD kicking in.
 
Last edited:

jmacz

Well-known member
Well, the Daystar works fine with the combo card IF the graycake is out... Daystar crashes on cold boot IF the graycake is in. Bolle pointed out it could be voltage related.

With the new PSU, voltage readings after full boot:
  • With just the combo card installed: v4.85
  • With the combo card and DayStar installed: v4.65
  • With the combo card, DayStar, and Graycake installed: v4.70
Not sure I understand why the voltage is higher with the Graycake installed.

The MO drive has negligible impact to the voltage.
 
Top