• Updated 2023-07-12: Hello, Guest! Welcome back, and be sure to check out this follow-up post about our outage a week or so ago.

Mac-Mini ReDux Fail . . . but it's OK!

Trash80toHP_Mini

NIGHT STALKER
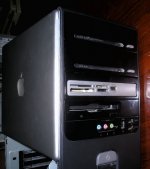
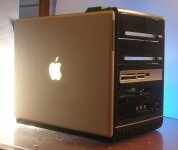
A couple of years ago, I decided to do a hack that'd be what I thought of as a Mac Mini. I eBayed a 12" MacBook Top Panel to test its suitability for the side panels. I wanted to have White-Light-Logos on the sides or a spot to make a pair of Rainbow Logos. Everything looked good, so I got another lid for the other side panel.

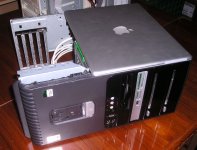
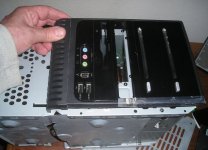
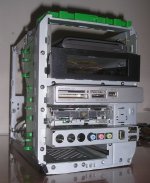
I found a ComPaq Presario SR1000Z sitting next to the compactor fairly recently and snagged it. The front panel and drives . . . heck, the whole thing was in great shape, but it wasn't really something I wanted to use. After a while I noticed how nicely the curve of the front bezel's top could be made concentric with the curve on the corners of the 12" MacBook lids. I finally realized that I could lop the grille off the bottom, lop the front bezel off just below the rounded A/V Bezel at the bottom of the I/O Stack and use a strip of clear Plexi as a spacer in between. With drive access LEDs lined up behind the clear plexi spacer should make it look like it was designed to be that way.

Unfortunately, there's not nearly enough room for my Micro-ATX ATOM NetTop board, but the Silver Sides and Gloss/Matte Black front bezel will make this a perfectly styled expansion chassis for HP-Maxi, the 3g HP Pavilion dm1 that's my main machine for the nonce. Who knows, maybe I'll wind up with a Hackintoshable MoBo that'll fit in there some day.

Meanwhile, a few IDE/ATAPI <-> USB2 adapters for the Zip & Opticals, a FireWire bridge for the HDD, Powered Hubs and a PSU to run the thing and it'll be really useful without a Proc on board. [}:)] ]'>

12inBookTower.2.2p.jpg

12inBookTower.1.2p.jpg

12inBookTower.0.2p.jpg

It's just roughed out for now, lots of tooling scars to clean up after the rest of the hackin' is done. The rest is pretty straight-forward metal and plastics fabrication work, other than widening the FDD opening in the glossy bezel, but I may be able to pull that off. Polishing plastic isn't something I enjoy unless it can be done with flames! [:D] ]'>

I'll post some better pics as soon as I can lop off the extra sheet metal at the bottom and get it standing on its own four feets.

 

Trash80toHP_Mini

NIGHT STALKER
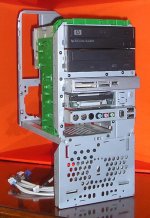
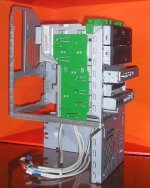
I don't think I made it clear: the bottom 2/3 of the chassis will be removed and the front bezel shortened.

Almost all of the sheet metal visible in the middle pic will have been removed during the final back panel modification.

Finished size will be about 9.25" High x 7.5"wide x 11.125" Deep.

There will only be a bit of matte black plexi side panel showing underneath the silver side panelss to match the sides of the front bezel and the matte black plexi top cover.


Trash80toHP_Mini

NIGHT STALKER
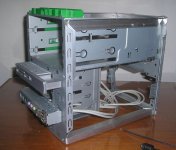
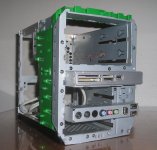
After a bit of poking around, test fitting, drilling out some pop-rivets, cutting, notching, more drilling and pop-riveting, here's a better look at the final dimensions and the beginnings of the interior framing.

MacBookMiniTower_Frame.00.p.jpg

MacBookMiniTower_Frame.01.p.jpg

After I noodle out a way to attach the front bezel without the clips in the lower section of the frontspiece and the cut down or replace the locking jaw mechanism at the top, I can cut and bend the remaining chassis waste to fit within the confines of the final inner dimensions.

Gotta find a small PSU amongst the stuff or source one that's shallow enough to work well within the cubic available.

If you look closely, you can see where I've cut away some of the wast at the back end of the other side . . .

. . . more pics to follow.


Trash80toHP_Mini

NIGHT STALKER
I showed this project thread to the grlf and it's the first hack she's shown any interest in at all, or voiced an interest in watching the progress . . .

. . . maybe because she wants one like it as an expansion chassis for her Lenovo sub-notebook . . .

. . . but still, it's amazing progress on the hobby acceptance front! :approve:


Gorgonops

Moderator
Staff member
Just as a random note... maybe it's just me having the issue, but I *totally* can't see the images you've attached to this thread.


MacJunky

Well-known member
Gorg, yeah. I mentioned that to cory a couple days ago. I guess you have to be either trash or an admin to see em. *shrug*

Trash, the ones in your recent 6500 thread are also similarly affected.


Trash80toHP_Mini

NIGHT STALKER
Interesting . . .

< reloads as attachments >

eees fix-ed? :?:

No wonder nobody replied to either thread! ::)

Thanks for the heads up, guys. I'll fix the 6500/DEC pics tonight if this works out. I was linking directly to the image files in the "Manage attachments" window. If the pics are viewable to all now, we may have just cornered a bug.


Trash80toHP_Mini

NIGHT STALKER
I can't log out to look at these posts/pics because I'd need to find my password . . . :I

But I did check the borked attachment links in the other thread at work after lunch and all they said was "Picture" or "image," IIRC. The newly uploaded and linked attachments in this thread showed up fine at work, so I'll assume everyone can see the pics of this hack now . . .

. . . right???? :lol:


Trash80toHP_Mini

NIGHT STALKER
Eight years and counting! Self-quarantine sure does bust out the old projects. Especially when several hit the wall for lack of nuts, bolts and such.

MacMini-G4-AV-Dozuki-Noko-0.JPG

Off with that Chinny-Chin's Chin! Dozuki-Noko eats some plastic.

MacMini-G4-AV-Front-Bezel-Fitment-1.JPG

Rough fitment before filing for flat, flush joint. There's at least 4.75" of front bezel missing from the donor.

MacMini-G4-AV-HotGlueMess.JPG

Notice aluminum chin-strap, hides the seam eventually  .  .  .  hot glue doesn't do it justice  .  .  .  any of it. But at least there's not gobs of excess sheet metal hanging off the top or out the bottom any longer. Aluminum angle framing complete. Gotta work out the top. back and sides to frame the 12" AlBook lids. Plexi playtime coming up  .  .  .  after I figure out how to handle the sliding lock retainer at the top. Router table setup or jig-n-router time first.


Cory5412

Daring Pioneer of the Future
Staff member
Is this the thing you alluded to in the other thread?

I like to think Apple has better taste than this, but also, it's not too difficult to imagine a no-Apple Jobs building something that looks vaguely like this as a future successor to the Power Macintosh 6000 line.


Trash80toHP_Mini

NIGHT STALKER
Having no I/O on the front panel isn't a matter of good taste, it's distaste for the user's convenience. This was an I/O box to hook up to my NetBook back then and it'll be handy in the future if I ever get it finished.


Trash80toHP_Mini

NIGHT STALKER
Back to the bare metal again:

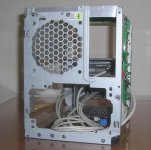
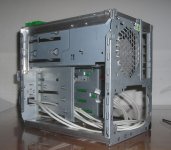
MacMini-G4-AV-fr-OBLQ.JPG

MacMini-G4-AV-fl-OBLQ.JPG

MacMini-G4-AV-RBk-OBLQ.JPG

MacMini-G4-AV-LBk-OBLQ.JPG

You can see the tangle of wires in there with no additional peripherals, there'll be a lot more, but I think I've figured out a plan.

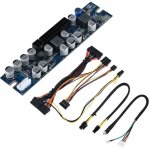
Originally I had a small PSU in mind, but decided a Pico-PSU was worth looking into and had never seen this type:

Pico-PSU-MacMini-G4-AV-00.jpg

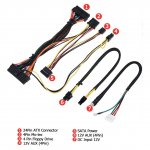
Pico-PSU-MacMini-G4-AV-02.jpg

They're for 1U equipment and the like. I guess I can peel off as many wires from the main harness as I like to a PCB for conditioning (adding resistors?) to run USB powered Hubs, USB peripherals and the like. The the 4-Pin Floppy cable will power the Imation SuperDrive behind the built in FDD bezel (yes, @Cory5412 I do have a pair of removable storage devices other than Zip Drives :lol: ) and the 4-Pin Molex cable can power some kind of 3.5" HDD with USB3 adapter.

This way I can keep a silent 12V brick on the floor with the 14" Notebook's lump-onna-rope next to the one for the 20" 1600x1200 panel for the QS and Dell '98 machine's spanned displays.

Working out the internal peripherals kinks:

MacMini-G4-AV-internalizing-peripherals-00.JPG

Already modified the FDD eject button to match the SuperDrive. The 3.5' to 5.25" adapter fits fine below the upside down CD Case I'll be using as a peripherals chassis even though it sits lower than spec ATM. I need to drill and tap holes in the requisite positions on the sides, does anyone know the thread spec on machine screws for mounting internal peripherals offhand?

The USB powered Zip250 on that shelf has been ripped asunder on the bench. Hopefully it'll be converted to a sub-3.5" but much greater than 2.5" internal peripheral  .  .  .  with yet another USB cable along with that of a thin profile external USB DVD or Blu-ray optical. I figure I've got nothing to lose as I've already lost one of the two tiny screws that fit three side mounting points of its silly little chassis. I'm drilling and tapping those frelling tiny holes out to 4-40. If that plan doesn't work out, I have another donor to spare or I can just get a for part only drive for about $15 with gobs of those screws inside its likely useless husk.

I figure I'm likely better off having discrete USB3 and USB2 channels to my Notebook or am I? Right now there's a tiny Thumb Drive in the USB3 Port, that'd be moved to a USB3 hub in the box along with the usb3 converted mass storage device in the bottom, hidden 3.5" bay. I have all kinds of room for any number of goodies behind those two flip down optical bay bezels as I'm sticking to low profile peripherals behind them.

This thing is going to be an incredible rat's nest of cabling inside, but if 12" AlBook booting straight into OS9 finally hits the ready for prime time mark, you can guess exactly where this might lead in that scenario.

edit: I'll be getting this bare metal rig up and running as a useful, unitized peripherals box before I worry about the niceties of trimming out and installing that pair of 12" AlBook lids. [}:)]

 
Last edited by a moderator:

markyb86

Well-known member
Following with intent!

I'm going to try a similar case mod to shorten(slim) a normal form factor ATX case into an XT desktop style case.


markyb86

Well-known member
does anyone know the thread spec on machine screws for mounting internal peripherals offhand? 
I'm curious to this as well. I don't know how to search this kind of question. I needed screws to mount an internal Zip, and couldn't find anything that matched -- except for four of those standoffs that are on the sides of serial/parallel/vga ports, etc.

Not much help because I don't know what those are called either haha.

But maybe those have an easier to find thread spec?

 
Top