jmacz
Well-known member
In January I picked up an Apple Macintosh 16" Color Display from a junkyard. It powered up and displayed an image but there were a lot of gremlins causing issues ranging from strange artifacts on the screen, very visible noise, unexplained behavior. I ended up tearing it apart and recapping it. That fixed all the issues except for one, sharpness. It was ok but not great. I tried all the pots inside the monitor but it only helped to a certain point. Eventually, it was clear it was the tube/age. I dealt with it but the tube kept deteriorating where the sharpness finally was unusable. RIP. So I decided to have some fun.
Meet my 16" Color Display:
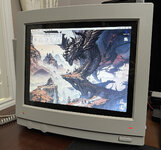
Woah... that's not 832x624.
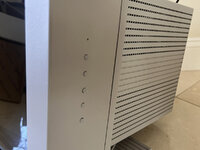
And what's going on here -->
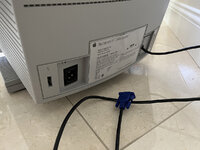
and here -->
Yeah... I gutted the monitor and put in a Samsung 512N LCD inside. Why take a small LCD and put it inside a desk space hogging CRT case? Dunno. Did it for fun. The display is crisp and running at 1024x768 with no fuzziness. I didn't want to deal with fuzzy scaling so I invested in some SuperMac Spectrum video cards capable of running 24bit at 1024x768 at 60/75Hz, and this Samsung 512N is native 1024x768 at both 60/75Hz.
First I gutted the monitor:
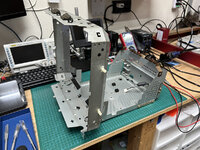
Reused the power plugs, the front power switch and LED. But everything else is gone inside. Next step was the front glass.
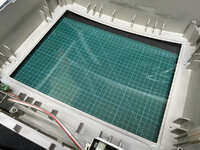
It's 1/8" thick acrylic plexi-glass. I made a jig to carefully bend the plexi-glass evenly (using a heat gun) to match the contour of the display front. Then fixed it in place with epoxy. Then 3d printed a mount for the LCD bezel controls. Also printed buttons for it and drilled holes into the side of the monitor case for the buttons.
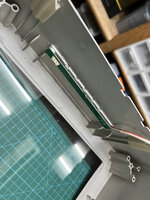
Then 3d printed some new mounts for the panel itself. I was going to machine the mount out of aluminum but the plastic prototype I 3d printed worked really well so just went with that.
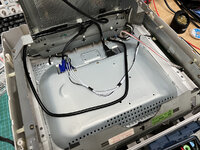
The VGA cable just extends out of the back of the case. For the power, I wanted the power button to work so I reused the exterior power plug and then inside, I wired it into the existing switch and used one end of a power cable to allow me to easily plug it into the LCD panel. The monitor LED I reused and tied it into the existing panel LED on the control panel.
Works great and looks 95% clean. Given the panel is flat and the monitor is horizontally curved, I had to make black "barn door" shields out of mylar so that there's no gaps between the panel and the edges of the glass. I say 95% because you can barely make out the edges of these shields but it's not bad.
So now I have a huge 16" monitor with an LCD inside. Yes, it takes up more room on the desk, but hey it looks cool
Meet my 16" Color Display:

Woah... that's not 832x624.
And what's going on here -->

and here -->

Yeah... I gutted the monitor and put in a Samsung 512N LCD inside. Why take a small LCD and put it inside a desk space hogging CRT case? Dunno. Did it for fun. The display is crisp and running at 1024x768 with no fuzziness. I didn't want to deal with fuzzy scaling so I invested in some SuperMac Spectrum video cards capable of running 24bit at 1024x768 at 60/75Hz, and this Samsung 512N is native 1024x768 at both 60/75Hz.
First I gutted the monitor:

Reused the power plugs, the front power switch and LED. But everything else is gone inside. Next step was the front glass.

It's 1/8" thick acrylic plexi-glass. I made a jig to carefully bend the plexi-glass evenly (using a heat gun) to match the contour of the display front. Then fixed it in place with epoxy. Then 3d printed a mount for the LCD bezel controls. Also printed buttons for it and drilled holes into the side of the monitor case for the buttons.

Then 3d printed some new mounts for the panel itself. I was going to machine the mount out of aluminum but the plastic prototype I 3d printed worked really well so just went with that.

The VGA cable just extends out of the back of the case. For the power, I wanted the power button to work so I reused the exterior power plug and then inside, I wired it into the existing switch and used one end of a power cable to allow me to easily plug it into the LCD panel. The monitor LED I reused and tied it into the existing panel LED on the control panel.
Works great and looks 95% clean. Given the panel is flat and the monitor is horizontally curved, I had to make black "barn door" shields out of mylar so that there's no gaps between the panel and the edges of the glass. I say 95% because you can barely make out the edges of these shields but it's not bad.
So now I have a huge 16" monitor with an LCD inside. Yes, it takes up more room on the desk, but hey it looks cool

