68kMLA Supporter cheesestraws Posted October 5, 2020 68kMLA Supporter Report Share Posted October 5, 2020 8 hours ago, BadGoldEagle said: I wonder how much it would cost to have brand new CRTs made... https://www.thomaselectronics.com/faq/ On that website, "we are your obsolescence solution" sounds perhaps a little creepier than they intended? 8 hours ago, chu-oh said: Unfortunately I knocked the yoke and gas escaped Done this myself, though not the dramatic sparks bit! The crunch and the hiss, just long enough to consider your error. Really bloody annoying, isn't it. It's a vacuum in there so what you're hearing at the crucial embarrassing moment is the air rushing in rather than gas rushing out (not that this makes any functional difference at this point, but if one can't be mildly pedantic on the Internet where can one?). Quote Link to post Share on other sites
JDW Posted October 5, 2020 Report Share Posted October 5, 2020 The most interesting thing I learned at the link is they seem to refurbish/replace the phosphor an existing CRTs! And, you have a choice of 50 different phosphors too! Quote Link to post Share on other sites
chu-oh Posted October 5, 2020 Author Report Share Posted October 5, 2020 8 hours ago, JDW said: That’s really unfortunate. I by no means wish to belittle your plight, but man, it’s too bad you didn’t have a video of that! I don’t think anybody has a video of a vintage Mac CRT doing that on YouTube! Haha, I don't think i could handle all the name calling/critism/abuse I'd get in the comments. Youtube is not a kind place. Quote Link to post Share on other sites
JDW Posted October 5, 2020 Report Share Posted October 5, 2020 Well, I tend to hide my blunders and only show the proper way to go about something on my YouTube channel. However, there are other repair guys who post a shocking amount of screw-ups; and although they get a nutcase in the comments every now and then, they have vastly more subscribers and views and comments than my channel does. For some reason, people seem attracted to screw-ups! In my case, I simply would like to observe what happened for scientific reasons (i.e., to satisfy my curiosity). Quote Link to post Share on other sites
chu-oh Posted December 6, 2020 Author Report Share Posted December 6, 2020 OK I'm back. Got a "for parts" Classic for a reasonableish price. I'm taking out the CRT now and it's caked in dust: Should I attempt to clean the coil or just leave it? Quote Link to post Share on other sites
chu-oh Posted December 6, 2020 Author Report Share Posted December 6, 2020 And I've just realised the classic has a revision B CRT - so it's useless for my needs. Back to square one I guess. Quote Link to post Share on other sites
JDW Posted December 6, 2020 Report Share Posted December 6, 2020 1 hour ago, chu-oh said: Should I attempt to clean the coil or just leave it? I highly recommend getting yourself a large sized, rubber rocket blaster, sold on Amazon, so you can safely clean dusk off the neck of that CRT. A rocket blaster is safer than compressed air but really works just as well. Now you just need to restore that "for parts" Classic. It's most assuredly restorable. Most sellers who don't know how resort to the "for parts" labeling. Quote Link to post Share on other sites
68kMLA Supporter rplacd Posted December 6, 2020 68kMLA Supporter Report Share Posted December 6, 2020 On 10/4/2020 at 6:29 PM, cheesestraws said: Done this myself, though not the dramatic sparks bit! The crunch and the hiss, just long enough to consider your error. Really bloody annoying, isn't it. It's a vacuum in there so what you're hearing at the crucial embarrassing moment is the air rushing in rather than gas rushing out (not that this makes any functional difference at this point, but if one can't be mildly pedantic on the Internet where can one?). Been there, done that Every collector's bound to do it at some point, sadly. I'm still keeping my busted CRT around, though – one day I'll find someone with an angle grinder to cut off the neck, so I can stick an LCD screen behind it. Quote Link to post Share on other sites
68kMLA Supporter Garrett Posted December 6, 2020 68kMLA Supporter Report Share Posted December 6, 2020 Breaking the CRT in one of my machines is one of my worst nightmares... in fact, I've had bad/sad dreams about it happening. It's one thing if the CRT was old, worn-out and/or has lots of burn-in, but (fortunately) the CRT in both of my machines is in near-pristine condition. I feel these CRTs are becoming harder and harder to find, especially in good condition. 11 hours ago, rplacd said: I'm still keeping my busted CRT around, though – one day I'll find someone with an angle grinder to cut off the neck, so I can stick an LCD screen behind it. Dumb question incoming: but what would that do? I can understand cutting off the rest of the CRT and leaving the face and placing and LCD behind that, but would placing a small LCD at the neck "magnify" it or something? Sounds pretty risky and dangerous, too, with all of that glass. My understanding of how CRTs work is very rudimentary. I also know that CRTs are prone to implosion - but I'm guessing a de-gassed CRT isn't as much of an implosion risk? Either way, good luck on the SE/30 project. Quote Link to post Share on other sites
Mighty Jabba Posted December 6, 2020 Report Share Posted December 6, 2020 I think putting the LCD behind the glass of a CRT just makes it look more legit than having a flatscreen installed in a compact Mac case. Quote Link to post Share on other sites
68kMLA Supporter Crutch Posted December 6, 2020 68kMLA Supporter Report Share Posted December 6, 2020 I keep hoping someone will come to market with a 3D-printed or otherwise fab’ed piece of glass (or ultra-transparent plastic) sculpted to have the shape of the front of a 9” Mac CRT but with a flat back and the requisite screw holes to facilitate installing an LCD beautifully inside a compact Mac case. I’ve seen a few amazing bespoke solutions but think a true commodity offering would be very popular with the community. Quote Link to post Share on other sites
aeberbach Posted December 6, 2020 Report Share Posted December 6, 2020 (edited) Like this? Yes it's ugly in red, but I've been iterating on the shape to make it a great fit so I've been using up the plastic I don't mind wasting. I'm working on a solution to make the LCD a direct replacement for the CRT. Fortunately/unfortunately I'm about to take a 3-week holiday but it won't be too many months before all those poor SEs and SE/30s with something broken between the analog video section and the front of the glass live again! When it works, commissioning a curved piece of transparent material as a front plate would be a definite possibility - but there would almost certainly be a minimum number required, a one-off could cost thousands. Edited December 6, 2020 by aeberbach curved glass Quote Link to post Share on other sites
68kMLA Supporter Crutch Posted December 7, 2020 68kMLA Supporter Report Share Posted December 7, 2020 This is very exciting. Please keep me posted! Quote Link to post Share on other sites
BadGoldEagle Posted December 7, 2020 Report Share Posted December 7, 2020 On 12/6/2020 at 6:47 AM, chu-oh said: And I've just realised the classic has a revision B CRT - so it's useless for my needs. Back to square one I guess. You know you can swap out the yokes right? The tube itself is identical. Quote Link to post Share on other sites
chu-oh Posted December 7, 2020 Author Report Share Posted December 7, 2020 2 hours ago, BadGoldEagle said: You know you can swap out the yokes right? The tube itself is identical. Orly? I was under the impression from this: That they weren't compatible. So if I can swap the analog board connector headers and use the se30 yoke (that's hopefully not damaged) I should be right? Quote Link to post Share on other sites
BadGoldEagle Posted December 7, 2020 Report Share Posted December 7, 2020 The types @Scott Baret mentions only apply to the yoke. I've once swapped a "type B" CRT from a Classic II in a "type A" Classic. Just replace the yoke and re-do the adjustments. The neck arrangement is also pretty much standard, given that you can also use green/amber phosphor 9" from other manufacturers. Quote Link to post Share on other sites
chu-oh Posted December 8, 2020 Author Report Share Posted December 8, 2020 13 hours ago, BadGoldEagle said: The types @Scott Baret mentions only apply to the yoke. I've once swapped a "type B" CRT from a Classic II in a "type A" Classic. Just replace the yoke and re-do the adjustments. The neck arrangement is also pretty much standard, given that you can also use green/amber phosphor 9" from other manufacturers. Oh that changes everything. So how did you handle the different analog board connections? Is it possible to use the staple trick to get the pin headers out and swap the sockets? Quote Link to post Share on other sites
BadGoldEagle Posted December 8, 2020 Report Share Posted December 8, 2020 I didn't touch the connector, I don't know those CRTs well enough to play around with the pinout. I simply removed the yoke altogether on both CRTs, taking note which way the connector was pointing (roughly), and reinstalled the one that goes with the analog board on the good CRT. Some info on how to take it out (there's only one screw to loosen, try with the dead CRT first) https://oldcrap.org/2019/05/03/inside-macintosh-crt/ The part relevant for you: Quote First you will need to remove the tube from the case and disconnect it from the analog board. This is the dangerous part of the job, because the tube will likely contain an electrical charge. You need to discharge it prior to removing the flyback electrode. There is a good video about it and it really works. To disassemble a Macintosh CRT, first start with removing the deflection yoke. It is very easy, unscrew the ring screw and gently pull the yoke from the CRT. Yoke’s purpose is to scan the electron beam over the screen horizontally and vertically. Then there's the adjustment. You shouldn't have to twist any of the magnets (only if the display is not rectangular, do it last if that's the case). The deflection yoke can be rotated or moved forward/back. If available, I'd place the Mac on a glass table facing down (that way you won't have to deal with the forward/backward adjustment). Don't tighten the screw all the way, plug everything back, and turn it on. If the display is tilted, turn it back off, wait a bit, and gently rotate the yoke accordingly. You could also do it while powered on, but if it's your first time, I wouldn't risk it. Just take your time! Also, that screw tightens the collar, so don't tighten it too much, just so that it won't move or you'll break the CRT's neck! Quote Link to post Share on other sites
techknight Posted December 9, 2020 Report Share Posted December 9, 2020 Ive done a youtube video years ago swapping CRTs around outlining the yoke issue. Basically, its a non-issue. All the black and white CRTs of that era have identical pinouts, and electrical specifications that are fairly similar for the 9" size. Only differences being the bolt pattern and anode lead location whether right or left side. (between different CRTs) Quote Link to post Share on other sites
chu-oh Posted December 13, 2020 Author Report Share Posted December 13, 2020 These are the different header types I'm talking about. Anyone have any ideas on a trick to remove the headers so attach the crt to the SE30 analog board? I've tried the old staple trick but it didn't work. I know I could simply snip and solder them but I'd prefer to be less destructive. Quote Link to post Share on other sites
68kMLA Supporter Daniël Oosterhuis Posted December 13, 2020 68kMLA Supporter Report Share Posted December 13, 2020 (edited) The connector is attached to the yoke, if you swap the yokes across the two tubes this should no longer be an issue. Edited December 13, 2020 by Daniël Oosterhuis Quote Link to post Share on other sites
chu-oh Posted December 13, 2020 Author Report Share Posted December 13, 2020 Ah of course. I'll try swapping the yokes. Thanks! Quote Link to post Share on other sites
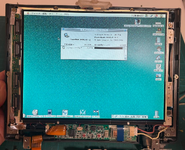
chu-oh Posted December 13, 2020 Author Report Share Posted December 13, 2020 Ok we're back.. ish. Quote Link to post Share on other sites
CC_333 Posted December 14, 2020 Report Share Posted December 14, 2020 18 hours ago, chu-oh said: Ok we're back.. ish. I don't think I've seen that particular kind of distortion on a Compact before! c Quote Link to post Share on other sites
chu-oh Posted December 14, 2020 Author Report Share Posted December 14, 2020 2 hours ago, CC_333 said: I don't think I've seen that particular kind of distortion on a Compact before! It was happening with the old CRT too - it's solved by adjusting the crt anode cap, making it taut seems to fix it. So I've played around with the yoke adjustment but I'm struggling to get it better than this (it's sitting towards the right). Do I need to adjust more or is this a geometry issue? Quote Link to post Share on other sites
Recommended Posts
Join the conversation
You can post now and register later. If you have an account, sign in now to post with your account.