-
 Hello Guest! We're hosting a challenge to welcome vintage Intel macs to the MLA during the month of July! See this thread for more information.
 -
We've made some quality of life improvements to the Trading Post. More info here.
You are using an out of date browser. It may not display this or other websites correctly.
You should upgrade or use an alternative browser.
You should upgrade or use an alternative browser.
ITXPlus: A ITX Sized Macintosh Plus Logicboard Reproduction
- Thread starter max1zzz
- Start date

Nice one.
Very Awesome work!, the Big purple and gold ceramic package 68000 slap bang in the middle of the board looks so incongruous, I love it! and I love this project in general ")


That's more or less the last thing I need to test, Just have to go through my scrap boards and find somewhere I can steal a 26LS30 and 26LS32 from but given the mouse works fine (which requires the SCC to work) I expect they will work just fineThat's really impressive! Are the serial ports functional?
Yep, -12V is used for the audio and is regulated down to -5V for the serial too. -12V is also available on the IWM expansion header should you wish to install a IWM to use a real floppy driveYou are too fast. Impressive work. -12V is for audio right ?
Last edited:
So, As mentioned above the board is now booting and working just fine but how did we get here?
When the board was initially tested after assembly it did nothing at all. No chime and no video. Though frustrating this is kind of what I expected, the scan of the apple schematics we have is not exactly the best scan ever, while laying the board out I cam across several missing connections where I had misread the schematics, maybe something similar was going on here?
After scanning through the schematic for the ITXPlus and comparing it with the apple schematics I noticed this:

Ahh yes, connecting the databus to the VIA backwards is not going to help. Lets fix that:

That's a pretty big error and I was hopeful fixing that would get the board working however sorting this produced no change in behaviour at all. Back to looking through the schematics then.....
A little further on I noticed I had done the exact same thing with the SCSI chip. ooops, lets fix that too:


Fixing that still did not produce any change from the board.
I couldn't see any more errors in the schematic so it was time to break the oscilloscope out. A bit of probing revealed activity on the RAM that looked very much like the initial power on RAM test, that's good! but why no video or chime?
Probing HSYNC and VSYNC revealed no activity a all, that seemed strange as I way always under the impression the video circuit was pretty much free running and that the sync signals should be present as long as power is on.....
Both sync's are generated by the LAG so lets start looking around there.
I started by comparing the connections on the ITXPlus board to the Plus Reloaded PCB (as this was faster than comparing to the schematic) everything looked fine till I got the the last pin, Pin 19 (aka RESNYB) was connected to two pins of U1F on the Plus Reloaded PCB but only one on the ITXPlus PCB. Looking at the schematic I was confused, It was connected to both pins in the schematic but only one on the PCB, what the hell! how did that pass DRC!?
Then I took a closer look. Pin 13, RESNYB. Pin 2, RESYNB... Hang on, RESYNB! that's not correct!

One quick jumper:

On power on I now immediately got the normal checkerboard pattern followed shortly after with:

It works!
Except there was still no sound....
The Board is using DosFox's design for a Sony Sound chip replacement, this is a design that is known to work fine so the issue has to be something I was doing wrong. Given up till now all the issues have been transcription errors so lets start with looking for those:


Yes someone was not paying enough attention when transcribing that and got a bunch of component values wrong. Fixing those (and a bunch more not pictured) was all that was needed to get sound working
So the board is working with some fairly minor (if slightly annoying) patches, I'll take that
But we are not done yet, at this point the board powers on but we have no way do anything. We need to sort out some I/O next!
When the board was initially tested after assembly it did nothing at all. No chime and no video. Though frustrating this is kind of what I expected, the scan of the apple schematics we have is not exactly the best scan ever, while laying the board out I cam across several missing connections where I had misread the schematics, maybe something similar was going on here?
After scanning through the schematic for the ITXPlus and comparing it with the apple schematics I noticed this:
Ahh yes, connecting the databus to the VIA backwards is not going to help. Lets fix that:
That's a pretty big error and I was hopeful fixing that would get the board working however sorting this produced no change in behaviour at all. Back to looking through the schematics then.....
A little further on I noticed I had done the exact same thing with the SCSI chip. ooops, lets fix that too:
Fixing that still did not produce any change from the board.
I couldn't see any more errors in the schematic so it was time to break the oscilloscope out. A bit of probing revealed activity on the RAM that looked very much like the initial power on RAM test, that's good! but why no video or chime?
Probing HSYNC and VSYNC revealed no activity a all, that seemed strange as I way always under the impression the video circuit was pretty much free running and that the sync signals should be present as long as power is on.....
Both sync's are generated by the LAG so lets start looking around there.
I started by comparing the connections on the ITXPlus board to the Plus Reloaded PCB (as this was faster than comparing to the schematic) everything looked fine till I got the the last pin, Pin 19 (aka RESNYB) was connected to two pins of U1F on the Plus Reloaded PCB but only one on the ITXPlus PCB. Looking at the schematic I was confused, It was connected to both pins in the schematic but only one on the PCB, what the hell! how did that pass DRC!?
Then I took a closer look. Pin 13, RESNYB. Pin 2, RESYNB... Hang on, RESYNB! that's not correct!
One quick jumper:
On power on I now immediately got the normal checkerboard pattern followed shortly after with:
It works!
Except there was still no sound....
The Board is using DosFox's design for a Sony Sound chip replacement, this is a design that is known to work fine so the issue has to be something I was doing wrong. Given up till now all the issues have been transcription errors so lets start with looking for those:
Yes someone was not paying enough attention when transcribing that and got a bunch of component values wrong. Fixing those (and a bunch more not pictured) was all that was needed to get sound working
So the board is working with some fairly minor (if slightly annoying) patches, I'll take that
But we are not done yet, at this point the board powers on but we have no way do anything. We need to sort out some I/O next!
So with the board booting it's time to look at the I/O
First to be tackled was the SCSI connectors, these where soldered on and the board booted Mac OS 7.1 from my BlueSCSI just fine. That's good! it's nice when stuff just works
Except.....

Apparently I used the wrong footprint.... Oh well I'll correct that in the next revision and these ones will work just fine
With that working lets look at the Keyboard and Mouse
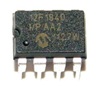
Originally I was just going to use a real Macintosh Plus Keyboard and mouse for the initial prototypes but that doesn't really fit with the "Build a new board from scratch" idea so I went hunting for adapters and found @Tashtari had made PS/2 adapters for both the keyboard and mouse using PIC12F1501's that where ideal

Other than managing to order the 12F1501's in the wrong package these adapters pretty much worked fine out of the box, I did however notice one odd thing, with the mouse adapter connected the system would always skip the power on memory test and would freeze on the floppy icon until the mouse was moved. This was odd but not a major issue so I didn't initially look into this much, once I had finished most of the other testing I did a bit of experimenting and found disconnecting the mouse button output from the PIC fixed the issue, I couldn't really see why this would be the case but spoke to Tashtari who very quickly whipped up a modified version of the firmware that fixed the issue So what was the issue? By default the firmware initializes all of the outputs of the PIC to a low state until the mouse is moved, the has the effect of making the system think the mouse button is being held down until the mouse is moved and what dose holding the mouse button do? Make the system try and eject the floppy and given this board doesn't even have a IWM installed that is never going to happen!
Next up to look up was my sudo soft power setup, this was already kind of working at this point but had needed some patching to get there. The setup is pretty simple, a CD4017 counter with the power button hooked to the clock input, the first press toggles a transistor to turn on the ATX PSU and the second will reset the chip back to the beginning. The main issue here was I misread the datasheet (and the last time I used a 4017 was in secondary school well over a decade ago (Holy frig was that that long ago? It doesn't fell like it was that long ago.....)) and assumed after reset all outputs where low when in reality output 0 is high after reset resulting in the machine just being stuck on. No bid deal, the outputs just needed to be moved up one and this isue was resolved.

(A pull down resistor was also added to reset)
This got the sudo soft power working but it was incredibly sensitive, just brushing your finger on the back of the power button was enough to trigger it. As soon as I looked at the schematic again the issue was obvious, a pulldown resistor was needed on the clock. As soon as this was added the sudo soft power worked as expected
Last to test was serial. I don't really have anything to say about this - it just worked fine
(Ok, one note - you might notice in some pictures of the board I have just built there is a bodge wire on one of the serial transceivers this is not a issue with the board, I ended up using a 75175 here instead of the 26LS32 that should be there and the 75175 has a slightly different enable setup, if you use the correct part this is not needed!)
The finished product:

And the upper port PCB:

I'm very happy with the way these boards came out they need a little tweaking but nothing major
First to be tackled was the SCSI connectors, these where soldered on and the board booted Mac OS 7.1 from my BlueSCSI just fine. That's good! it's nice when stuff just works
Except.....
Apparently I used the wrong footprint.... Oh well I'll correct that in the next revision and these ones will work just fine
With that working lets look at the Keyboard and Mouse
Originally I was just going to use a real Macintosh Plus Keyboard and mouse for the initial prototypes but that doesn't really fit with the "Build a new board from scratch" idea so I went hunting for adapters and found @Tashtari had made PS/2 adapters for both the keyboard and mouse using PIC12F1501's that where ideal
Other than managing to order the 12F1501's in the wrong package these adapters pretty much worked fine out of the box, I did however notice one odd thing, with the mouse adapter connected the system would always skip the power on memory test and would freeze on the floppy icon until the mouse was moved. This was odd but not a major issue so I didn't initially look into this much, once I had finished most of the other testing I did a bit of experimenting and found disconnecting the mouse button output from the PIC fixed the issue, I couldn't really see why this would be the case but spoke to Tashtari who very quickly whipped up a modified version of the firmware that fixed the issue
So what was the issue? By default the firmware initializes all of the outputs of the PIC to a low state until the mouse is moved, the has the effect of making the system think the mouse button is being held down until the mouse is moved and what dose holding the mouse button do? Make the system try and eject the floppy and given this board doesn't even have a IWM installed that is never going to happen!Next up to look up was my sudo soft power setup, this was already kind of working at this point but had needed some patching to get there. The setup is pretty simple, a CD4017 counter with the power button hooked to the clock input, the first press toggles a transistor to turn on the ATX PSU and the second will reset the chip back to the beginning. The main issue here was I misread the datasheet (and the last time I used a 4017 was in secondary school well over a decade ago (Holy frig was that that long ago? It doesn't fell like it was that long ago.....)) and assumed after reset all outputs where low when in reality output 0 is high after reset resulting in the machine just being stuck on. No bid deal, the outputs just needed to be moved up one and this isue was resolved.
(A pull down resistor was also added to reset)
This got the sudo soft power working but it was incredibly sensitive, just brushing your finger on the back of the power button was enough to trigger it. As soon as I looked at the schematic again the issue was obvious, a pulldown resistor was needed on the clock. As soon as this was added the sudo soft power worked as expected
Last to test was serial. I don't really have anything to say about this - it just worked fine
(Ok, one note - you might notice in some pictures of the board I have just built there is a bodge wire on one of the serial transceivers this is not a issue with the board, I ended up using a 75175 here instead of the 26LS32 that should be there and the 75175 has a slightly different enable setup, if you use the correct part this is not needed!)
The finished product:
And the upper port PCB:
I'm very happy with the way these boards came out
they need a little tweaking but nothing major
Last edited:
So what's next? The boards need a little tweaking to resolve the issues noted above, once this is done I'll get another run of test PCB's made and tested and then post the designs up on github
I also intend to make a Port Riser board with connections for a original keyboard and mouse should people wish to use these rather then a PS/2 ones. I'm also considering a port riser that also plugs into the internal SCSI port and and has a built in BlueSCSI with the SD card sticking out the rear I/O area
And maybe a version of Bolle's Micromac Performa clone for it too
As for the rest of the PCB's in this batch I will probably assemble all of them, one I will keep as a test board and the other 3 will probably be offered as assembled and tested boards. Once I have the final revision in hand I might also do some unassembled kits too. And if you don't want to purchase one the PCB designs will be on GitHub for you to download and have produced at any manufacturer of your choosing
Aad finally a picture of my work in progress build:
Last edited:
Is that an ITX case? I don't see provision for an expansion card or is that a perforated backplane cover plate?
I don't even see room for a power supply? Would it be at the front of the case or is PicoPSU implementation specified by the mfr?
I wonder if the Lisa 2/5 Floppy controller circuitry could be adapted. There is also this project which could maybe be extended: https://www.applefritter.com/content/announcing-iwmless-iwm-substitution-call-beta-testers
Hah... I was helping one of my kids debug a board last weekend, and he hit this exact thing, and spent a few hours trying to figure out why output 0 was high after reset (in his case, resulting in the child circuit being stuck off) before asking for help. "It's designed that way, it's not a bug" resulted in a quick fix to the schematic and everything workedThe main issue here was I misread the datasheet (and the last time I used a 4017 was in secondary school well over a decade ago (Holy frig was that that long ago? It doesn't fell like it was that long ago.....)) and assumed after reset all outputs where low when in reality output 0 is high after reset resulting in the machine just being stuck on.
@max1zzz what's all that cable crud at top right of case?
Obligatory Tangent:
That setup you have would make a great riff on the OUTBOUND 125 for mains power limited Portable Mac playtime.


VGA LDC Controller/Panel combo keeps it thin. Front bezel overlaps letterboxing bars. Move KBD to back to make room for TrackBall wrist rest setup.
Muad'Dib logo required of course.")
edit: is 12.5 inches too wide for home printers?
Obligatory Tangent:
That setup you have would make a great riff on the OUTBOUND 125 for mains power limited Portable Mac playtime.
VGA LDC Controller/Panel combo keeps it thin. Front bezel overlaps letterboxing bars. Move KBD to back to make room for TrackBall wrist rest setup.
Muad'Dib logo required of course.
edit: is 12.5 inches too wide for home printers?
Last edited:
Similar threads
- Replies
- 42
- Views
- 10K