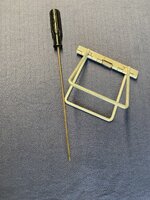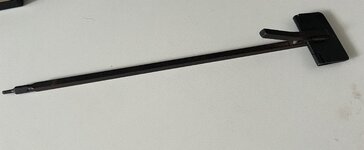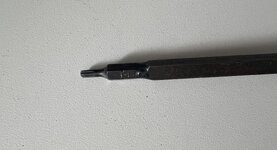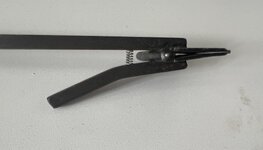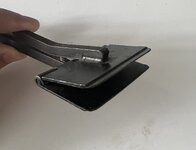
I had one back in the day, and still have the screw extractor and the anti-static wrist strap. I decided to make the actual case cracker today, so here's a recap of that adventure.




It's good to see that thing again! When I helped close down the Apple Dealer I worked for until about 2012, the case opener is one of the things I wish I'd grabbed, especially now that I have something like two dozen Mac Classic-style machines in my collection which I'd've never dreamed of being a thing at the time. I can finesse the cases open with a large flat screwdriver and some careful urging to not leave behind pry marks, but perhaps one of David's suggested 3201 clips is in my near future. At least I got one of the long Torx drivers!Not only do I remember them, but I had a hand in the design. Made a bunch of them for both Apple Service and also Radius.
Still have a few in my stash. Also some of the extended Torx driver

Hum, you don't need to do this. If you put a compact face down on a bed, remove the screws, and then sort of "snatch" at the sides with flat palms, the pressure pulse inside from your hands comming together combined with the resistance to acceleration of the main mass of the computer means the case releases with no chance of marks.I can finesse the cases open with a large flat screwdriver and some careful urging to not leave behind pry marks
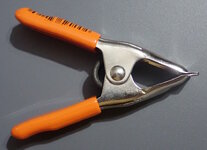
That’s what I had and have now lost.Pony 3201 Spring Clamp. https://amzn.to/4wNYUdE
Pull off the rubber tips. Put the lips in a vise to squish them straight. Voilà! Mini Mac Cracker.
View attachment 101395
But… welding!Hum, you don't need to do this. If you put a compact face down on a bed, remove the screws, and then sort of "snatch" at the sides with flat palms, the pressure pulse inside from your hands comming together combined with the resistance to acceleration of the main mass of the computer means the case releases with no chance of marks.
You only need to lift it an inch or two.
It sounds worse than it is? But basically it doesn't put any metal against the plastic.
If I didn't want to do that, you could always use a plastic spudger.
That’s the deluxe version, that is!Not only do I remember them, but I had a hand in the design. Made a bunch of them for both Apple Service and also Radius.
Still have a few in my stash. Also some of the extended Torx drivers.View attachment 101389
Fine by meBut… welding!

Yeah, I've done that a few times, but some of the machines I get have been sitting in a barn/garage for 20 years untouched and they do not come apart. Sometimes they need some prying, and I'm not talking twisting the screwdriver against the crack in the case. Just simple easing apart the stuck plastic. Anyway: 3201 on order, arrival by Monday.Hum, you don't need to do this. If you put a compact face down on a bed, remove the screws, and then sort of "snatch" at the sides with flat palms, the pressure pulse inside from your hands comming together combined with the resistance to acceleration of the main mass of the computer means the case releases with no chance of marks.

We actually tried these at the time but found the rounded corners often helped the thing walk out of that groove leaving marks.Pony 3201 Spring Clamp. https://amzn.to/4wNYUdE
Pull off the rubber tips. Put the lips in a vise to squish them straight. Voilà! Mini Mac Cracker.
And even more than that. The OG one is made from a piece of piano hinge and if you look closely they have stamped numbers on them -the 2 sides are a matched pair. The raw hinge (it came in 2 meter lengths) had to be disassembled to machine that thin step, then the handle was welded on, then zinc plated and reassembled.But… welding!
Yeah, I've noticed this. Mine have generally been in the family for decades and all of them had been opened before I owned them.Also, we were dealing with "virgin" assemblies then and a lot of the force required has to deal with how often the thing has been apart before.
I have some lovely 99.9% stuff here, but suspect I'm too far awayI have an extra OG cracker here I would trade for a case of decent IPA if anyone in the North SF Bay Area is interested...

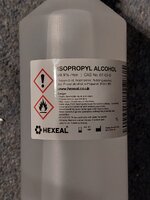
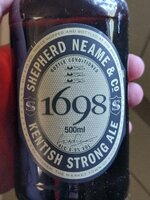
Had a quick look out of curiosity (again, too much sea between us) at what I have in, but I generally prefer amber or dark beers so I mostly have TEA.I have an extra OG cracker here I would trade for a case of decent IPA if anyone in the North SF Bay Area is interested...


@Huguenot that is AWESOME and they worked well! ThanksNot only do I remember them, but I had a hand in the design. Made a bunch of them for both Apple Service and also Radius.
Still have a few in my stash. Also some of the extended Torx drivers.

Either of those would do as well if you were closer, it's all west coast style out here but I'm a fan of the traditional stuff as well.Had a quick look out of curiosity (again, too much sea between us) at what I have in, but I generally prefer amber or dark beers so I mostly have TEA.

That's really nice, respect to whoever made it. Suspect she made it or it was made for her.I've had this thing in my toolbox for a long time. I think my grandmother acquired it when upgrading her SE to 2MB in the late eighties. Not sure who made it, but they did a good job!
Nice looking tool indeed, bit of a blacksmith look to it as well. Thanks for posting the pics.I've had this thing in my toolbox for a long time. I think my grandmother acquired it when upgrading her SE to 2MB in the late eighties. Not sure who made it, but they did a good job!