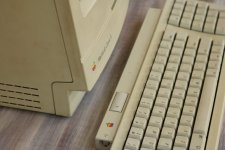
Macintosh Classic II Restoration

PotatoFi

Well-known member
Recently, a Macintosh Classic II came up on eBay for $99 with free shipping. It came with the Macintosh itself, two Apple Keyboard II's, a mouse, a LocalTalk cable, and two LocalTalk transceivers. According to the listing, it would power on and show a "Floppy Disk" icon, but the keyboards and the mouse apparently didn't work. Now, the Classic II has basically been my dream compact Macintosh. Why not the SE/30, you ask? I certainly don't have anything against the SE/30, in fact I would absolutely love to own one. But the PDS slot isn't useful to me due to the price of cards for it. The 16-bit data bus sounds nice, and being able to go for more than 10 MB of RAM I suppose would be cool... but at the end of the day, the Classic II is the one I've always wanted.

I decided to take a gamble and buy it. My bet was that the PRAM battery hadn't exploded since there was a floppy disk icon, and that the SCSI drive is probably just stuck. I also laughed at the eBay listing, because he had the keyboard plugged into the LocalTalk transceiver, and the LocalTalk transceiver plugged into who-knows-what. And besides, if the machine didn't boot, there would be no way to test the mouse or the keyboard. It's possible that he fried stuff by plugging them into the wrong ports, but that was a risk I was willing to take.

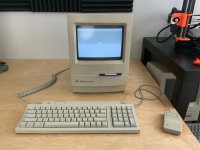
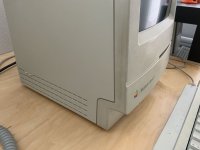
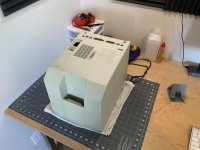
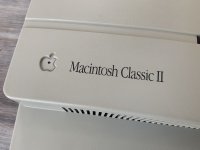
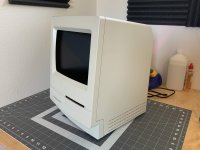
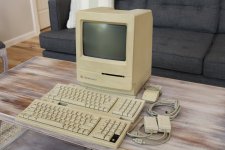
Today, the Macintosh Classic II arrive! Here is is, straight out of the box:
IMG_1009.JPG

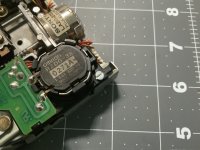
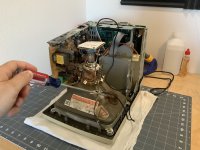
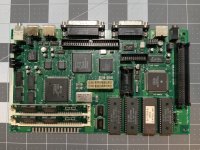
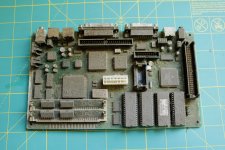
Of course, the VERY first thing I did was pop the case off, and check the PRAM battery. The case was super stubborn to get off, unlike my various Pluses and SE's. I was thrilled to see that the PRAM battery hadn't leaked, but surprised to see a wire connecting the VLSI chip and what I think is the ADB IC.
IMG_1019.JPG

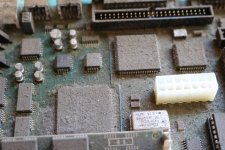
Just look at the dust on this thing! I've never seen it as bad as this.
IMG_1022.JPG

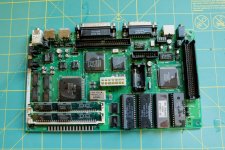
For shock value, I'll show you what the board looked like after a quick rinse in the sink. I also scrubbed it with detergent and a toothbrush. I cleaned it more isopropyl alcohol, but didn't get a photo. More on that tomorrow. That blue wire sure is curious, if anyone has any ideas about what that might be, please let me know.
IMG_1024 (1).JPG

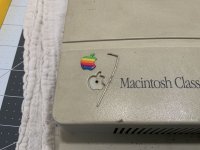
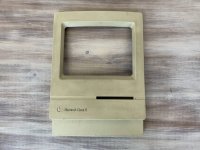
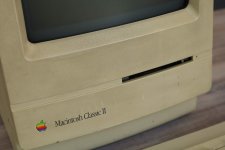
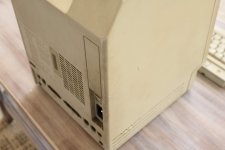
Next, I turned my attention back to the case. It looks awful, the worst I've ever seen, and I've restored 6 compact black and white Macs. This will be my 7th restoration. It smells like cigarettes, and it's very greasy.
IMG_1014.JPG

IMG_1017.JPG

IMG_1018.JPG

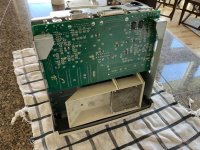
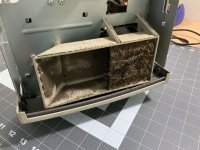
Yikes, I hope I can bring this one back. It is really bad. Fortunately, there are no scratches or cracks. Let's a take a look at the inside that I ignored when I yanked the logic board.
IMG_0370.JPG

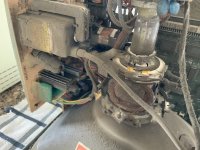
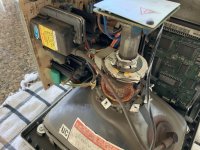
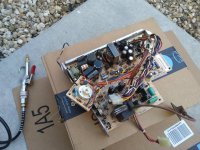
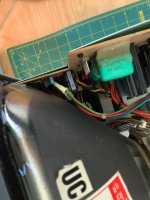
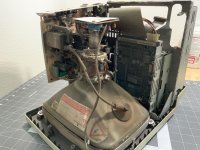
This kind of stuff doesn't really gross me out, but it does leave me in awe. You can see why I immediately abandoned my plans to attempt to power it on. Not like this! Check out the fuzzy stuff all over the analog board and CRT:
IMG_0372.JPG

And that's all for now! So here is my current to-do list for this Mac:

  • Blow the dust out of the inside
  • Figure out how I want to clean the analog board, CRT, and neck board (suggestions welcome)
  • Temporarily reassemble and attempt power-on
  • Clean floppy drive
  • Scrub the case, chassis, and all similar parts
  • Attempt to unstick the SCSI drive (nothing to lose)
  • Clean and lubricate floppy drive
  • Retrobrite case (full submersion method)
  • Order tantalum capacitors
  • Install tantalum caps


...and we haven't even gotten to the keyboards yet! I won't be able to work on this for a few days, but I'll post an update as soon as I have one. Thanks for checking this out!

 
Last edited by a moderator:

AwkwardPotato

Well-known member
  • Figure out how I want to clean the analog board, CRT, and neck board (suggestions welcome)
Personally I'd just use a soft brush to clean the dust off the high-voltage parts (I don't feel too comfortable getting water, etc. near them).

Really look forward to seeing your progress on this Mac; your previous restoration threads have been really cool to watch!


jimjimx

Well-known member
Here’s a different way to brighten plastics.  Straight sunlight, and some science behind it. 


PotatoFi

Well-known member
More progress last night! My goal for the evening was to get it to boot from a floppy disk. First, we need to clean this dust out.

IMG_0379.jpg

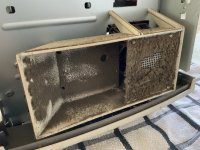
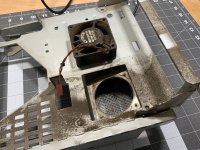
Ugh, what a mess.

IMG_0380.jpg

And the cooling fan shroud, once more.

IMG_0381.jpg

After about 10 minutes with the air compressor, it looks better. Still not great, but better. I will thoroughly clean everything when I take it clear apart for retrobrite.

IMG_0382.JPG

Logic board completely cleaned and reinstalled (it will get a recap soon).

IMG_0383.jpg

And the moment of truth... does it power on?

IMG_0384.jpg

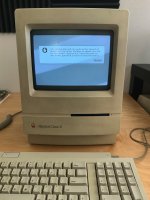
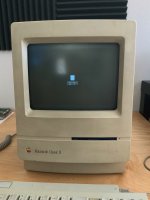
Hooray, it does! And the mouse, when plugged in through the keyboard, works just fine! I did decide to take my chances with a floppy disk. The drive would barely even lock the floppy drive down in position. It took a couple of tries to get the floppy to seat all of the way. The drive would seek for a moment, and then give up and painfully push the disk back out with a "X Floppy" icon on the screen. I only tried a couple of times, because I didn't want to snap the eject gear. Clearly, this drive needs to be cleaned (but we already knew that).

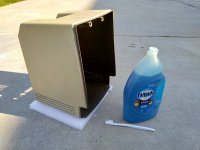
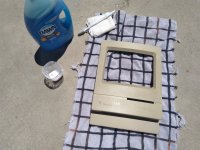
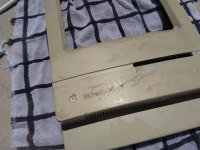
As I normally do with these machines, I decided to pop the case off and work on cleaning that for a bit to let the CRT bleed off, before extracting the hard drive and floppy drive. I took it outside, and went after it with dishwasher detergent and a soft toothbrush.

IMG_20190620_184000.jpg

First, I did a small area on top to see if it made a difference, and it definitely did!

IMG_20190620_184245.jpg

On all of the stubborn marks and places that I couldn't scrub, I used a wet paper towel and baking soda. I always use care with this as it acts as a minor abrasive and removes a bit of texture... but losing a tiny bit of texture to have it look completely clean is worth it to me. When I was done and the case was dried, here's what it looked like:

IMG_0393.jpg

So satisfying. I don't feel like I'm going to get lung cancer just by looking at it any more! I'll post a bunch of before and after pics of the case later so you can see the full transformation. But no time for photos... I wanted to get working on that floppy drive!

IMG_0385.jpg

Joel: Says, "No time for photos!"

Also Joel: Posts a photo.

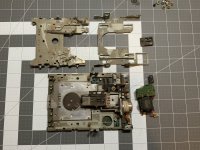
IMG_0386.jpg

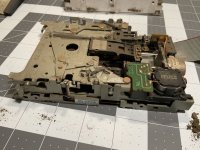
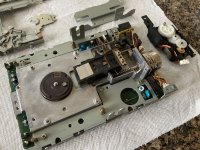
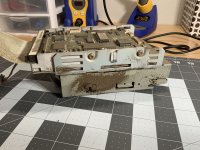
I'm sure that there has been worse... but this is the dustiest one I've ever encountered, including the Macintosh Plus that I restored (still not working) from the aircraft hangar. Using this video by What's Up TK Here, I disassembled the drive to clean it, but I ran into a problem when I tried to take off the eject mechanism. Does anyone else share my burning hatred of Phillips screws?

IMG_0388.jpg

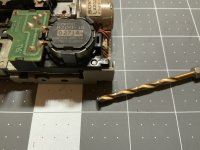
I tried the rubber band trick, I tried my impact driver, I tried a screw extractor... but eventually, I just gave up and drilled it off. I had the vacuum cleaner right next to the screw to immediately remove metal shavings - those are probably not good for the floppy drive, and this is a prized 1.44 MB drive. I do not want to have to replace it. 

Drilling off the screw head worked!

IMG_0389.jpg

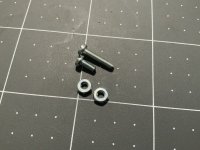
Curiously, I removed what was left of the screw with my fingers. Figures. It looks like an M2 screw? I'll have to go to the hardware store to see if I can find a replacement. Last photo of the night:

IMG_0390.jpg

That's where I had to call it quits. The drive is now ready for cleaning. My plan is to drench it in isopropyl alcohol, and gently scrub everything down with that soft toothbrush. I'll keep rinsing and scrubbing. I will avoid any direct contact with the read/write heads. If anyone has advice on how to work around these, please let me know. I don't want to risk further damaging this drive. 


PotatoFi

Well-known member
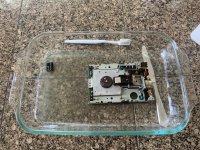
Time for another update! This will be pretty boring... but it's still an important step. First, I drenched the disassembled drive in 91% Isopropyl alcohol in a Pyrex pan, and gently scrubbed it with a soft toothbrush.

IMG_0394.jpg

Here's a closeup. It's looking a lot better! I alternated between gently scrubbing and rinsing. I even scrubbed the read/write heads, SUPER gently.

IMG_0395.jpg

As soon as it was clean, I took it out to the air compressor and blew as much of the alcohol out as possible. Instead of letting the air compressor fill up, I started using it immediately to avoid hitting the drive with high pressure. Then, I let it air-dry overnight.

IMG_0396.jpg

Remember that Phillips screw that I cammed out of? None of my M3 screws fit, so I determined that it was an M2.5. Three hardware stores later, I found a couple of M2.5's but they're way too long (Anything smaller than M3 is very hard to find in a hardware store in the United States). I screwed on a nut, cut the screw short with some cutters, and then backed the nut off to reform the threads.

IMG_0397.jpg

It worked! The screw head looks stupid but whatever.

IMG_0398.jpg

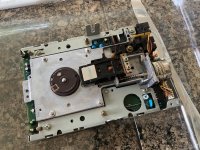
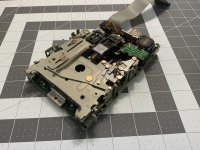
And here is the reassembled drive! For lubrication, I used Dupont Teflon Silicone Lubricant. I use it on the linear rails on my 3D printer, and I like how clean it stays. It also doesn't get sticky like lithium grease. Floppy disks are extremely satisfying to snap in, and they basically fly out of the drive when you eject manually. Perfect!

IMG_0402.jpg

So... will it read the disk and boot? Well, it will at least read the disk!

IMG_0400.jpg

Curiously this is a 7.0.1 installer disk (Double-Density), but no matter! The drive seems to be working, which is what I wanted. I did pull out my 6.0.8 disk, and this was the result:

IMG_0401.jpg

The Sad Mac error code here is:

  • 0000000F
  • 00007FFF
According to the Sad Mac Error Codes page, $000F is "Reserved for Macintosh Compatibility", but it doesn't get into what the second line means. I'm not really worried about it, as I don't even know if my 6.0.8 boot disk is even any good. I think my next step is to make some newer boot disks that I know this Mac can boot up.

 
Last edited by a moderator:

PotatoFi

Well-known member
Personally I'd just use a soft brush to clean the dust off the high-voltage parts (I don't feel too comfortable getting water, etc. near them).

Really look forward to seeing your progress on this Mac; your previous restoration threads have been really cool to watch!
Thanks, I'm glad you're enjoying them! I think I'm going to take your advice about the soft brush.

Looks like some potential screen burn in.  I hope not.  Good luck.  Keep us posted on your progress.
Yes, sadly the worst in my collection. :(  Since this is kinda my "dream Mac", I might swap a CRT in from another Mac? But when it's on, you can't see the burn-in at so maybe I'll just use it as is.

Here’s a different way to brighten plastics.  Straight sunlight, and some science behind it. 
Yeah... I've seen this video. I've got my retrobrite process pretty dialed at this point (more on this soon), so I think I'll stick to what I know. I'll document it pretty well here so people can see my methods and the results that they achieve.

Outstanding!  Keep them coming.
Thank you! I will!

Wow, so much work. Good job.
Thank you! Yep, lots of "work"... but I find it to be very relaxing. The worse shape they're in, the more fun. :D

Are you using 6.0.8L? The regular 6.0.8 won’t work. 
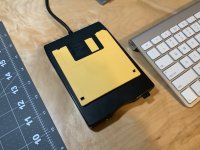
Thanks for bringing this up! I now remember reading somewhere that 6.0.8L added compatibility for the Classic/Classic II, but I'd completely forgotten about it. After seeing your suggestion, I grabbed 6.0.8L images from The Macintosh Repository. After uncompressing the .SIT, I placed the two images on my desktop and wrote them to a 1.44 mb floppy disk with DD in modern macOS and my cheap USB floppy drive.

IMG_0405.JPG

In the Terminal in macOS, start by listing the available disks, and identify which one is the floppy drive:

diskutil list


macOS had already mounted the disk, so I unmounted it:

diskutil umountdisk /dev/disk6


Finally, DD the image to the drive:

sudo dd if=6.0.8L\ System\ Startup.img of=/dev/disk6 bs=84


And the results:

IMG_0406 (1).JPG

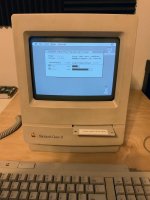
It looks like this unit has 4 MB of RAM, which is consistent with the 80 MB (!!!) hard drive. So yeah... it has officially booted! Thank you @sixsevenco for the tip... you saved me a lot of time!


sixsevenco

Well-known member
Thank you @sixsevenco for the tip... you saved me a lot of time!
Glad to help.  I couldn't get those images from the repository to work.  I ended up finding 6.0.8L elsewhere on the internet.  I actually prefer System 7.0.1 on my Classic II.  It boots very fast.  I couldn't get AppleShare on 6.0.8L to work with my OrangePi linux server running Netatalk for printing and networking.  In my opinion, using an Asante adapter to connect to Netatalk is by far the easiest way to get new apps on the mac.  I've also maxed out my ram and put in SCSI2SD adapter.  Glad you're Classic ii is running.  Be sure to post a picture when you've finished with the retrobrighting.  :)


badCaps

Well-known member
I really enjoy your write-up and pics.  Stuff like this gets me excited to start a few of my pending restores.  Nice work!


PotatoFi

Well-known member
This is an exciting one... I finally tore it down for retrobrite! 56k warning here for sure - I am going to personally put strain on the 68kmla forum servers with this post (Sorry, Cory!).

First, face-down on a towel to take apart. I've found that sliding an old debit card between the front and back housings on the top helps split the case.

IMG_0410.jpg

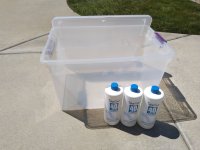
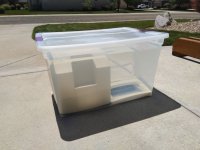
Before I went any further, I decided to get my hydrogen peroxide "preheating" in the sun. I stole one of the kids' LEGO Duplo containers, poured in 3 bottles of Salon Care 40-Proof hyrdrogen peroxide, and filled the rest with water. I've settled on using the full submersion + sun method for larger parts like this, because it seems to completely eliminate the possibility of the "marble" effect, but you do have to be very careful that the parts don't float. If they do, the parts above the liquid will bleach very bright, and there's nothing that you can do that I know of to fix it.

IMG_20190629_115217.jpg

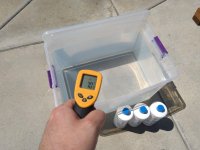
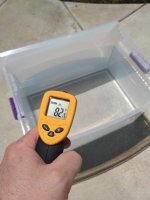
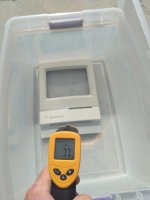
The starting temperature was 70°F... not bad, but 80°F or 90°F would be a lot better. Some time in the sun will help that. As I type this, I'm hearing the 8-Bit guy narrating. Pretty funny.

IMG_20190629_115616.jpg

Even though it had been sitting for several days, the very first thing I did was follow the CRT discharge procedure. I ALWAYS do this, but I've never heard even a little "snap", even on my non-bleeder Pluses. I think it's because I always let them sit for at least 4 hours (usually a day) before discharging.

IMG_0411.jpg

Hrm, it looks like the chassis and fan shroud are one piece, as the shroud posts are melted into place. I'll have to keep these two parts together.

IMG_0412.jpg

I gotta say... the Classic II comes apart very easily. The Plus has awful analog to logic board connectors, the SE is very cramped for disconnecting things, and the SE also has the screen brightness knob to sneak in and out. Nothing of the sort on the Classic II... plenty of room for unplugging HDD, FDD, and power cables.

IMG_0414.jpg

Ok, it's all apart now!

IMG_0415.jpg

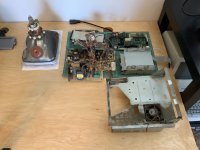
Here are all of the parts. These will all need to be cleaned and inspected. The analog board has some badly bulging capacitors so I will need to order new ones right away.

IMG_0417.jpg

It's important to pop the Apple logo out with something small enough to go through the hole, but not sharp enough to puncture the logo (which I've done). Removing this is critical when using sunlight and/or heat in the retrobrite process. I recently learned this the hard way on an M0116 keyboard, where the red completely bleached out. Very sad.

It's also nice to use the plastic behind the logo to see how the retrobrite is coming along.

IMG_0419.jpg

And just for fun, here's the "before". I'll show this again later in this post.

IMG_0420.jpg

Finally, the moment I've been waiting for: cleaning! I'm using the usual supplies here: Dawn dishwasher detergent, a cheap toothbrush from a hotel, and for the stubborn stuff, a wet paper towel and baking soda.

IMG_20190629_130148.jpg

Look at the grease coming off! So satisfying! The effect was even greater in person.

IMG_20190629_130612.jpg

The first round of scrubbing with soap and water worked miracles!

IMG_20190629_131405.jpg

Now to deal with these black marks... there weren't many, but I wanted to remove them, so I went to work with the wet paper towel and baking soda.

IMG_20190629_131423.jpg

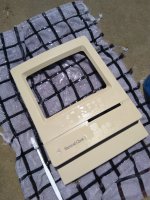
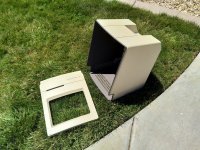
Next, it was time for the retrobrite! I decided to let the Classic II rest in the grass awhile I popped the lid off the container.

IMG_20190629_132212.jpg

82.5°F, not bad for an hour or two in the Idaho sun.

IMG_20190629_132244.jpg

I started out with both parts are the same time, rotating once every 20 minutes, but after about 4 rotations, I decided to split them up.

IMG_20190629_132704.jpg

Sadly, I couldn't finish them up that day because we had evening commitments, and I wasn't willing to leave the parts alone, for fear that they would float. The next day, I spent a couple more hours on the front and back individually, rotating every 30 minutes. It took awhile because, of course, it was partially overcast. Ugh. But it did work. I think that it took around 4 hours, total.

IMG_20190630_092857.jpg

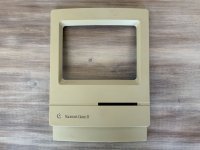
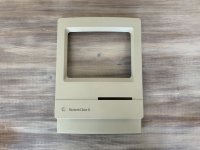
And here are the results! I'll show you before, cleaned, and retrobrighted.

Before:

IMG_0420.jpg

Cleaned:

IMG_0421.jpg

Retrobrighted:

IMG_0424.jpg

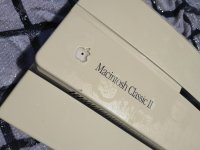
Here's a close-up of the Apple logo, which is a good indicator. It's VERY close... but I'm starting to think that Retrobright gets exponentially slower as it works - getting the last little bit takes a very long time, so you get diminishing returns.

IMG_0425.jpg

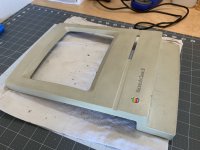
Here's the front of the whole case:

IMG_0427.jpg

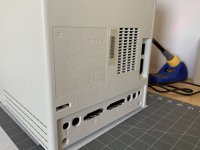
Last one, here's the back. Notice that the serial number sticker peeled up a bit... bummer. I've never had one detach before, but overall, I think it was worth it.

IMG_0428.jpg


Crutch

Well-known member
Great post, these look terrific!  I don’t have a Classic so just curious since you mentioned how to open these ... does @Dog Cow‘s recommended approach of just pressing down with a screwdriver into one of the (loosened) Torx screws while pulling back on the case work to open these without needing to use a credit card or anything to pry the pieces apart?


PotatoFi

Well-known member
Great post, these look terrific!  I don’t have a Classic so just curious since you mentioned how to open these ... does @Dog Cow‘s recommended approach of just pressing down with a screwdriver into one of the (loosened) Torx screws while pulling back on the case work to open these without needing to use a credit card or anything to pry the pieces apart?
Thank you! As for the case-opening method, I'll have to give that a try.

I had a but more time after posting last night, so I worked on the analog board, which is a huge mess.

IMG_0432.JPG

I took it outside and blew more dust off (remember, this is the second pass). Last time, wasn't careful to avoid the speaker... this time I paid close attention to that.

IMG_20190701_201841.jpg

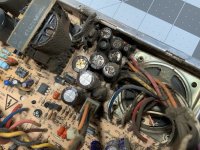
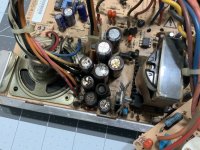
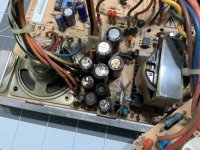
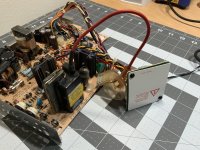
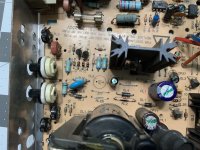
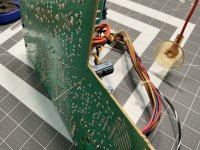
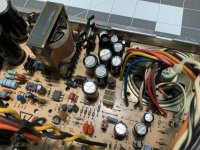
Yeah, these caps are hosed. The tops are all bubbled, and they've leaked everywhere. There's even rust on the speaker frame. I need to identify all of these caps, but they're so closely packed in there that I'll probably have to desolder things. I've started to list them out in my capacitor spreadsheet, but there's still a lot of work to do.

IMG_0437.JPG

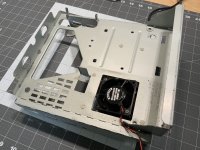
The chassis was the last major part to clean.

IMG_0435.JPG

I scrubbed the chassis with soap and water in the kitchen sink, and used alcohol and cotton swabs to clean up the fan.

IMG_0436.JPG

I'd hoped to finish up the Mac itself (excluding mouse and keyboard) this weekend, but I realized late last night that it's a 5-day weekend, so I probably can't get capacitors here in time. Besides, I need a few hours to figure out exactly what to order.

 
Last edited by a moderator:

Mu0n

Well-known member
Again with the quality post. Your stuff is always so detailed, well Illustrated and you list the materials and methods, making it a superb reference for all.

Do you know if the analog boards are similar between classic 1 and 2? The 1's board is on my to-do list this summer.


dochilli

Well-known member
AB of classic I and II are different. You can change the AB and the screen from one to another, but not only the AB.


PotatoFi

Well-known member
Again with the quality post. Your stuff is always so detailed, well Illustrated and you list the materials and methods, making it a superb reference for all.
Thank you! Hopefully these don't get too detailed...

Anyway, things have been in a stall lately due to all of the activity around the 4th of July, and some other projects around the house. For example, I pulled CAT5e to our island and installed a wall-mount AP. Much better than than having a ceiling-mount AP laying around on the switch rack in the closet! This thing has an integrated 4-port ethernet switch, so plugging Macs into ethernet at on the kitchen island will be much easier. See how I tied it back in? And now you know where the "Fi" in my username comes from.

IMG_20190705_172602 (1).jpg

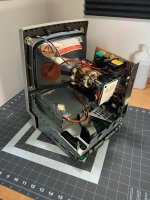
I did a bit of reassembly, and when I installed the CRT, I gently vacuumed everything with the brush head on the vacuum. Then, I wiped the tube down with isopropyl alcohol and gently cleaned parts on the next with cotton swabs. There were a few parts (like the windings) that I didn't touch at all.

IMG_0454.jpg

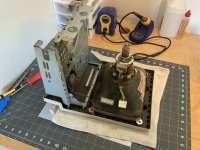
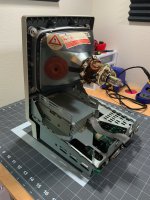
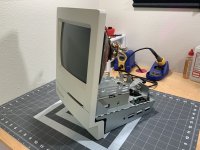
One thing I REALLY appreciate about the Classic II is how you can stand it upright without the logic board being anywhere near your work surface. It's much nicer than the SE and Plus in that regard. Overall, this thing is just plain easier to work on.

IMG_0453.jpg

Ok, I need to list all of the capacitors on this board, but it's still SUPER gross. Look at all of the gunk everywhere!

IMG_0437.jpg

This time, I got another Pyrex dish, and went crazy with alcohol and a toothbrush. I scrubbed, rinsed, and scrubbed everything. Then I went after it with cotton swabs and more alcohol, just so I could get to a point where I could read the voltage and capacitance values! I also spent time with the toothbrush and alcohol on the wiring looms, CRT back board, and power switch. I was super careful to steer clear of the speaker... getting liquid on that would probably be bad.

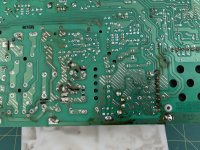
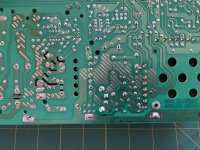
The back was nasty too. Here's before:

IMG_0441.jpg

And here's after. I think all of the damage was from the group of large capacitors on the other side of the board!

IMG_0448.jpg

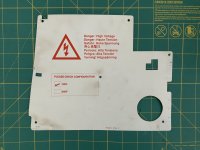
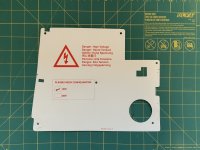
I also worked on the shield. Before:

IMG_0442.jpg

And after I attacked it with Windex! I was careful to avoid the check mark next to "120V", which looks like it was done with a Sharpie.

IMG_0449.jpg

And here's the whole board after cleaning. I'm especially proud of the anode wire, anode cap, and the back board. They look brand new! Now I can finally determine capacitance values, voltage, diameter, and lead spacing for all of the capacitors.

IMG_0450.jpg

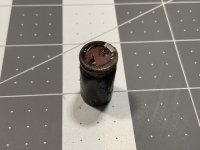
As you may have noticed, I did need to desolder CP36 to read the values. Look at how far gone this thing is. I'll bet all of the other capacitors nearby are in similar condition. I can't wait to get these all removed and thrown away!

IMG_0452.jpg

Now, on to the capacitance values. I couldn't find a list of Macintosh Classic II analog board capacitors anywhere, so here's a quick list (and here's a link to a complete spreadsheet):

  • CF1: 47 uF, 25v
  • CF2: 220 uF, 16v
  • CF3: 1000 uF, 16v
  • CF4: 470 uF, 25v
  • CL1: 1000 uF, 25v
  • CL2: 4.7 uF, 250v
  • CL3: 1 uF, 50v
  • CL11: 47 uF, 16v
  • CP1: 220 uF, 250v
  • CP2: 470 uF, 50v
  • CP3: 10 uF, 25v
  • CP4: 47 uF, 25v
  • CP5: 1 uF, 50v
  • CP6: 2200 uF, 10v
  • CP7: 1000 uF, 10v
  • CP8: 2200 uF, 16v
  • CP9: 470 uF, 25 v
  • CP10: 470 uF, 25 v
  • CP11: 220 uF, 50v
  • CP12: 1000 uF, 16v
  • CP13: 220 uF, 250v
  • CP34: 1 uF, 50v
  • CP36: 2200 uF, 10v
  • CP37: 1 uF, 50
  • CV2: 470 uF, 10
I also purchased tantalum SMD's for the logic board, here they are in a grouped format:

  • Quantity 3: 47 uF, 16v
  • Quantity 2: 1 uF, 50v
  • Quantity 8: 10 uF, 16v
Specifying these particular caps is a bit tricky, because a length of 3.5mm is a bit short to reach the pads, and 6mm is way too long, and there are few packages in between. So I settled for 3.5mm for the smaller caps.

Arrow.com was about $57 due to shipping and handling charges, so I tried Digi-Key and got everything for about $31. The spreadsheet has links to each part. Ideally, I'd share the BOM on Digi-Key but it doesn't look like I can freely share a link. Maybe a .CSV file would do the trick?

Anyway, the next update should be about recapping the analog and logic boards!


PotatoFi

Well-known member
Capacitors came in today, HOORAY! Time to get to work, and hopefully have this Mac up and running! First, I marked all of the old caps on the analog board with a Sharpie, so it would be easy to keep track of what is done.

IMG_0469.jpg

Then I started replacing caps! My method is to heat one lead, rock the cap to one side, heat the other lead, rock it to the other side, and repeat until it pops out. Then, I swab out from under the old cap with alcohol to make sure nothing is left on the board. I replaced them one at a time to make sure I didn't mix anything up, and I referred to photos in this thread constantly to make sure the polarity was correct (although polarity is usually clearly marked on the board). All of the new caps have the exact same diameter, but not the same height:

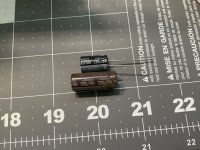
IMG_0470.jpg

If there's a bunch of solder leftover, I'll use solder wick to clean out the holes before installing the new cap. I just bend the leads like this to hold it in place, add some solder, and trim with flush cutters (I absolutely love these ones).

IMG_0471.jpg

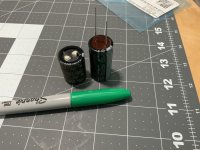
Check out these massive caps! They're the same diameter, but the new ones are much taller. Sharpie for scale.

IMG_0472.jpg

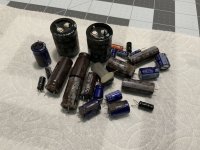
Here's all of the gross old caps. They even smelled bad as I desoldered them! There was sometimes some crackling and a sweet kind of smell, which I would assume was burning electrolyte.

IMG_0473.jpg

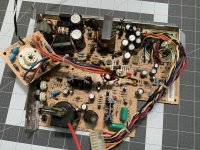
And here's the results! Check out that gorgeous, clean board full of fresh caps!

IMG_0474.jpg

This section was a particular pain, but it needed it the most. The results are so satisfying. The new caps are definitely shorter than the old ones.

IMG_0475.jpg

At this point, I decided to install the analog board and test it. One of my strategies for working around high voltage stuff is to do it as little as possible. I want to know that my work is good before diving into the logic board, which is easy to remove and work on with no discharge procedures or anything like that. It could also help me isolate a fault if I know that the analog board was good before recapping the logic board.

I love how easily the Macintosh Classic II goes back together! The analog board is SO much easier to install on this than an SE. It has a channel that sits on the chassis, and two screws on the back.

IMG_0476.jpg

I moved my SE FDHD off the desk, plugged in a power cord and flipped the switch, and... 

Well, first off, it chimed, although very quietly. There was no sound before so that's already an improvement! But then, it only showed a single, bright dot in the middle of the screen. I instantly knew what that meant! I shut it back off very quickly to investigate, and...

IMG_0477.jpg

Ha yep, there's the problem. A bright white dot usually means a J1 connector issue on a Mac Plus, so I immediately knew what my mistake was. I plugged it back in and...

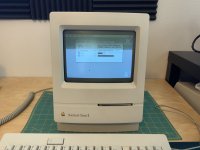
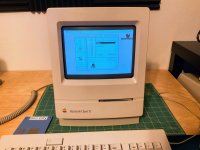
Success! The Macintosh Classic II booted up to my 6.0.8L floppy with no hassle. Still no hard drive, but this proves that my analog board rework is good. Well... mostly. Sadly, while the sound did work,, it was super quiet. When cranked all of the way up, you could barely hear it chime. You can't really hear the monkey sound at all. I was pretty confused, but decided to press on.

IMG_0498.jpg

After playing Sim City on it for a bit, and mowing the lawn in the cool of the evening, it was time to tackle the logic board!

IMG_0499.jpg

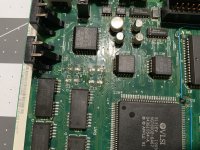
First, I need to remove the old caps. I do this by grabbing them with a pair of pliers and twisti...

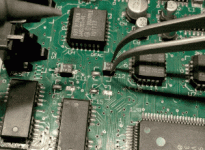
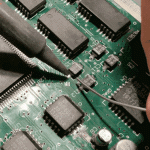
Ha, gotcha! None of that nonsense here. Although since I don't have a hot air station, my method probably isn't a whole lot better. I carefully grip the old cap with tweezers, heat one side and gently rock it to one side, and then go do the same on the other side. I might have to heat each side 5 or 6 times as I work it loose, because I go as slow as possible. I haven't lifted a pad doing this yet (knock on wood)!

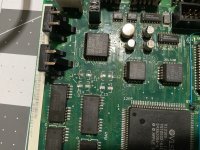
IMG_0500.jpg

Next I clean the electrolyte off with alcohol and a cotton swab:

IMG_0501.jpg

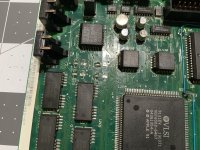
Next, I heavily tin all of the pads to the left. I'm a leftie, so that's the direction that I'll be coming at it with the soldering iron from. I don't tin the pads on the right. Note that I glob quite a but of solder onto the left-hand pads.

IMG_0503.jpg

Now for the fun part. To position the new capacitor, I firmly grab it with my tweezers, heat up the tinned pad, slide the cap into place, and remove heat as soon as it's positioned correctly. If I didn't quite get it right, I can heat the pad back up, move it around a bit, and remove the heat. I didn't get this one absolutely perfect because I was working around my iPad Pro, recording video.

Solder.gif

Sometimes if it doesn't seem like it's sitting flush with the board, I'll just push down on it with my tweezers and heat the pad up for the second. That always seats it nicely.

After all of the caps in a given group are tacked down on one side, and I've double-checked that they are installed correctly, I add solder to the other side. Of course, I HAD to bump the board while recording this one but whatever.

Solder 2.gif

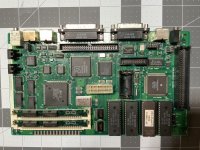
And here's the board, all done! Will it work? I actually have no idea. I'm going to plug it in right now.

IMG_0511.jpg

aaaaaaaaaaNNNNDD it works! Not only does it boot up, but the sound is much louder! I didn't think that sound issues would be due to bad caps on the logic board, but I guess I was wrong! Recapping the analog board brought the sound back, and recapping the logic board got the volume up to normal levels.

IMG_0512.JPG

And with that, I'm going to call it a night. Don't worry, there's still a lot more to do on this machine. We need to deal with the probably-stuck hard drive, get a PRAM battery installed, and we haven't even touched the keyboard and mouse!

 
Last edited by a moderator:
Top