• Updated 2023-07-12: Hello, Guest! Welcome back, and be sure to check out this follow-up post about our outage a week or so ago.

IIsi no sound or video

jlindsay26

Well-known member
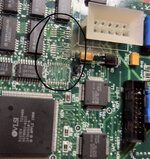
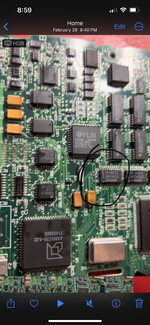
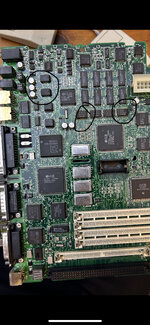
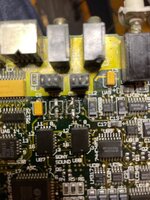
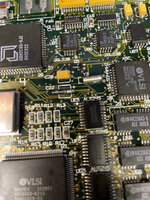
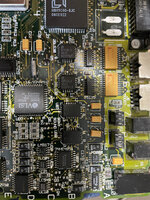
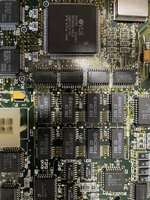
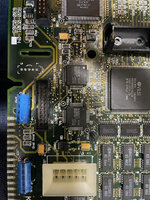
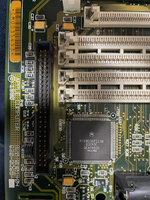
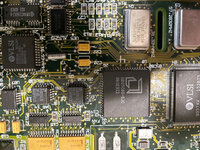
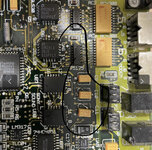
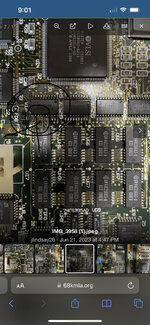
Decided to do a bit of recapping this weekend recapped a color classic logic board that wasn't boot success. recapped an SE/30 logic board with low sound success but in the process and with a little help determined that the analog board need to be recapped. Next up was a IIsi that wouldn't power on recapped the logic board and power supply now it starts from the keyboard power button powers my bluescsi and when I insert a floppy disk it reading but no video or sound. I'm using a Apple 15 multiscan display it work test on my cube using an adapter and 4megs of memory from my pile of 30 pin simms. Figure I ask if there's anything I should be looking at first
thanks in advance.
 

imactheknife

Well-known member
Check the legs / pads on these chips.
 

Attachments

  • 073ABFF8-22F0-4C0D-BECC-B9D78985D97E.jpeg
    073ABFF8-22F0-4C0D-BECC-B9D78985D97E.jpeg
    1.2 MB · Views: 26
  • 4CB282ED-964E-49BB-AEBF-9A8121A9F802.jpeg
    4CB282ED-964E-49BB-AEBF-9A8121A9F802.jpeg
    2.5 MB · Views: 20
  • BAACF285-DB08-4A7C-A353-3B67D9061501.jpeg
    BAACF285-DB08-4A7C-A353-3B67D9061501.jpeg
    3.1 MB · Views: 21

jlindsay26

Well-known member
Check the legs / pads on these chips.
Thanks for the tip, I see signs of cap goo any tip for clean I did IPA and a Q-tip and it help a bit, but I still see residue. It doesn't look like any of the pins have separate from the pads but I'll be honest my eyesight isn't as good as it use to be. While I was taking a second stab at cleaning the voltage regulator by the caps in the second image pop off luckily I didn't lose it so I solder it back on. I going to take a look at a battery bombed IIsi board I have tomorrow and see if any of those chips are in better shape maybe start trying to swap them.
 

imactheknife

Well-known member
Thanks for the tip, I see signs of cap goo any tip for clean I did IPA and a Q-tip and it help a bit, but I still see residue. It doesn't look like any of the pins have separate from the pads but I'll be honest my eyesight isn't as good as it use to be. While I was taking a second stab at cleaning the voltage regulator by the caps in the second image pop off luckily I didn't lose it so I solder it back on. I going to take a look at a battery bombed IIsi board I have tomorrow and see if any of those chips are in better shape maybe start trying to swap them.
I have had some nice easy fix iisi, and some nasty iisi that took a lot to fix. Sometimes you do have to pull chips off and clean. Not always a quick recap unfortunately! Keep us posted
 

jlindsay26

Well-known member
I have had some nice easy fix iisi, and some nasty iisi that took a lot to fix. Sometimes you do have to pull chips off and clean. Not always a quick recap unfortunately! Keep us posted
Thanks I think I start by harvesting the the nicest chips from the one you circle off the damaged board and then start swapping them in I'll be honest I'm ok at soldering not great so will see how it goes. Given the condition of the power supply I'm happy that appear to be working I measure the voltage at the hard drive power connect and it was just over 12 and 5 volts. It would be nice to get this working but will see.
 

jlindsay26

Well-known member
I have had some nice easy fix iisi, and some nasty iisi that took a lot to fix. Sometimes you do have to pull chips off and clean. Not always a quick recap unfortunately! Keep us posted
decided to work on this a bit tonight took a few of the ram chips off the damage board. Reflowed solder on the chips you circled figured it's a baby step to trying to pull and resolder them back on. After that I start checking continuity on the caps and found three that didn't have continuity to there test points C10, C11 and C22 little scraping and solder got those fixed. Figure I'll try powering up again in a bit, fingers crossed.
 

Attachments

  • IMG_3955.jpeg
    IMG_3955.jpeg
    62 KB · Views: 19

joshc

Well-known member
Are you able to take better / higher quality close-up photos of your board? I will check over them to see if I can spot anything useful.
 

jlindsay26

Well-known member
Thanks for the offer, not sure that I can get much better picture just using camera phone, but here are a few more photos. Looked at the board for a few minutes at lunch and noticed that C21 had lifted away from the board on the negitive side and took the pad with it put a piece of a capacitor leg down to get continuity to the test point and ground.
 

Attachments

  • IMG_3956 (1).jpeg
    IMG_3956 (1).jpeg
    487.9 KB · Views: 19
  • IMG_3957 (1).jpeg
    IMG_3957 (1).jpeg
    567.8 KB · Views: 16
  • IMG_3958 (1).jpeg
    IMG_3958 (1).jpeg
    592.7 KB · Views: 14
  • IMG_3959 (1).jpeg
    IMG_3959 (1).jpeg
    573.1 KB · Views: 12
  • IMG_3960 (1).jpeg
    IMG_3960 (1).jpeg
    523.4 KB · Views: 10
  • IMG_3961 (1).jpeg
    IMG_3961 (1).jpeg
    564.6 KB · Views: 15

jlindsay26

Well-known member
checked for continuity on all the caps noticed a broken trace on C36 and C9 doesn't seem to have continuity to it's test point felt like I check earlier and it did but this time I took notes going try fixing these and see what happens. After that I guess I start looking harder at the memory and sound chips
 

imactheknife

Well-known member
Check your solder on the three caps by sound chips. Are you cleaning pads really well before putting new caps on? Looks like a little to much solder, try using less if possible. The other picture shows how corroded the legs can be on those 245 chips. If you pull off any chips check traces that might be below as well
 

Attachments

  • DAE90DA8-8FF4-4AEF-9C04-AFFE0E9E512C.jpeg
    DAE90DA8-8FF4-4AEF-9C04-AFFE0E9E512C.jpeg
    1.3 MB · Views: 15
  • 49FA4D69-EB36-44AC-B953-B96EB76B8F06.jpeg
    49FA4D69-EB36-44AC-B953-B96EB76B8F06.jpeg
    2.6 MB · Views: 17

joshc

Well-known member
Remove the SONY sound chips and clean under them with fresh solder/wick/IPA. The legs look like they may still have electrolytic leakage on them.
 

jlindsay26

Well-known member
Forgot it mention this got some low melt solder to help with removing chip pull the memory closest to the caps and sound chips clean up put it back together and now I have a happy IIsi. Thank you to everyone for give their advice. Been very busy tinkering and it been fun fixing and getting these old Macs up and running.
 

JC8080

Well-known member
Forgot it mention this got some low melt solder to help with removing chip pull the memory closest to the caps and sound chips clean up put it back together and now I have a happy IIsi. Thank you to everyone for give their advice. Been very busy tinkering and it been fun fixing and getting these old Macs up and running.
Nice to hear an IIsi success story! I have battled two of my own - one defeated me, the other one was a successful repair. They are finicky machines.
 

imactheknife

Well-known member
Forgot it mention this got some low melt solder to help with removing chip pull the memory closest to the caps and sound chips clean up put it back together and now I have a happy IIsi. Thank you to everyone for give their advice. Been very busy tinkering and it been fun fixing and getting these old Macs up and running.
Excellent:) good job!
 

jlindsay26

Well-known member
Excellent:) good job!
Thanks I’ve been on a bit of a roll getting things working. Probably happiest that my Mac portable is running now. Been using Macs since the early nineties I think the fixing aspect of getting into these vintage Mac has been the most fun, honestly haven’t sent a lot of time using the other then installing OS and running benchmarks.
 
Top