• Updated 2023-07-12: Hello, Guest! Welcome back, and be sure to check out this follow-up post about our outage a week or so ago.

PowerBook 1400 Restoration: Redux

LaPorta

Well-known member
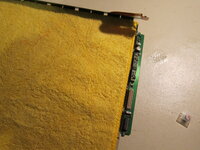
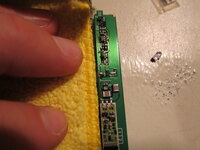
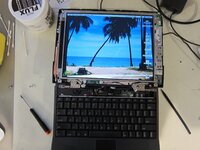
The next part is delicate: you can damage the very small connections between the upper circuit board and the LCD if you put too much pressure. Flip up the upper circuit board out of the way, and lift the back of the LCD housing away from the display panel itself:
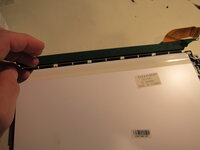
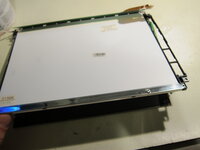
IMG_5929.JPG

IMG_5930.JPG

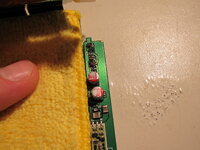
That will leave you with the bare panel and board containing the capacitors:
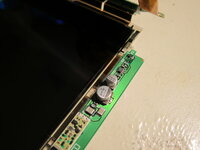
IMG_5931.JPG
 

LaPorta

Well-known member
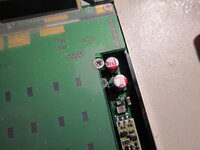
Next, I set a lint-free cloth (previously grounded to release any static) over the panel. I did this because I had a previous issue where debris had gotten onto the LCD. This helps to prevent that from happening when you are soldering/desoldering. One more thing I want to make extremely clear: DO NOT OVERUSE ALCOHOL WHEN CLEANING THE CAPACITOR PADS. The reason is this: these caps are so close to the LCD, it is easy for the LCD to wick the alcohol into the space between the LCD and the glass, causing a stain on the image when you look at it. I later found that I could separate those layers and clean it up, but you don't want to go through all of that, as it can introduce dust and debris into the image as well.

Then, replace the caps as you would any others. Lastly, replace everything in reverse order and you will see the caps shiny and new where the others previously were.

IMG_5932.JPG

IMG_5933.JPG
IMG_5935.JPG

IMG_5936.JPG
 

LaPorta

Well-known member
I tested the LCD prior to reassembly. I would do this because the less times you assemble-reassemble those fragile plastic clips on the outer shell, the better:

IMG_5937.JPG
 

LaPorta

Well-known member
That is everything for now. I think I will put the battery rebuild into a separate thread.
 

LaPorta

Well-known member
What does solid polymer mean? Do some tin can capacitors not have liquid electrolyte inside? I thought they were all fluid filled?
Solid Organic Polymer Electrolytics. Look them up: use a solid material instead of liquid electrolyte. Won't leak.
 

3lectr1cPPC

Well-known member
Great tutorial on getting the LCD panel disassembled. Will come in great handy when I get mine apart for recapping.
 

croissantking

Well-known member
Solid Organic Polymer Electrolytics. Look them up: use a solid material instead of liquid electrolyte. Won't leak.
Wow! Ok - everyone has been talking about using tantalums to avoid leakage but we can achieve this with solid polymer electrolytics too, and keep the authentic aesthetic. I guess this is a little-known fact among the retro community.
 

CC_333

Well-known member
Wow! Ok - everyone has been talking about using tantalums to avoid leakage but we can achieve this with solid polymer electrolytics too, and keep the authentic aesthetic. I guess this is a little-known fact among the retro community.
I don't think they're necessarily little-known, but their use is probably less common because (at least in my experience) tantalum caps have generally been cheaper than the organic polymer ones.

So, if one wants to spend top dollar for good caps that look like the originals and won't leak, than organic polymer is the way to go. Otherwise, if one doesn't care how the caps look, tantalums are just as good and they're more affordable.

Ceramic caps are somewhere in the middle. I don't know much about them other than they tend to be non-polar, which can make them a bit easier to install (which is good, because they're usually quite small).

c
 

3lectr1cPPC

Well-known member
I don’t recommend ceramic caps most of the time because in many cases they just won’t work well. Their capacitance can vary based on applied voltage which is bad in many circuits, LCD screens being a great example. I use tantalum caps where possible, electrolytics where that fails. Ceramics only when nothing else will fit because frankly I don’t know enough about circuits to know when not to use them.
 
Top