• Updated 2023-07-12: Hello, Guest! Welcome back, and be sure to check out this follow-up post about our outage a week or so ago.

Performa 476 Restoration

PotatoFi

Well-known member
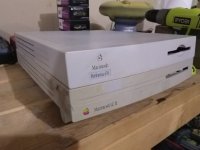
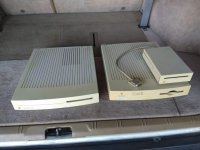
I picked up a floppy enclosure, LCII, and Performa 476 on Craigslist! In this thread, I'll focus on the restoration of the Performa 476.
IMG_20200310_183300.jpg

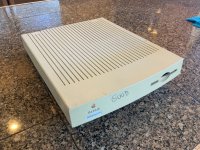
At first glance, it doesn't look it, but this thing is pretty dirty!
IMG_0454.jpg

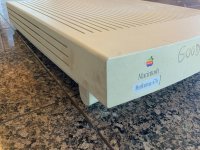
And of course, someone wrote "GOOD" on it with a Sharpie. It was good until you did that!
IMG_0455.jpg

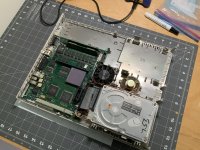
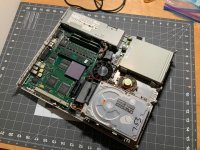
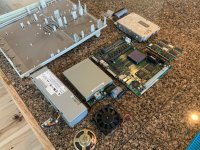
I managed to get everything apart without breaking any clips. My hope is to put it back together once, so I don't risk breaking anything more than I have to. It does appear to have the original 230 MB hard drive.
IMG_0458.jpg

First, I want to Retrobrite the case. This will be tricky for a few reasons:

1. It's not sunny right now.

2. I'm completely out of liquid hyrdrogen peroxide... and because of Coronavirus, I want to stay home. I'm not sure that the beauty supply store would have what I need anyway, given the current situation. I do have 40 volume cream... I'll have to work with that.

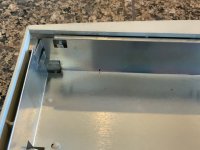
I needed to get the Apple badge out (retrobrite can cause it to fade), so I drilled a tiny hole in the metal shielding to push the badge out from the back. No shot of the hole here, but here's where I made the mark.
IMG_0459.jpg

Time for cleaning! As usual: a toothbrush and dish soap are my weapons of choice.
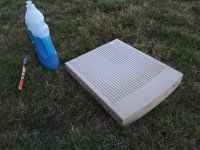
IMG_20200322_180827.jpg

I went as far as I could with the soap before switching to alcohol to work on that Sharpie "GOOD".
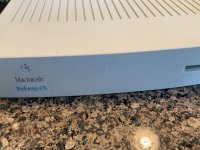
IMG_0463.jpg

And this is where I ran into problems. Normally, I'd grab some baking soda... but guess what we're out of? No problem, I'll go to the store and... nope, can't do that either. I ended up waiting a couple of days before one of our neighbors made a run to the store and asked if we needed anything. They left baking soda in a brown paper bag on our doorstep.
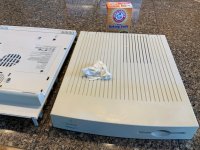
IMG_0464.jpg

Baking soda and a wet paper towel does remove a tiny, tiny bit of texture... but it works great for black marks and Sharpies. All clean now!
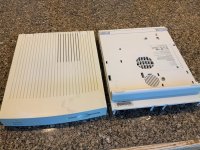
IMG_0465.jpg

As you can see, the bottom is pretty good, but the sides and top have varying degrees of yellowing. I decided to focus on the bottom first, so I could test retrobrite methods and get the machine back together sooner, as the top isn't specifically needed for assembly.

No pictures of this part, but I first decided to do my indoor retrobrite method: a CFL UV "lizard" lamp in a cardboard box lined with tin foil, hydrogen peroxide cream, and plastic wrap. I did one 4-hour treatment, but abandoned the idea going forward for a couple of reasons:

1. We're running low on plastic wrap, and again, I can't go out to get more

2. I'm running a bit low on hydrogen peroxide cream

3. This can cause streaking if you're not careful... and I don't want to risk it

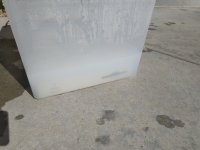
So I decided to change plans. I filled a container with hot water and added a fish tank heater that should be able to maintain 92°F. Initial temp was about 110°F. Then, I added 1.5 cups of hydrogen peroxide cream, and mixed it in with a large whisk from the kitchen. Here you can see the water without the peroxide (it looks somewhat cloudy now, but you can see through it, sorta).

On the container is a plastic lid (to avoid electrocution), and above that, the CFL UV lizard lamp.
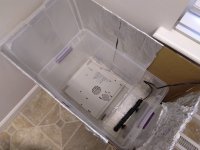
IMG_20200325_082853.jpg
 

After 2 hours, I don't see a difference, but this method is probably very "low and slow". I might move it out into the sun if we get any today.

Next, we'll recap the logic board! More on that soon.


PotatoFi

Well-known member
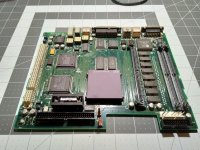
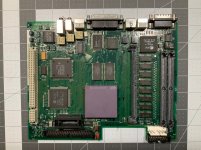
Time to recap the logic board! Of all of the logic boards I've recapped, this is one of the cleanest.

IMG_20200324_215633.jpg

First, I removed this thing:

IMG_20200324_215716.jpg

For the 5th time, I used the "twist" method. So far, I've only lifted one pad doing that so far. On this board, things went perfectly.

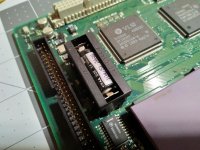
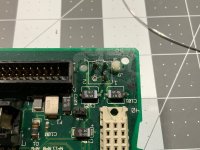
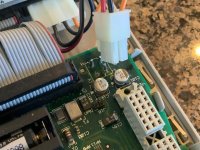
When I disconnected the hard drive power, it pulled out one of the "pins". On closer inspection, I realized that the Molex connector was completely gone, and someone had soldered something in place to work as pins. What a mess. 

IMG_0469.jpg

I think the replacement I need is this part. I'll order one along with a set of capacitors for the power supply shortly.

After twisting all of the old caps off, I fired up my soldering iron and heated up the pads, knocking the leftover legs off one at a time. After that, I went over each pad with desoldering braid to clean it up. They cleaned up very easily. Usually, I have to apply flux and burn through a bunch of corrosion but that wasn't the case here. After desoldering braid, I clean all of the pads with cotton swabs and isopropyl alcohol.

Here you can see most of the caps removed, but I haven't cleaned up the pads yet. Image above with the power connector shows cleaned pads.

IMG_0467.jpg

Next, it was time to solder on caps. Here are prefilled Digikey shopping carts with the capacitors that I used:

Quadra 605/Performa 475/Performa 476 Logic Board Capacitors: https://www.digikey.com/short/zjhq02

Astec Power Supply Capacitors: https://www.digikey.com/short/zjhq1d

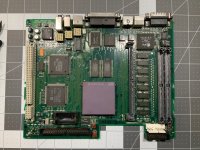
As usual, my process is to heavily tin one pad, heat the pad, slide the new capacitor into place, and remove heat (and then tweezers) when I'm satisfied with placement. Then, after double-checking polarity, I solder down the other side. Here are the results:

IMG_0471.jpg

One thing I like about these specific caps is that they look almost factory. You can barely tell that they were installed later. C19 is an example of a factory cap.

IMG_0470.jpg

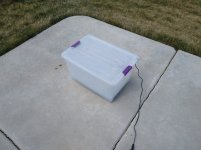
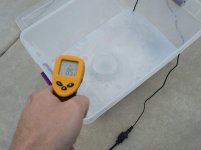
Before I end this update, I made a bit more progress with the RetroBrite. After most of the day sitting indoors maintaining about 100°F, I moved the container outside, where ambient temp was 50°F. In sunlight, it would easily maintain 100°F, but if there was cloud cover for a significant amount of time, it would dip to 85°F. I think the $13 fish tank heater did a pretty good job! I think this is a viable solution for RetroBrite on cold but sunny days.

IMG_20200325_143855-1.jpg

IMG_20200325_185356.jpg

After most of the day indoors under the UV lamp, and about 2 hours of hit and miss sunlight outside, I pulled the bottom out and rinsed it. It's about 95 percent done, which is where I think I will stop; I expect diminishing returns since my hydrogen peroxide is pretty thin and also cloudy since it's cream mixed with water.

I decided to bring the container back inside (ambient temp 68°F in the house), put in the top half of the case, and leave it under the UV lamp all night.

I'll report back tomorrow!


PotatoFi

Well-known member
After leaving the bottom half of the case under the UV lamp all night, I decided that it was done. Time to switch to Retrobrite for the top. I started out with it outside:

IMG_20200326_115620.jpg

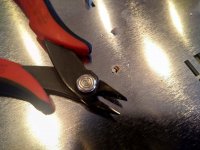
Cloud cover was hit-and-miss, so I ended up leaving it under the UV lamp inside all night. After a full night, I was very sad to find that the metal shield inside had started to rust. I'd been warned about this here on the forums before but had forgotten. I didn't get a photo of the rust, but you can see a bit of it when I used flush cutters to remove the shield.

IMG_20200326_164727.jpg

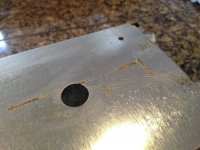
Anywhere that the plastic touched metal was the first to rust.

IMG_20200326_164920.jpg

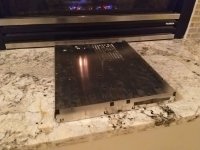
To address the rust, I soaked the whole thing in vinegar in a cookie sheet for a few hours (turning it on each side to get everything submerged for awhile), before scrubbing the rust with a toothbrush. Then I rinsed with water and left it in front of the gas fireplace to dry.

I'm glad I learned my lesson on this Performa 476... this is a bit of a "test run" before I restore the LCII, which is slightly more important to me than the Performa, because it seems like the quintessential "pizza box" Mac to me.

IMG_20200326_222706.jpg

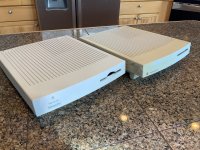
But how about the Retrobrite? Compared to the LCII, this looks perfect! The reality is that it's not - there are a few spots that have a tiny bit of yellow, but I think I'm going to stop while I'm ahead. It looks uneven in this photo, because it's still slightly damp, but don't worry, it looks pretty consistent in color when it's dry.

IMG_20200326_211401.jpg

Here it is next to the LCII again:

IMG_0472.jpg


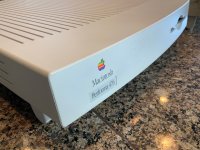
The red band on the badge is a bit faded. When I bought it, I could tell that it was in direct sunlight whenever the seller's garage was open. I wonder if anyone will ever make reproduction badges?

Sadly, the "GOOD" is still visible. Ugh.

IMG_0475.jpg

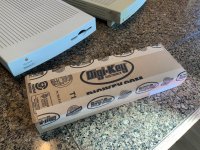
I thought this was as far as I'd get for the weekend, but look what arrived! I'm always shocked at how fast Digikey gets parts to me for $4.99 in shipping.

IMG_0476.jpg

I don't have any photos, but I cleaned up the shield and reinstalled it. It seemed to snap back into place, and didn't need any hot glue on the old plastic posts that I clipped off with the flush cutters.

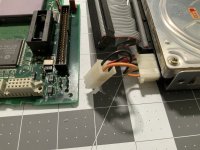
I didn't show this earlier, but when I took it apart, I found this awful "fix" for the hard drive power connector. The connector broke at some point, so someone soldered in these awful "pins" to fix it. Gross! Part of my Digikey order was a new connector to replace this. Figuring out which connector to buy was MUCH more difficult than soldering the new one in, which I'll show you now.

IMG_0457.jpg

Testing to make sure I have the connector oriented correctly. The anchors on each side only go in one way, but I wanted to be sure it was all correct before soldering it down.

IMG_0482.jpg

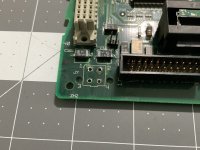
Next I desoldered the old "pins", and cleaned the holes out with desoldering braid. Also, check out those gorgeous capacitors!  :p

IMG_0483.jpg

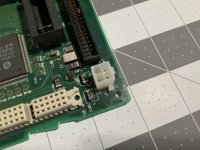
And there's the new connector installed! That looks so much better. Even though I'll probably end up putting a bus-powered SCSI2SD in this at some point, I couldn't stand it not being "right". I also didn't want to have to remove the logic board again either for fear of breaking the plastics. And besides, that hard drive might still work!

IMG_0484.jpg

And here it is, right now. Tonight, I'll clean the floppy drive out and recap the power supply (new caps came in that box from Digikey). I probably can't test it, as I don't have a VGA display other than my 2009-era Sharp Aquos TV, which is a bit picky about input resolutions and refresh rates. @sclements is sending me a VGA monitor, but I'll probably have to wait until it arrives to see if this thing works.

IMG_0485.jpg

 
Last edited by a moderator:

joshc

Well-known member
Great work so far, keep it up!! You can't beat a pizza box Mac :)

I have an LC II and a LC 475 that both need the same treatment. I have a gap coming up between jobs soon so I hope to start tackling some of these projects soon.


PotatoFi

Well-known member
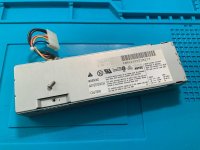
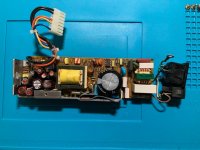
Last night there were two more things to tackle: the power supply and the floppy drive. First, the power supply. To keep track of screws, I write a tiny number next to each screw hole with a Sharpie to keep track of where they all go.

IMG_0486.jpg

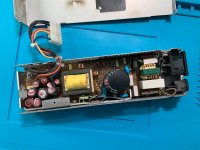
Uh-oh. It immediately became apparent that this Astec PSU is not the same as the Astec PSU that I recapped for @sclements last week. I ordered an identical set of caps... and they might not work here.

IMG_0487-1.jpg

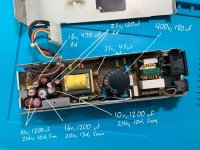
Yeah, nope, they're not the same. I used my iPad Pro + Pencil to take note of what each caps specifications are, including diameter, height, and lead spacing.

IMG_0487.jpg

A few of the capacitors ended up working, including the big chokercap(tm), so I replaced what I could and left the rest. The good news is that there was no bulginess or cap juice anywhere. The new caps don't have red Sharpie marks on the tops.

IMG_0492.jpg

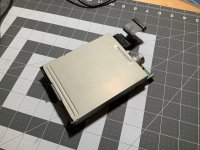
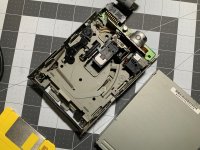
Next, the floppy drive.

IMG_0493.jpg

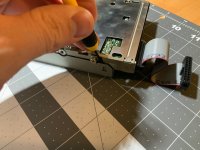
A screwdriver released the little clips on the sides.

IMG_0494.jpg

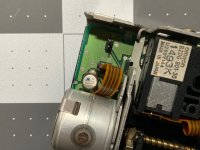
What the heck is this?! Ugh, more SMD electrolytic caps. If the drive ever stops working, I know where I'll look first. While it looks pretty corroded, I hit it with some alcohol and it looks the same. I think it's fine.

IMG_0495.jpg

I'm very unfamiliar with these drives, so I decided to not tear it down. I hit it with some compressed air, and cleaned it a bit with cotton swabs and alcohol where I could. I cleaned the gunk off the leadscrew for the read/write head, and added a drop of Dupont Silicon Lubricant, and reassembled it.

IMG_0496.jpg

And here it is, completely reassembled and ready to fire up!

IMG_0497.jpg

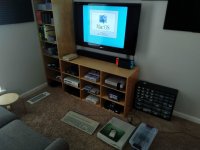
Now remember that I don't have a proper monitor for it, so I have to use my 2009-era Sharp Aquos LCD TV. It's very picky about input resolutions and refresh rates, so if it doesn't output 640x480, it probably won't work. I plugged everything in, fired it up and...

After a chime, nothing. No video.

No idea what could be wrong. I messed with the TV for about 15 minutes, because it wasn't showing any input signal at all (not even a warning about an incompatible signal), when suddenly it dawned on me...

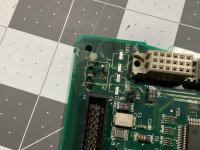
I'd forgotten the PRAM battery.

My buddy @sclements will laugh, because earlier that day, he'd tried to boot up his Quadra 605 and had no video. When he checked the PRAM battery voltage, it was flat. A fresh battery immediately fixed the problem. And here I was, only about 6 hours later with the same problem, and I couldn't figure it out. A fresh PRAM battery, and then:

IMG_20200329_132209.jpg

It works! So... that's it, this machine is basically done! Currently, it has System 7.5.3, 20 MB of RAM, and the original 230mb hard drive, which seems to be working fine. It looks like the last time it was touched was around 1999. There's a few spreadsheets, and someone's W-2 (complete with social security numbers, yikes). It was fun to poke around a bit to see where the machine came from - looks like it was used in some kind of healthcare business in a nearby city. I'm surprised that the hard drive exited that environment intact. I'm glad it did for the sake of preservation, but I think I'd like to completely wipe it and install a fresh operating system.

Future upgrades would be more RAM, and perhaps an Ethernet card. I think the hard drive is new enough that it might actually last awhile, so I'll hold off on a SCSI2SD.

So, the big question. Which OS should I install? Keep in mind that I have a System 6 machine in my collection (Macintosh Plus), a System 7.0 machine (Macintosh SE FDHD), a Classic II, an SE/30, and a PowerBook 170... so I'm leaning towards making this my "System 8.1" machine. Any thoughts?


mdeverhart

Well-known member
I suppose it depends on if you want to use it for anything in particular, or if you just want to have a System 8.1 machine. I had 8.1 on a Centris 650 back in the day (can’t remember how much RAM it had), and it was... fine. It definitely wasn’t fast. I’m planning on putting 7.5.5 (probably) on my current Centris 650 whenever I get around to reloading it.


PotatoFi

Well-known member
Quick follow-up: I had the machine running when we experienced an earthquake. We grabbed the kids and ran outside, while the machine and four 3D printers in my office kept running. A few minutes after the earthquake stopped, we were back inside, and settling down, the hard drive started making a horrible horrible noise! Sounds like R/W heads skating on the platters. Not sure if it was simply from a couple of hours of use, or if the earthquake got it, but now I need a SCSI2SD for this machine.  :lol:


Paulie

Well-known member
At least you're all safe. And to be fair, it was always a case of when, not if, the SCSI disk would fail, so the earthquake has just helped the process along a bit.


PotatoFi

Well-known member
At least you're all safe. And to be fair, it was always a case of when, not if, the SCSI disk would fail, so the earthquake has just helped the process along a bit.
Yes and yes!

 
Last edited by a moderator:
Top