• Updated 2023-07-12: Hello, Guest! Welcome back, and be sure to check out this follow-up post about our outage a week or so ago.

Macintosh SE Restoration

PotatoFi

Well-known member
Back in April of this year (2019), I picked up three compact Macs on Craigslist. Originally, I was doing a restoration thread with all three of them, but that was awhile ago, and it was a bit chaotic to write about all three. There's one Macintosh SE left to finish restoring, so I've decided to break it out into it's own thread. I also need to get this one done pretty quickly, as I've traded it for a 3D printer and need to deliver to my friend in a couple of weeks, when I'll be driving through the city he lives in. So much of what I do with these machines is based on my travel patterns!

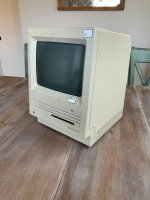
Here's a photo back from April when I got it. The one in question is in the center with the "Mac 4" sticker.

IMG_20190412_134928.jpg.b89f59764ec8394a6e3ba0f0889ff641.jpg

When I first received it, it was exhibiting a "sad mac" on boot. It came with a couple of 1mb 8-chip sticks of RAM, so I swapped them out with the four 256kb sticks that I pulled out of my SE FDHD, and that fixed the problem! No more sad Mac. Now, I have the standard list of things to do to get the machine fully restored:

  • Recap the analog board to promote general health and long-life
  • Clean analog and logic boards
  • Install battery tray and battery
  • Clean and retrobrite case
  • Clean and lubricate floppy drive


As of yesterday, I've received new caps for the analog board, so I'll tackle that straight-away. I've also ordered a new PRAM battery and tray (I don't remember if it needs a tray or not).

The real challenge, given the timeframe that I have to work with, is going to be getting the retrobrite done. In the past, I've done hydrogen peroxide cream in sunlight, but I've found that the cream is pretty risky as it can produce streaking. Cream under a UV lamp indoors is slower and safer (you can refresh the cream every 6 hours or so), but still not completely safe. The safest method I've found is full submersion in liquid hydrogen peroxide, but this works best outdoors on hot days. Right now... it's about 50 degrees outside. So here's what I'm going to try: I've ordered a fish aquarium heater that is supposed to hit 97 degrees. I doubt it can maintain that temperature outdoors, but I might test that with plain-ol' water in the driveway. If that doesn't work, I'll bring it indoors and see how hot it gets for potential use with a UV lamp. If THAT doesn't seem to work, I'll probably revert to using a UV lamp and hydrogen peroxide cream.

This will also serve as a bit of an experiment, as I have an SE/30 (HACK HECK'N YES ZOMG!!!!!) that needs retrobrite this winter as well.


LaPorta

Well-known member
I have seen in other recent threads that using oxyclean, water, and heat will

work and that the UV exposure is not necessary...this could work for you.

im going to try the submersion method in front of my wood stove...that will be a good 120 degrees right there.

 
Last edited by a moderator:

jessenator

Well-known member
oxyclean, water, and heat will work and that the UV exposure is not necessary
be careful  :sadmac:

FDysrbv.jpg.bdc9ec300b9ee7c1e87188a8a72832bc.jpg


I wasn't


jessenator

Well-known member
The bottom of the EKII is "normal." The mouse got way too bright and chalky

Also, not easily translatable, but the button got boogered, too. Somehow there was pressure "down" and it stuck in perma-click position. I kinda fixed it with a hot air gun and some experiments.

Also, the awkward corner that got missed part way through...

 
Last edited by a moderator:

PotatoFi

Well-known member
Okay, I'm back! And I have some good news: the restoration went flawlessly, and I successfully delivered it to my friend. Want to hear the whole story? Okay, here we go!

you've_got_mail.gif

Here's where we were last time I updated the thread.

IMG_0039.jpg

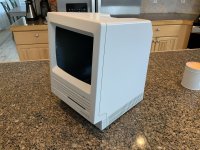
The machine was pretty dirty and had some stickers and old tape residue, but overall was in pretty great shape.

IMG_0043.jpg

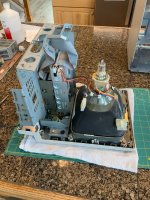
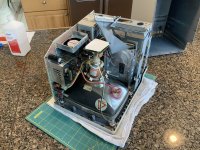
The first step was to pop the back off and discharge the CRT. I've done a lot of these black-and-white compacts now (Plus, SE, Classic II, and SE/30), and I always let the machine sit with the power off for at least 4 hours before following the discharge procedure. I've never heard even a tiny snap - the bleeder resistors that the SE, Classic II, and SE/30 have apparently make quick work of that residual current. I don't use an in-line resistor either; just a wire with alligator clips and a long screwdriver.

IMG_0047.jpg

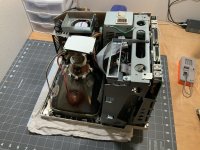
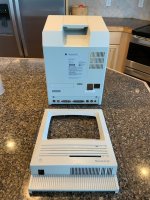
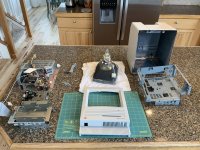
In about 5 minutes after the discharge procedure, the Mac looked like this. I'm getting REALLY quick at tearing these down!

IMG_0048.jpg

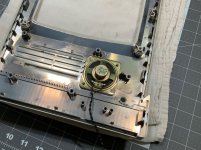
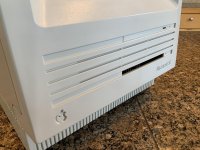
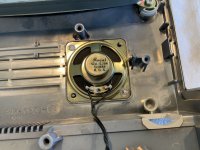
Now that it's all torn down, I want to get started on retrobrite right away, since I literally had less than 48 hours to complete this restoration. The speaker on the front needs to come out, but it's literally melted into place in two corners.

IMG_0049.jpg

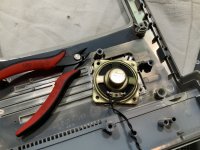
My $5 Hakko flush-cutters make quick and clean work of that. I'll hot-glue the speaker back into place later on.

IMG_0050.jpg

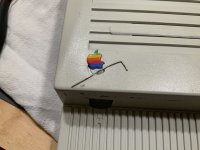
The next step to prep for retrobrite is to pop out the Apple logo. I ruined one of these on a keyboard once... the red bleached to white during the retrobrite process. I think it was the heat and sunlight that got it.

I remove them with my special wireless router reset tool, e.g. a paperclip. I gently push from the back to remove the badge. I've only damaged one like this when I used something too sharp, and it threatened to poke through the color. The paperclip is blunt so it works fine.

IMG_0051.jpg

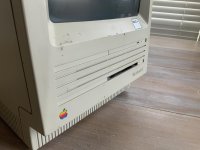
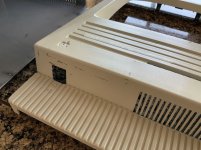
Let's have one last look before we start cleaning.

IMG_0052.jpg

I've seen much worse!

IMG_0053.jpg

Beneath the sticker is a nice sneak peek at what the plastic originally looked like. I do know that this machine came from Albertson College here in Idaho. I believe the school has changed names now.

IMG_0054.jpg

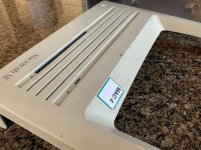
This picture isn't great... but it does technically meet the "post-cleaning" photo requirement. I cleaned these the usual way: dishwasher soap, a toothbrush, and a bunch of elbow grease. For stubborn sticker and tape residue, I used isopropyl alcohol on a paper towel. This is probably one of the cleanest Macs I've restored, it just didn't take much work!

IMG_0055.jpg

I wanted to get retrobrite started as quickly as possible due to my time constraints. If you've seen my restorations before, you know that I break retrobrite up into a few main methods:

  1. Full submersion in liquid in sunlight (fast, safe)
  2. Cream covered with plastic wrap in sunlight (fast, very risky)
  3. Cream covered with plastic wrap under a UV lamp (slow, slightly risky)

Since winter is definitely here in Idaho, #1 is basically out. When the liquid is diluted with some water in a big plastic bin, heat seems to be very important for making stuff happen. #2 would work, but I find this method to be very risky; anything that dries out under the plastic wrap bleaches too bright, and can't be removed. As a result, I avoid this method at all costs. #3 works well, but takes at least 24 hours and can cause minor but correctible marbling if your peroxide cream isn't even. This happened on my SE FDHD, which had some brown "blotchy" stuff on the side that I was able to almost completely correct with more hydrogen peroxide cream and time under the UV lamp.

I experimented with method #1 a bit by purchasing a very cheap $15 aquarium heater that claimed it could get up to 97°F, and putting that in my retrobrite container (just with plain water for the test). Sitting in the driveway, I could only hit about 80°F after a few hours, but I didn't test much more than that. I'm keeping this trick in my back pocket, but for now, I decided to go with the tried and true method #3, which is:

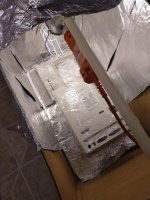
  • A CFL "lizard lamp" from the pet store, which emits UV light
  • A large cardboard box lined with tin foil and a way to suspend the lamp
  • "Salon Care" 40-proof hydrogen peroxide cream from Sally Beauty, evenly and liberally brushed on with a paintbrush
  • Parts covered with plastic wrap, as airtight as feasible

I exposed the parts for 8 hours one day, refreshed the cream before bed, and then let the parts for overnight. So 8 hours, refresh, then 12 hours. I think that refresh in the middle is super important, as it helps you keep things evenly exposed to hydrogen peroxide.

IMG_20191109_215135.jpg

With the retrobrite doing it's thing, it was time to turn my attention to the floppy drive.

IMG_0056.jpg

After a quick visit to the air compressor in the garage, it looked like this. I always avoid hitting the drive with full air pressure, especially around the read/write heads and delicate flex cables.

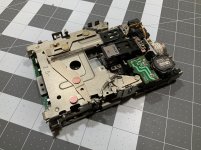
IMG_0057.jpg

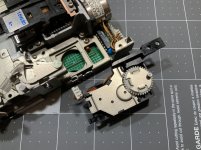
I always pop out the eject motor first to make sure there's no old grease in there that could cause it to bind and break a gear. It's just two 2.5mm screws, but I always apply LOTS of downward force on the screws when I break them loose; I've rounded off the phillips heads before.

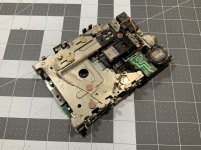
IMG_0059.jpg

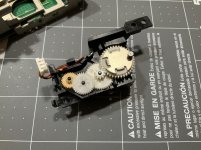
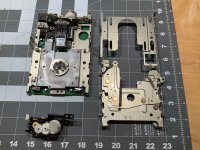
After carefully releasing a couple of the little black clips, the internals are revealed. I swabbed them out with some alcohol, but overall they looked pretty good. I added a couple of drops of Teflon Silicone Lubricant. I've been using this stuff on my 3d printer linear rails for like... 8 years now. Works great for stuff like this.

IMG_0060.jpg

After referencing the drive disassembly guide by What's Up TK Here again, I took apart the drive. Sometimes I go crazy with Isopropyl alcohol in here, completely hosing down the drive, scrubbing with a toothbrush, and rising with more alcohol... but this time I just swabbed things out with q-tips. Then, I lubricated stuff with more Dupont Silicone lubricant, reassembled the drive, and checked it for smooth operation with a bad floppy disk.

IMG_0061.jpg

The next morning, I pulled the case out of the UV box, removed the plastic wrap, and cleaned off the peroxide cream, and...

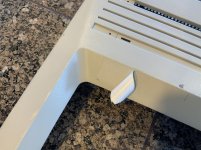
IMG_0062.jpg

Beautiful. Retrobrite is done on this machine! I always use the plastic underneath the Apple badge as a control, and the difference here is super duper marginal.

IMG_0063.jpg

Time for reassembly!

IMG_0064.jpg

A couple dabs of hot glue hold the speaker in place.

IMG_0065.jpg

CRT, then the chassis, then the drives... I did hit the CRT with some Windex before installing it.

IMG_0066.jpg

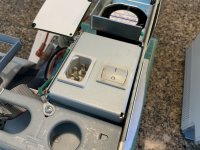
Next, the analog board!

IMG_0067.jpg

HEY. What about that analog board recap that I promised?! Well... I'm out of time. Fortunately, my friend who is getting the machine is fully capable of pulling the board and sending it to me for a recap if needed.

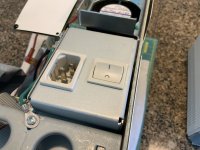
Ew, the power switch is gross. Can't have that.

IMG_0068.jpg

Ah, much better! I may have got a bit overzealous with the alcohol and scrubbing though. Easy to do.

IMG_0069.jpg

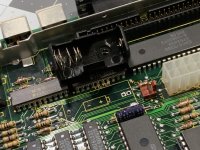
We're getting close... but another thing this machine needs is a new battery and battery tray. I bought both from RetroFixes.com. They have great prices, fast shipping, and great customer service. Here's the new tray, almost ready to go in:

IMG_0070.jpg

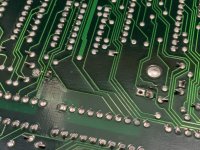
...and here it is soldered from the bottom. It doesn't matter which pads you use on each end, as each respective end is connected. I'm not the best at soldering, but I can get the job done.

IMG_0071.jpg

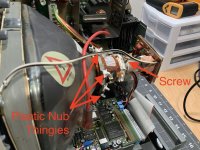
I finished reassembly and powered the machine on to do some testing, and was reminded that the CRT was slightly crooked. I decided to risk my life to fix this problem by touching a CRT while it was on.

YEP. TOUCHED A LIVE CRT. AND SOMEHOW, I DID NOT DIE.

I didn't get any exact photos, but here's the process that I used.

  1. I powered the machine off and unplugged it.
  2. I loosed the Phillips screw that clamps the yoke onto the tube, and made sure I could carefully rotate the yoke (see photo)
  3. I powered the machine back on.
  4. Touching only the plastic nub thingies, I carefully rotated the tube until the picture was straight (see photo).
  5. I powered the machine back off.
  6. I carefully snugged up the yoke clamp.
  7. Powered the machine back on to verify that it was correct.

IMG_0046.jpg

At this point, all that was left was to wipe the hard drive, install System 7, get LocalTalk working, and load up a bunch of software!

IMG_0076.jpg

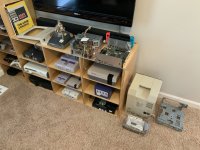
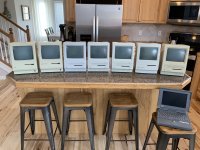
Sadly, I didn't have time to get a real "post-restore" photo shoot done, but I did have time for this photo. The amount of Macs in my house had peaked, so I wanted to take the opportunity to get a picture of all of them. Sadly, I forgot about a friend's SE SuperDrive that is out in the garage!

IMG_0077.jpg

Going from left to right:

  1. Plus, originally a 128k. Has a bad analog board or flyback. Retrobrite in early 2019, beige case though.
  2. Plus, completely works. Need to sell it. Retrobrite in early 2019, also beige.
  3. The Macintosh SE in this thread. Gone now, with my friend.
  4. Another Macintosh SE, retrobrite mid-2019. Delivered to another friend. 
  5. My prize SE FDHD. My very first Mac, but I've barely had it for a year. Retrobrite in December 2018. It has re-yellowed just a bit... but I still think the retrobrite was totally worth it!
  6. Classic II. Retrobrite a couple months ago. Was super yellow. Has re-yellowed a little bit, but again, worth doing.
  7. My newest addition: an SE/30! I haven't got this one booting yet. Heck, I haven't even wiped it down. Full restoration coming on that one soon.
  8. My PowerBook 160! It also needs a restore, namely new caps. But it does boot and run!

Okay, that's it for this restoration! Thanks for reading. Looking forward to your comments and questions about the process!
 

quorten

Well-known member
Impressive restoration skills, I am but a novice when it comes to working on compacts Macs.

I see you're using a 1/2 AA battery socket.  Do you happen to know the kind of battery chemistry of the replacement battery you used?  For 1/2 AA batteries from my searches, there doesn't seem to be as many choices on battery chemistry and lithium thionyl chloride seems to be the most common chemistry.  Alas, that particular battery chemistry appears to have risks that the others don't have.


SE30_Neal

Well-known member
Okay, I'm back! And I have some good news: the restoration went flawlessly, and I successfully delivered it to my friend. Want to hear the whole story? Okay, here we go!

View attachment 30360

Here's where we were last time I updated the thread.

View attachment 30361

The machine was pretty dirty and had some stickers and old tape residue, but overall was in pretty great shape.

View attachment 30362

The first step was to pop the back off and discharge the CRT. I've done a lot of these black-and-white compacts now (Plus, SE, Classic II, and SE/30), and I always let the machine sit with the power off for at least 4 hours before following the discharge procedure. I've never heard even a tiny snap - the bleeder resistors that the SE, Classic II, and SE/30 have apparently make quick work of that residual current. I don't use an in-line resistor either; just a wire with alligator clips and a long screwdriver.

View attachment 30363

In about 5 minutes after the discharge procedure, the Mac looked like this. I'm getting REALLY quick at tearing these down!

View attachment 30364

Now that it's all torn down, I want to get started on retrobrite right away, since I literally had less than 48 hours to complete this restoration. The speaker on the front needs to come out, but it's literally melted into place in two corners.

View attachment 30365

My $5 Hakko flush-cutters make quick and clean work of that. I'll hot-glue the speaker back into place later on.

View attachment 30366

The next step to prep for retrobrite is to pop out the Apple logo. I ruined one of these on a keyboard once... the red bleached to white during the retrobrite process. I think it was the heat and sunlight that got it.

I remove them with my special wireless router reset tool, e.g. a paperclip. I gently push from the back to remove the badge. I've only damaged one like this when I used something too sharp, and it threatened to poke through the color. The paperclip is blunt so it works fine.

View attachment 30367

Let's have one last look before we start cleaning.

View attachment 30368

I've seen much worse!

View attachment 30369

Beneath the sticker is a nice sneak peek at what the plastic originally looked like. I do know that this machine came from Albertson College here in Idaho. I believe the school has changed names now.

View attachment 30370

This picture isn't great... but it does technically meet the "post-cleaning" photo requirement. I cleaned these the usual way: dishwasher soap, a toothbrush, and a bunch of elbow grease. For stubborn sticker and tape residue, I used isopropyl alcohol on a paper towel. This is probably one of the cleanest Macs I've restored, it just didn't take much work!

View attachment 30371

I wanted to get retrobrite started as quickly as possible due to my time constraints. If you've seen my restorations before, you know that I break retrobrite up into a few main methods:

  1. Full submersion in liquid in sunlight (fast, safe)
  2. Cream covered with plastic wrap in sunlight (fast, very risky)
  3. Cream covered with plastic wrap under a UV lamp (slow, slightly risky)

Since winter is definitely here in Idaho, #1 is basically out. When the liquid is diluted with some water in a big plastic bin, heat seems to be very important for making stuff happen. #2 would work, but I find this method to be very risky; anything that dries out under the plastic wrap bleaches too bright, and can't be removed. As a result, I avoid this method at all costs. #3 works well, but takes at least 24 hours and can cause minor but correctible marbling if your peroxide cream isn't even. This happened on my SE FDHD, which had some brown "blotchy" stuff on the side that I was able to almost completely correct with more hydrogen peroxide cream and time under the UV lamp.

I experimented with method #1 a bit by purchasing a very cheap $15 aquarium heater that claimed it could get up to 97°F, and putting that in my retrobrite container (just with plain water for the test). Sitting in the driveway, I could only hit about 80°F after a few hours, but I didn't test much more than that. I'm keeping this trick in my back pocket, but for now, I decided to go with the tried and true method #3, which is:

  • A CFL "lizard lamp" from the pet store, which emits UV light
  • A large cardboard box lined with tin foil and a way to suspend the lamp
  • "Salon Care" 40-proof hydrogen peroxide cream from Sally Beauty, evenly and liberally brushed on with a paintbrush
  • Parts covered with plastic wrap, as airtight as feasible

I exposed the parts for 8 hours one day, refreshed the cream before bed, and then let the parts for overnight. So 8 hours, refresh, then 12 hours. I think that refresh in the middle is super important, as it helps you keep things evenly exposed to hydrogen peroxide.

View attachment 30377

With the retrobrite doing it's thing, it was time to turn my attention to the floppy drive.

View attachment 30372

After a quick visit to the air compressor in the garage, it looked like this. I always avoid hitting the drive with full air pressure, especially around the read/write heads and delicate flex cables.

View attachment 30373

I always pop out the eject motor first to make sure there's no old grease in there that could cause it to bind and break a gear. It's just two 2.5mm screws, but I always apply LOTS of downward force on the screws when I break them loose; I've rounded off the phillips heads before.

View attachment 30374

After carefully releasing a couple of the little black clips, the internals are revealed. I swabbed them out with some alcohol, but overall they looked pretty good. I added a couple of drops of Teflon Silicone Lubricant. I've been using this stuff on my 3d printer linear rails for like... 8 years now. Works great for stuff like this.

View attachment 30375

After referencing the drive disassembly guide by What's Up TK Here again, I took apart the drive. Sometimes I go crazy with Isopropyl alcohol in here, completely hosing down the drive, scrubbing with a toothbrush, and rising with more alcohol... but this time I just swabbed things out with q-tips. Then, I lubricated stuff with more Dupont Silicone lubricant, reassembled the drive, and checked it for smooth operation with a bad floppy disk.

View attachment 30376

The next morning, I pulled the case out of the UV box, removed the plastic wrap, and cleaned off the peroxide cream, and...

View attachment 30378

Beautiful. Retrobrite is done on this machine! I always use the plastic underneath the Apple badge as a control, and the difference here is super duper marginal.

View attachment 30379

Time for reassembly!

View attachment 30380

A couple dabs of hot glue hold the speaker in place.

View attachment 30381

CRT, then the chassis, then the drives... I did hit the CRT with some Windex before installing it.

View attachment 30382

Next, the analog board!

View attachment 30383

HEY. What about that analog board recap that I promised?! Well... I'm out of time. Fortunately, my friend who is getting the machine is fully capable of pulling the board and sending it to me for a recap if needed.

Ew, the power switch is gross. Can't have that.

View attachment 30384

Ah, much better! I may have got a bit overzealous with the alcohol and scrubbing though. Easy to do.

View attachment 30385

We're getting close... but another thing this machine needs is a new battery and battery tray. I bought both from RetroFixes.com. They have great prices, fast shipping, and great customer service. Here's the new tray, almost ready to go in:

View attachment 30386

...and here it is soldered from the bottom. It doesn't matter which pads you use on each end, as each respective end is connected. I'm not the best at soldering, but I can get the job done.

View attachment 30387

I finished reassembly and powered the machine on to do some testing, and was reminded that the CRT was slightly crooked. I decided to risk my life to fix this problem by touching a CRT while it was on.

YEP. TOUCHED A LIVE CRT. AND SOMEHOW, I DID NOT DIE.

I didn't get any exact photos, but here's the process that I used.

  1. I powered the machine off and unplugged it.
  2. I loosed the Phillips screw that clamps the yoke onto the tube, and made sure I could carefully rotate the yoke (see photo)
  3. I powered the machine back on.
  4. Touching only the plastic nub thingies, I carefully rotated the tube until the picture was straight (see photo).
  5. I powered the machine back off.
  6. I carefully snugged up the yoke clamp.
  7. Powered the machine back on to verify that it was correct.

View attachment 30388

At this point, all that was left was to wipe the hard drive, install System 7, get LocalTalk working, and load up a bunch of software!

View attachment 30389

Sadly, I didn't have time to get a real "post-restore" photo shoot done, but I did have time for this photo. The amount of Macs in my house had peaked, so I wanted to take the opportunity to get a picture of all of them. Sadly, I forgot about a friend's SE SuperDrive that is out in the garage!

View attachment 30390

Going from left to right:

  1. Plus, originally a 128k. Has a bad analog board or flyback. Retrobrite in early 2019, beige case though.
  2. Plus, completely works. Need to sell it. Retrobrite in early 2019, also beige.
  3. The Macintosh SE in this thread. Gone now, with my friend.
  4. Another Macintosh SE, retrobrite mid-2019. Delivered to another friend. 
  5. My prize SE FDHD. My very first Mac, but I've barely had it for a year. Retrobrite in December 2018. It has re-yellowed just a bit... but I still think the retrobrite was totally worth it!
  6. Classic II. Retrobrite a couple months ago. Was super yellow. Has re-yellowed a little bit, but again, worth doing.
  7. My newest addition: an SE/30! I haven't got this one booting yet. Heck, I haven't even wiped it down. Full restoration coming on that one soon.
  8. My PowerBook 160! It also needs a restore, namely new caps. But it does boot and run!

Okay, that's it for this restoration! Thanks for reading. Looking forward to your comments and questions about the process!
Look great all together. A good Network game is needed lol


PotatoFi

Well-known member
Impressive restoration skills, I am but a novice when it comes to working on compacts Macs.

I see you're using a 1/2 AA battery socket.  Do you happen to know the kind of battery chemistry of the replacement battery you used?  For 1/2 AA batteries from my searches, there doesn't seem to be as many choices on battery chemistry and lithium thionyl chloride seems to be the most common chemistry.  Alas, that particular battery chemistry appears to have risks that the others don't have.
I used whatever is offered by retrofixes.com. Whenever I pass a Mac on to a friend, I give them a very strong warning about leaving the battery in for an extended period of time, but I figure any battery should be okay for 5 or 10 years, right? Interested to hear your thoughts.

Look great all together. A good Network game is needed lol
Yeah... will Bolo run on a black-and-white Mac?


SE30_Neal

Well-known member
I change batteries every 5/6 years to play safe but think 10 would be fine too.

not heard of Bolo if I’m honest, I’m sure macintoshgarden would have network games although It would have to be an early game to work on all machines you have.


quorten

Well-known member
Interested to hear your thoughts.
For 1/2 AA batteries, I would probably prefer the lithium manganese dioxide ("CR") chemistry over lithium thionyl chloride when available.  Although I did find one source online, I was hoping to be able to order the battery together with other components from the same supplier/store.  The standard/common chemistry for 1/2 AA is okay if you're careful.  But, if you have a preference for certain battery chemistries, it seems the best way is to do one of the retrofit mods to allow the use of a more common battery size.

Also, seeing the "Maxell bomb" damage photos, well I figure those must have been something like a lithium thionyl chloride battery with a missing/failed fuse that causes them to be so destructive.  Maybe their only failing was their fuse, a problem not replicated across other manufacturers of the same chemistry.


LaPorta

Well-known member
Bolo runs on a Mac Plus or better per the electronic manual. One of the greatest games ever. I had friends over my house in middle school during the summer, and we would play all day, only breaking for lunch.


SE30_Neal

Well-known member
Bolo runs on a Mac Plus or better per the electronic manual. One of the greatest games ever. I had friends over my house in middle school during the summer, and we would play all day, only breaking for lunch.
Sweet i’ll look that up, sounds like a trial is needed :)


LaPorta

Well-known member
As an aside, it also runs all the way through OS 9 on basically any machine. If you like it, and have an internet-connected newer Mac as such, let me know, we can play a game!


SE30_Neal

Well-known member
As an aside, it also runs all the way through OS 9 on basically any machine. If you like it, and have an internet-connected newer Mac as such, let me know, we can play a game!
it looks like a good game, i like tank games :)  i have 3 networked so going to give it a try 


SE30_Neal

Well-known member
Let me know. I would kill to play again. It's been years.
I will do. I’m Just waiting for a few 50pin scsi cables to arrive as i had stripped my system apart last weekend for its annual clean and To add in a few extra bits like scanner, external hhd, a few CD-ROMs, zip drive, printer, graphics tablet, joystick etc then realised I didn’t have enough cables but to late. So its sll unplugged until they arrive :(  I imagine next weekend now but looking forward to trying it out across my 3 machines. Should be a giggle

 
Last edited by a moderator:
Top