-
Updated 2023-07-12: Hello, Guest! Welcome back, and be sure to check out this follow-up post about our outage a week or so ago.
You are using an out of date browser. It may not display this or other websites correctly.
You should upgrade or use an alternative browser.
You should upgrade or use an alternative browser.
Macintosh Classic II Restoration
- Thread starter PotatoFi
- Start date
PotatoFi
Well-known member
Thanks, Sam!Well done sir! That's a beautiful walk through.
-Sam
Okay, time for another update. The very last thing to do on the Classic II itself before I restore the mouse and keyboard is to try to fix the hard drive. Before tearing it down, all I knew/could remember is that it wouldn't boot from it, but I did have a faint recollection that I couldn't hear the drive spinning up. Still, worth checking out!
Now first, no PotatoFi thread is complete without a ridiculous amount of over-engineering... so I present to you, my Completely Custom 3D-Printed Glove Box! It has a HEPA filter in the back, a vacuum cleaner attachment on the side, and portals that hold gloves in on the front. The idea is that you can plug in a vacuum cleaner and flip it on for a second to purge all of the dust before getting to work. I could do a dedicated thread about this build if anyone is interested. I did build it specifically for Macintosh hard drives... but I could see myself using it for working on Game Boy screens as well.
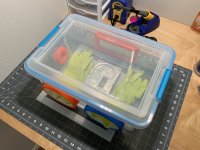
I'm going to attempt a hard drive repair per What's Up TK Here's video, in which he fills the drive with metal shavings and dust, but still manages to get his Mac booting! I figure that if he can do that in those conditions, I might be able to achieve success in my Glove Box (tm). I mean, the hard drive is dead, so what do I have to lose?
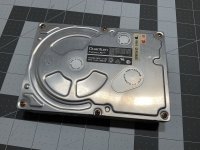
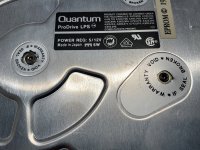
First, I removed the warranty-voiding stickers. I didn't realize that this was exposing the internals, and if I'd known, I would have done this in the glove box.
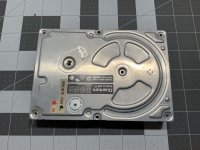
Next, I removed all of the screws. Again, wish I'd done this in the box.
Next, into the glove box!
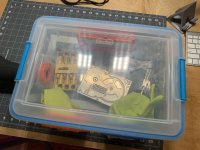
After purging the dusty air, I carefully removed the top. I didn't get many pictures of this part, because getting your hands in and out of the gloves is pretty tricky, especially with the limited space in the box, and platters that you really do not want to touch. Many thanks to my wife for snapping this photo for me (just to answer that question)!
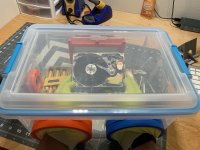
Getting the three screws loose on the magnet required a trip to the hardware store for a #1 Phillips bit. I used a 1/4" drive ratchet and a small hex adapter, which gave me plenty of torque in the compact working space. Seriously, this glove box is just barely big enough to work in! And I felt like I was doing brain surgery with a flathead shovel. But, I steered completely clear of the r/w head armature and platters, and only removed the magnet to check the condition of the rubber bumpers.
No pictures of this part, but sadly, I discovered that the rubber bumpers described in TK's video weren't gooey at all. In fact, they were in great condition. My heart definitely sank a bit at this discovery. Not much to do but put it back together.
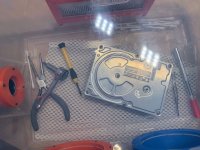
I resealed the holes with tape.
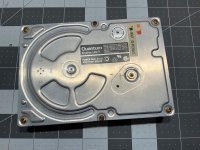
Not expecting a miracle, I installed the drive and flipped the power switch. It didn't even spin up, no nope. I decided to shove the floppy disk in and let it boot up and hang out with me while I typed up this update.
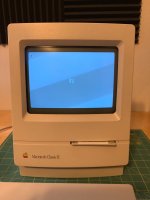
And then... just for fun... I gave it a reboot after about 5 minutes of sitting idle. It ejected the floppy, and the hard disk totally spun up! It made a horrible grinding sound, which quickly subsided and was replaced with a high-pitch metal-on-metal sound - probably a r/w head skating on a platter. But to my amazement, it booted up! I couldn't believe it!
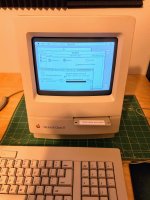
Not much interesting on the machine... a copy of Claris Works and a couple of password protected files. The disk seems to work fine other than the horrible sounds... which makes me think that it won't live for long. Ultimately, I think this machine needs a SCSI2SD, but that will probably need to wait for a couple of months for funding.
So... a success? Nah, not really. It's possible that the drive would have eventually spun up anyway, so maybe I just made it worse? Oh well. Next, I'll restore the keyboards and mice, so stay tuned for that. I have some fun ideas about what to do about the missing keys!
Last edited by a moderator:
PotatoFi
Well-known member
The hard drive sounds a bit better this morning, but you can still hear the stuff that is worrying me.
View attachment Hard Drive Noise.m4a
View attachment Hard Drive Noise.m4a
PotatoFi
Well-known member
Totally will! Might take me a few days to get there.I totally would want a dedicated thread on your glove box build. I want to make one! That is amazing!
Today, I restored the mouse and keyboard! I'll warn you that there's no satisfaction at the end of this post... I need light to take good "after" photos of the whole system tomorrow, so that will be a separate post. Here's what I started with:
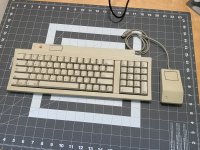
You can clearly see where sunlight yellowed it, and where there were shadows.
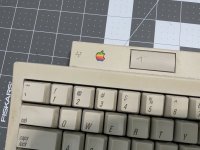
The first order of business: pull the keycaps! I 3D printed this keycap puller, which makes life a lot easier.
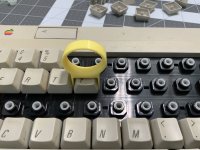
All of the keycaps pulled:
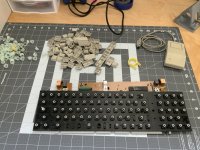
Before applying retrobrite, I always scrub everything. You know my methods at this point. I do each key individually, as well as the whole keyboard case.
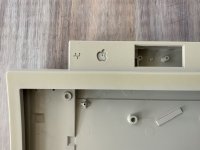
I think I mentioned this before, but it's worth mentioning again: always pop the Apple badge out before retrobrighting! Otherwise, the retrobrite can mess with the red and yellow colors. I use a paperclip and gently press from the back.
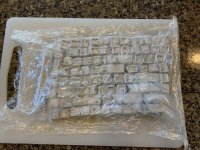
I'm going to use peroxide cream instead of full submersion for the keys, because I haven't come up with a creative way to keep keys from floating around. I work on a cutting board so none of the keys get turned upside down when I move them. So here, I laid down some plastic wrap, arranged all of the keys, and used my trusty free-from-a-hotel-somewhere toothbrush to dab a bunch of hydrogen peroxide cream on each key. Plenty of cream is important here - you don't want anything to dry out. If a spot dries out, you'll get a bright spot and a marbling effect.
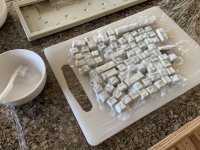
Next, I fold the plastic wrap over the top, crease the edges, and roll up the end to create a mostly-airtight seal.
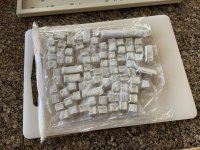
It was evening at this point, and with cream and plastic wrap, I prefer to use the "low and slow" UV lamp, which minimizes the chances of things drying out and causing bleaching or marbling.
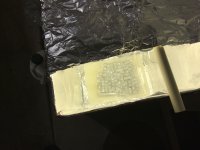
Fast forward overnight and to today. At this point I haven't done the keyboard case or cleaned the mouse, so let's get the mouse cleaned up first. Here's the top:
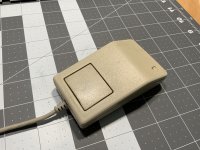
Pretty much the same condition as the Classic II was. Here's the bottom:
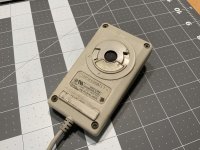
I didn't get a picture of the mouse all cleaned up, oops. Satisfaction denied! I did grab some pictures of the ADB connector though. It's pretty gross, I like to pay a bit of attention to these since they're plugged into the keyboard.
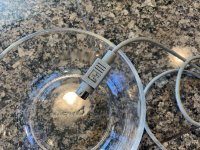
Alcohol and a toothbrush helped quite a bit, but it wasn't perfect:
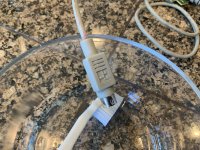
I worked on it with alcohol and baking soda, and that helped a bit more. As I write this, I realize that the majority of my hobby is just cleaning things...
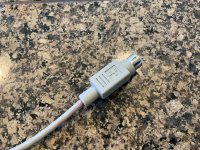
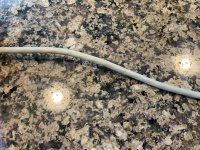
Don't forget the ADB cable itself...
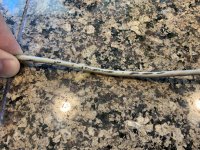
I scrubbed it down with a paper towel and alcohol. It looks nearly perfect now.
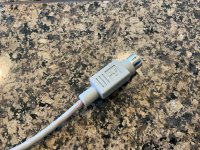
And here's the final picture of the connector. It looks almost new, save the pink marker that I couldn't get off.
At this point, the keys had been under a UV lamp in the garage at 80°F/26.5°C all night, so I pulled them out to take a look. I didn't take any photos of this, but I checked out the spacebar and it was almost done, but not quite. I freshened up the hydrogen peroxide and put them out in the driveway mid-morning to speed up the process. I only had them out there for about 40 minutes in total, rotating them a few times. With that much sun and heat, I watch parts with cream and plastic wrap SUPER closely. They absolutely can't dry out anywhere, or it will ruin the parts!
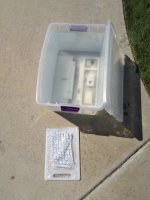
I got the mouse shell and keyboard shell out in the tub of liquid hydrogen peroxide as well. The mouse ball retainer wanted to float, so I clipped a binder clip to it for some weight and that worked perfectly. The submerged parts stayed out there for several hours. The starting temp was 80°F/26.5°C, but after a few hours climbed to 105°F/40.5°C.
 \
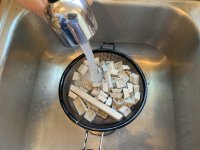
\Rinsing the keys after 40 minutes in the sun! It never takes long with that much UV, heat, and concentration of hydrogen peroxide. It's just a bit risky.
Letting them dry.
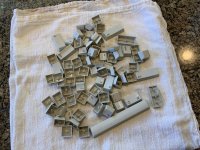
At this point, the parts in the liquid were constantly floating, and they seemed like they were completely done anyway. I pulled them out, rinsed everything off, dried them, and brought them inside for assembly. I didn't get any closeups of the keyboard shell, but it basically looks perfect.
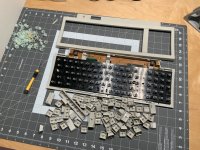
It was at this point that I realized that the locking mechanism on the Caps Lock key was broken, likely from my pulling on the keycap. I took the keyboard apart to see if I could fix it.
I pulled up on the back metal plate, and undid clips one at a time while holding pressure. It let go bit by bit until it was free.
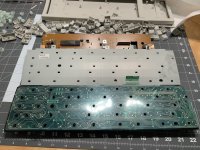
After peeling up the membrane, the key switch in question fell right out. Apparently, this is a Mitsumi manufactured keyboard, and they used a proprietary locking switch here that wasn't used on any other keyboard model. There's almost nothing online about these. The only thing I could find was this page, which was super valuable.
The part that broke is that little broken copper wire, which acts as the locking mechanism. The copper leafspring keeps pressure the wire. I spent a good hour attempting to make a replacement, but it was just too small to work with, and my wire diameter was slightly too large.
I did try pulling the switch from my other keyboard, but it broke in the exact same way when I pulled the key, taking it apart. D'oh! Eventually, I gave up on repairs, deciding that the caps lock just won't lock on this keyboard anymore. Too bad... I love that clicky feeling when I need to yell at some people in an IRC chatroom...
If anyone knows where I might be able to get a replacement switch (or two), please let me know.
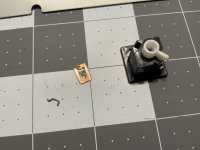
And on that terrible disappointment, it's time to end! I'll post final photos of the Macintosh Classic II, Apple Keyboard II, and mouse tomorrow when I have light!
---
Also, one last photo that I cannot seem to remove no matter what I do:
Last edited by a moderator:
PotatoFi
Well-known member
Ok, time for the results! But first, a little disclaimer. I wanted to accurately capture the difference in yellowing, before and after. I decided to try using a white balance card with my DSLR, but in retrospect... I think it made the case look a lot yellower than it actually was. For the final result, I decided to shoot on full auto, and then manually adjust the white balance on the before photos to match as best as I can. That makes the photos I posted in the beginning a bit inaccurate... but I feel like these manually adjusted ones convey how much it changed pretty well. So here are the results!
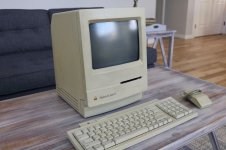
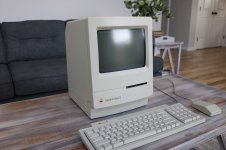
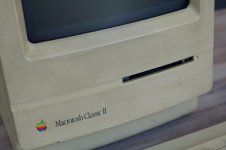
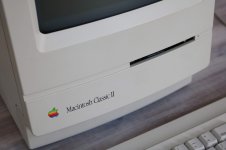
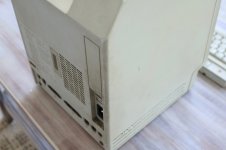
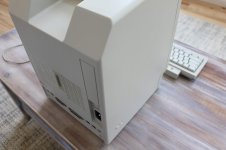
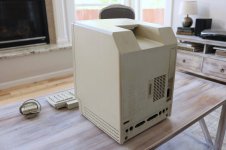
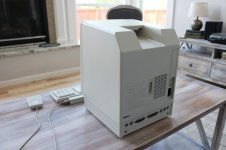
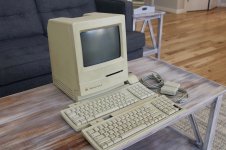
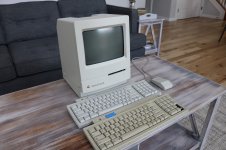
Here's a complete log of what I did:
If you have any questions about the restoration at all, be sure to let me know!


Here's a complete log of what I did:
- Cleaned and lubricated floppy drive
- Cleaned and recapped logic board
- Cleaned and recapped analog board
- Cleaned chassis and all other internal parts
- Disassembled and cleaned mouse and keyboard
- Retrobrighted the Mac itself, keyboard, and mouse
- Installed a new PRAM battery
- Took apart and reassembled drive (probably hurt more than helped)
If you have any questions about the restoration at all, be sure to let me know!
Dkopsieker
Member
This is a great looking system. Good job!! I am in the process of restoring a classic ii as well. I am recapping the analog board, and when i was replacing CP5, i was removing the huge glob of hot glue that was covering it and the ceramic cap next to it... i accidentally mangled the ceramic cap.... i need to replace it, but can not figure out what size i need. I was able to read the markings from it, but not sure about the voltage, as it seems it doesn't have the voltage on there. the markings are " B - 682K - (Manufacturers symbol) 28 "
I take it its a 6800 pico farad rating, 10% fault tolerance. There is a line under the 682K, which i have read means 50V or 100V... not sure about that though.
by the way, it is CP21 on the board. I just need to know what to replace it with. I'll probably be using digi-key to order the parts.
Any help would be greatly appreciated! Thanks.
PotatoFi
Well-known member
Thank you so much!This is a great looking system. Good job!!
I popped the case off and took a look, and sadly, I don't think I'm going to be able to help very much. Mine says "682k" on one side, and absolutely nothing on the other.by the way, it is CP21 on the board. I just need to know what to replace it with. I'll probably be using digi-key to order the parts.
Hi PotatoFi,
Nice job! I have a bunch of yellowed stuff and I looked up peroxide and retrobrite from reading your thread and noticed you used 3 bottles of 40 hair developer. My wife has 20 and she said to use very little of it. I took my 3rd yellowest keyboard and put a little of the 20 in the cap and spread just a tiny bit with a q-tip and wrapped it in plastic and put it in the sun this morning for 2 hours. Since it was a test I wasn't even careful about how I put it on with the q-tip and I thought I'd get a nice marbled effect if I crinkled up the plastic wrap. But, except for the spot I missed with the q-tip it seems to have worked anyway. No marbling.
I left the space key alone so it would be easier to tell how it worked since my iPhone 5 will look different at different times of the day.
Before I started.

how it looked with the developer spread. You can see I barely, barely used any:

how it looks now that I am done after loosely, crinkley, wrapping it and leaving it in the sun for two hours. Then put back together.

you can still see a faint streak of yellow on the top right of the keyboard where I missed a spot (bottom right of the photo) and as I said I left the space bar alone for color comparison.
My question is since you used a lot more and a lot stronger hair developer and haven't had a yellow reoccurrence, did you use less before and had it return to yellow? I'd like to use as little as possible but without having the yellow return (I'll be keeping them away from UV and heat going forward).
Here is what I used (and used hardly any of it) it's called Clairol Pure White and is $2.85 for a 16 ounce bottle.

Thanks. And again, nice job!
Eric
Nice job! I have a bunch of yellowed stuff and I looked up peroxide and retrobrite from reading your thread and noticed you used 3 bottles of 40 hair developer. My wife has 20 and she said to use very little of it. I took my 3rd yellowest keyboard and put a little of the 20 in the cap and spread just a tiny bit with a q-tip and wrapped it in plastic and put it in the sun this morning for 2 hours. Since it was a test I wasn't even careful about how I put it on with the q-tip and I thought I'd get a nice marbled effect if I crinkled up the plastic wrap. But, except for the spot I missed with the q-tip it seems to have worked anyway. No marbling.
I left the space key alone so it would be easier to tell how it worked since my iPhone 5 will look different at different times of the day.
Before I started.

how it looked with the developer spread. You can see I barely, barely used any:

how it looks now that I am done after loosely, crinkley, wrapping it and leaving it in the sun for two hours. Then put back together.

you can still see a faint streak of yellow on the top right of the keyboard where I missed a spot (bottom right of the photo) and as I said I left the space bar alone for color comparison.
My question is since you used a lot more and a lot stronger hair developer and haven't had a yellow reoccurrence, did you use less before and had it return to yellow? I'd like to use as little as possible but without having the yellow return (I'll be keeping them away from UV and heat going forward).
Here is what I used (and used hardly any of it) it's called Clairol Pure White and is $2.85 for a 16 ounce bottle.

Thanks. And again, nice job!
Eric
PotatoFi
Well-known member
Looks good! I can't tell whether you popped your Apple logo out or not... be sure to do that! I've had the red and yellow parts turn white when leaving them in the sun with hydrogen peroxide.
The recurrence of yellowing has been extremely slight on my Macintosh SE FDHD that I did in December. I did that one with 30 Proof cream under a UV lamp in our utility room. Despite the very slight recurrence... I think the retrobrite was completely, totally worth it.
The recurrence of yellowing has been extremely slight on my Macintosh SE FDHD that I did in December. I did that one with 30 Proof cream under a UV lamp in our utility room. Despite the very slight recurrence... I think the retrobrite was completely, totally worth it.
PotatoFi
Well-known member
Hey @LaPorta, you asked about the CRT in my Classic II in the Awful Macintosh SE thread! Does this image tell you what you need to know?
Also, correct me if I am wrong... but isn't any CRT compatible, as long as you swap the yokes? Adrian's Digital Basement did this on a video he released today, and it looked pretty simple.
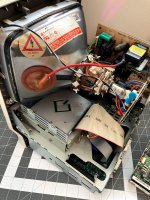
To fill everyone else in, the CRT on this Classic II has some burn-in, and is pretty dim. I think it need to be replaced.
Additionally, despite my recapping it, there is a "ghosting" effect that occurs. Basically, the image smears to the right. I'm not sure what is going on there yet. If you have some advice, let me know.
Also, correct me if I am wrong... but isn't any CRT compatible, as long as you swap the yokes? Adrian's Digital Basement did this on a video he released today, and it looked pretty simple.

To fill everyone else in, the CRT on this Classic II has some burn-in, and is pretty dim. I think it need to be replaced.
Additionally, despite my recapping it, there is a "ghosting" effect that occurs. Basically, the image smears to the right. I'm not sure what is going on there yet. If you have some advice, let me know.
PotatoFi
Well-known member
Yeah, I think probably just a broken trace. I think it's possible that this wire was run at the factory... but that's just a guess.Wow, this is a beautiful log! I'm waiting to do a Classic -> Classic II board upgrade, so the recap guide is really gonna help. Did you ever figure out what the jumper wires were for – maybe broken traces?
erichelgeson
Well-known member
I have the exact same wire on my Classic II too, so I think a factory defect fix is probably accurate. (and yes that battery was removed right after that photoYeah, I think probably just a broken trace. I think it's possible that this wire was run at the factory... but that's just a guess.
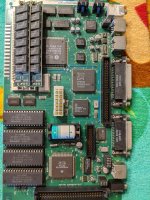
Last edited by a moderator:
PotatoFi
Well-known member
Similar threads
- Replies
- 10
- Views
- 461
