• Updated 2023-07-12: Hello, Guest! Welcome back, and be sure to check out this follow-up post about our outage a week or so ago.

iBook Clamshell

MacUp72

Well-known member
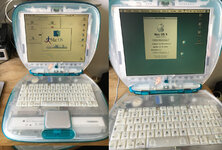
Yesterday I got a Clamshell 300Mhz from a collegue for 20 Euros, together with a stable case, two YoYos and a translucent blue MacAlly USB mouse, nice.
It is dirty and the display has a red tint to one side, but I took it anyway for a little restore fun.
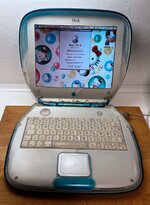
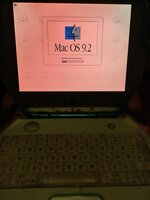
4.jpg IMG_1155.jpeg

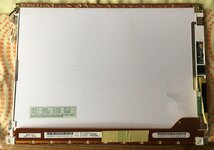
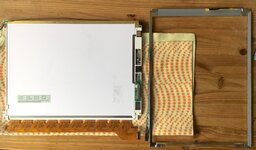
I took it apart and cleaned all the brown stains, at the moment I`m disassembling the display ( not so easy ) to see if there are exploded caps but maybe this is not the problem for the tint..
 

CircuitBored

Well-known member
I think the red tint is to do with the backlight unless I'm mistaken.

Correct, that's the hallmark of a dying fluorescent tube. Tubes in this condition should not be used because fluorescent tubes are negative-resistance devices. The more current flowing, the lower the resistance, i.e. when stuck at low emission as pictured, the lamp is drawing a lot of power and putting abnormal strain on the ballast. The ballast is the component that mediates the voltage so that the lamp doesn't destroy itself as its resistance drops. There are failure modes built into most decent cold-fluorescents used in LCDs but at twenty or more years of age they are not to be trusted.

To go even nerdier: the uneven red discoloration is actually a neat quirk of the physics of fluorescent lights. In mercury-based fluorescent tubes, the mercury that normally interacts with electrons to create UV is slowly absorbed into the glass, phosphor and electrodes until the lamp no longer functions properly. The red you are seeing is caused by the argon "taking over" from the mercury as the initial discharge (the electrons that usually crash into mercury atoms to create UV are hitting solely noble gases instead). The iBook you showed only has one backlight, so how come the red discoloration isn't affecting the entire screen? The loss of mercury has created a DC-bias inside the tube, which causes uneven distribution of the diminished mercury along the tube due to the "uneven" charge. The red side of the tube is where the charge is lowest and the base gas has taken over from the mercury as the primary light source, emiting a dim red light that is mostly absorbed by the phosphor and not re-emitted.

Apologies if this seems like rambling or irrelevant trivia. I quite literally do lighting for a living and almost never get a chance to bang on about the various physical phenomena that make it so interesting.
 

Forrest

Well-known member
When Restoring this iBook, will the fluorescent tube be replaced or can you replace it with LED backlighting?
 

MacUp72

Well-known member
yeah, thats a bummer, maybe I'll dive into a LCD swap, I read that a LCD from 12" ibook or PB fits..
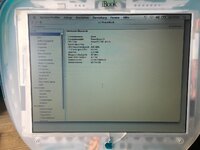
I put in an older mSata adapter with 128GB card in it after finishing a clear case mod now.
interestingly, the display clears up in both OS after running some time, but maybe this is no solution.
but hey, I like that old little thing, it really is an iMac to go and not comparable to a solid PB 12 but for 20 bucks I dont complain..
( the CD drive works, kinda, doesnt like the 9.2.2 iMac CD)
circuitBored, thanks for your clarification..

edit, I think a LCD swap maybe easier than the LED mod..

l.jpg
 
Last edited:

3lectr1cPPC

Well-known member
Absolutely. I paid $140 for my two clamshells in a lot - back in 2018. Stuff was much cheaper then. Nowadays that lot would be at least $300... glad I got mine when I did.
The CCFL tube can be replaced, LED mod is more difficult but doable.
As for replacing the LCD with one from a later iBook, that's known as the XGA mod. It requires a special LG brand LCD cable to do it.
Contrary to what is commonly said online, it DOES work on an original 4MB video iBook.
 

MacUp72

Well-known member
originally I was thinking that the tint cause was a blown display cap (see first foto above) there were some brown liquid stains on the lower end of the display, so I thought the electrolyte fluid came down and that also would explain the half of the monitor stain..but CirciutBored explained it.
another question would be finding a correct donor display for the tubes..the complete disassambly was a pita, the bezel also, two standoffs came off. I thought this plastics would be a bit more stable than those of the 3400/1400 but well..
 

bibilit

Well-known member
I paid $140 for my two clamshells in a lot - back in 2018. Stuff was much cheaper then

Yes at some point, it was cheaper.

Some units can be found cheaply, but probably nothing online, (ebay or similar will be far more expensive)

i was lucky to find my own units pretty cheap (some around 5 €...untested and without PSU, and more lucky to have working units in the end)
 

MacUp72

Well-known member
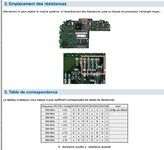
has somebody overclocked his/her Clamshell? There are some infos here..
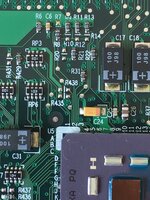
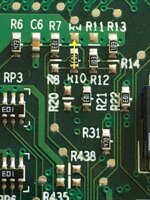
but looking at the mainboard, these are really tiny Rs ..:cool:
somebody on the MacRumors forum already did that, what are your experiences?
of course it is risky using components over their specifications and the Clamshell doesnt have a fan either. So using new cooling pads is important etc ( maybe a tiny additional fan is possible)


IMG_1159.jpg


Bildschirmfoto 2023-05-05 um 10.05.51.jpg
 
Last edited:

bibilit

Well-known member
Never tried myself, what for really ?

You can have a try with a grahite pen (instead of soldering components) if you need to have some tests done.
 

davidg5678

Well-known member
I've done overclocking to my clamshell. The improved performance results were absolutely worth it for me. You should be comfortable soldering resistors that small, but otherwise, as long as you start with a light overclock, and build up from there, I think the risks aren't terribly high. I did replace the thermal pads at the same time as the overclock, and I haven't noticed anything problematic with regard to heat.
 

MacUp72

Well-known member
I've done overclocking to my clamshell. The improved performance results were absolutely worth it for me. You should be comfortable soldering resistors that small, but otherwise, as long as you start with a light overclock, and build up from there, I think the risks aren't terribly high. I did replace the thermal pads at the same time as the overclock, and I haven't noticed anything problematic with regard to heat.

thanks,with my original 300 Mhz board I guess the max but stable would be 366 mHz. I will get a 366Mhz board from a SE soon, so I will test if that will go too 400 maybe. And yes, the Rs are TINY.:cool:
 

Forrest

Well-known member
How did you install OSX 10.4.11 on the original iBook. According to MacTracker, OSX 10.3.9 was the max.
 

MacUp72

Well-known member
How did you install OSX 10.4.11 on the original iBook. According to MacTracker, OSX 10.3.9 was the max.
I just put in the old mSata adapter with ssd in, it was installed on a Pismo I think.
But the original HDD that was in there also had 10.4.11 on it.
 

joshc

Well-known member
yeah, thats a bummer, maybe I'll dive into a LCD swap, I read that a LCD from 12" ibook or PB fits..
I put in an older mSata adapter with 128GB card in it after finishing a clear case mod now.
interestingly, the display clears up in both OS after running some time, but maybe this is no solution.
but hey, I like that old little thing, it really is an iMac to go and not comparable to a solid PB 12 but for 20 bucks I dont complain..
( the CD drive works, kinda, doesnt like the 9.2.2 iMac CD)
circuitBored, thanks for your clarification..

edit, I think a LCD swap maybe easier than the LED mod..

View attachment 56110
What’s going on with the more translucent plastics than in your first post? Did I miss something?
 

MacUp72

Well-known member
ok, I got cheap a clamshell board ( SE, 366 Mhz), repaired the monitor and did a quick resoldering of one resistor to get the CPU from 366 Mhz to 400 Mhz now. Display working also, not perfect but much better than before. The SE board even has slightly more onboard RAM, it now reads 576 MB instead of 544MB. It reponds quite more quickly than before.

IMG_1201.jpg

display backlight repair:
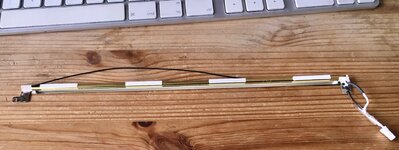
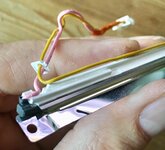
I had a display of a PB 12" display at hand, broken, but backlight working, so complete disassembly to unmount the channel on top of the display for the little tube inside.

IMG_1195.jpg IMG_1197.jpg

original channel with backlight inside

IMG_1198.jpeg

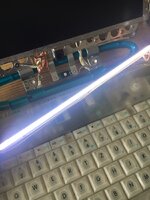
quick test with the new tube from the PB 12".

IMG_1194.jpg IMG_1191.jpeg


to set the CPU from 366Mhz to 400Mhz you only have to move R10 up to the position of R9.

IMG_1186.jpg
 
Last edited:
Top