-
Updated 2023-07-12: Hello, Guest! Welcome back, and be sure to check out this follow-up post about our outage a week or so ago.
You are using an out of date browser. It may not display this or other websites correctly.
You should upgrade or use an alternative browser.
You should upgrade or use an alternative browser.
haplain's never-ending quest
- Thread starter haplain
- Start date
volvo242gt
Well-known member
Sounds like they used the PCI PowerMac startup chime. A little higher than the G3 and newer chime, and a little lower than the AV Mac chime.
http://www.mackido.com/EasterEggs/Sounds/StartPowerMacPCI.mov'>http://www.mackido.com/EasterEggs/Sounds/StartPowerMacPCI.mov
Link from here: http://www.mackido.com/EasterEggs/
-J
http://www.mackido.com/EasterEggs/Sounds/StartPowerMacPCI.mov'>http://www.mackido.com/EasterEggs/Sounds/StartPowerMacPCI.mov
Link from here: http://www.mackido.com/EasterEggs/
-J
uniserver
Well-known member
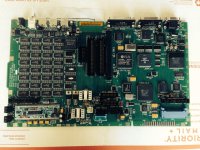
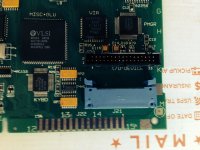
it probably sounds like a powermac 6500 start up chime, that is because the board is a powermac 6500 board 
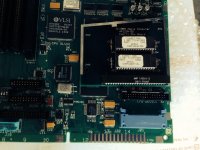
now if i were to of been a little more adventurous i could have desoldered the ROM slot from the proto TAM board
and soldered it onto the 6500 board and tried to use that proto ROM simm. then probably your mac chime would have became
the tam one? that is if the rom simm actually works… but i didn't want to get too crazy with that proto board ...
also that other tam proto board i fixed for you… the one that i soldered the 6400 roms onto.
what mac tone did that one make?
if it made the tam sound then that tells me something between the rom and mainboard, even though they were 6400 roms
still knew it was a tam board and played the TAM bong.
witch means probably you could make any 6400 - 6500 play the TAM bong if you were crafty enough like maybe dougg3
haplain
Well-known member
They both have very distinctive tones. They are entirely different from one another. The previous prototype TAM you did makes the standard TAM bong but the "new" one makes a noise I've frankly never heard, just because my experience with the 6xxx series is next to nothing.
I just need to pop that proto ROM in the TAM's to see if it works, that would be too cool if it did. For those of you who don't know what were talking about the prototype TAM boards don't have the ROM on the board but rather a chip that plugs into the board. I have 2 of those ROM chips, 1 is known to be bad, the other we're hopeful is working. More to come on that.
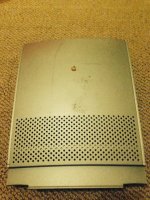
I wonder if the mold that this one was created from was also destroyed? I know they destroyed the stock TAM mold but this one is entirely different. Even the FATBACK is from a different mold. It has holes in the FATBACK for heat dissipation.
haplain
Well-known member
Didn't have a chance to try that ROM chip yet but I will soon.
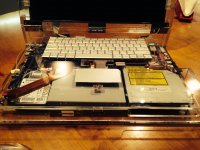
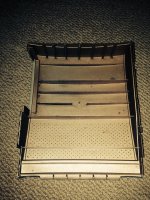
I wanted to post the photos of this TAM FATBACK so people can see it. Anyone ever seen one like this?
It's a little hard to see, but I tried, to capture the bronze color that TAM is on the inside. You can see the difference in color on the left side of the FATBACK. It's really a unique color. I understand why it wasn't produced in the gold/bronze but it's really neat.


haplain
Well-known member
Trash80toHP_Mini
NIGHT STALKER
Niiiice!!!!! :approve: So, what the heck size IS IT after all? :?:
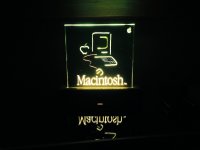
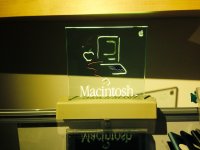
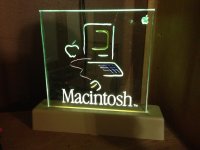
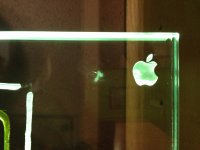
How deep is the etching/sandblasting and how the heck was that Garamond type done?
How deep is the etching/sandblasting and how the heck was that Garamond type done?
Macdrone
Well-known member
I would guess the glass was "ground" or "routered" to depth for each area, as to change what areas catch more light the deeper it is, then normal glass etching acids in the ground out areas. Al you have to do is put tape on the glass and it won't cloud any area other than where it is painted in. An engraving machine that can do glass would be awesome for this, as it can modify depth and can map out reverse as it is set up for that.
If I was still in the Navy we had Hermes engraving machines that could engrave anything. Wish I had 5000 dollars I might just buy one. Any normal computer can run the unit. The software comes with it but it's basically just photoshop with a plug in.
If I was still in the Navy we had Hermes engraving machines that could engrave anything. Wish I had 5000 dollars I might just buy one. Any normal computer can run the unit. The software comes with it but it's basically just photoshop with a plug in.
Trash80toHP_Mini
NIGHT STALKER
Macdrone
Well-known member
Only issue with sandblasting is the variable depths across the glass. I am sure with any template any option would work. I would just like a layout, if he does one anybody can use whatever is open to them to make it.
Its colored so I guess matching that will be kind of a pain.
Its colored so I guess matching that will be kind of a pain.
Similar threads
- Replies
- 5
- Views
- 359
- Replies
- 33
- Views
- 2K
- Replies
- 46
- Views
- 2K

