• Updated 2023-07-12: Hello, Guest! Welcome back, and be sure to check out this follow-up post about our outage a week or so ago.

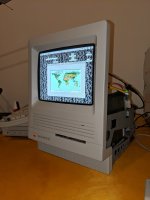
Fun with colour on my SE/30

Trash80toHP_Mini

NIGHT STALKER
Short version: from my perspective, a vacuum formed or drooped thin plexi cover would be your optimal solution.

TLDR

Forgot to mention cooling noise. IIRC the projector sounds a bit like a tiny jet engine. Hopefully newer ones are cooler running and a lot more quiet. Think Classic/MDD. No problem for ceiling game projection or rear facing screen movie projection, but could be annoying for desktop mode. Something to think about.

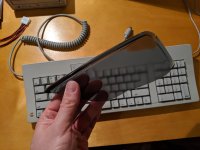
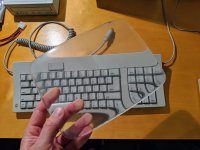
Better solution all around would be vacuum forming clear plexi replacement CRT faces. I've done a first round and results were better than expected with a rudimentary setup and heating scrap plex I had on hand in the oven. Switching to very thin plex and a better setup should yield useful LCD covers. No refractive index to speak of for acrylic, but I wonder if convex-convex lens configuration and CRT face glass refraction might induce slight, uneven magnification of the LCD image.

After disassembling a display for recycling, I'm wondering if you could vacuum form an LED backlit LCD. [}:)]


ants

Well-known member
Quick update: As you can see from the broken shard of glass below, the CRT cutting was unsuccessful!

IMG_20190524_181854~2.jpg

But perhaps it was a blessing in disguise, because as you can see the glass is very dark, thick and has a stipple texture on the inside. It would have led to poor clarity from the LCD.

But it gave me an idea - using my remaining CRT I made a silicone mould of the convex surface and then made a cast using clear polyurethane resin:

IMG_20190524_181834~2-3024x2268.jpg

Truth be told, it was an immense amount of work to achieve this result. I had multiple failed attempts and even made my own pressure chamber so that the resin would be free from air bubbles!

Stay tuned for final assembly!

 
Last edited by a moderator:

PB145B

Well-known member
Not sure how I missed this thread, but this is incredible! 

I’m excited to see the finished product!


LaPorta

Well-known member
You pulling this off would be incredible. Please document how you do it. I need this for my arcade monitor someday!

 
Last edited by a moderator:

olePigeon

Well-known member
Hmm.  I wonder if it'd be cheap enough to just have a mold made and get new glass.  It's not a complex shape, relatively small and it'd be useable on every compact model except for the LC 5xx line.  Preliminary Googling shows that it's not too expensive.  MUCH cheaper than injection molding.


Byrd

Well-known member
ants, if you ever want to make a negative mould, I have access to a reasonably large vacuum press (and nearby oven) to form perspex - I'm in Melbourne


Trash80toHP_Mini

NIGHT STALKER
But perhaps it was a blessing in disguise, because as you can see the glass is very dark, thick and has a stipple texture on the inside. It would have led to poor clarity from the LCD.
Love it, that's great info for my projection screen project

But it gave me an idea - using my remaining CRT I made a silicone mould of the convex surface and then made a cast using clear polyurethane resin:

Truth be told, it was an immense amount of work to achieve this result. I had multiple failed attempts and even made my own pressure chamber so that the resin would be free from air bubbles!
Very nice work, ants. looks fabulous. From your description of the process it sounds like you've made a plano-convex lens? I've always wondered about refractive index complications. How does it look when sitting on the LCD, no distortion? Pic looks like you've got a little bit of magnification of your index fingertip? Do the edges of the LCD look nice and straight or is there a tad of either barrel or pincushion distortion?

Can't wait to see the final assembly, fabulous! :approve:

 
Last edited by a moderator:

ants

Well-known member
Here is the only photo I took before I accidentally fried the LCD controller board... a fleeting moment of glory:

IMG_20190525_170759.jpg

It looked great - zero distortion and the curved resin panel fits the Mac perfectly.

I accidentally reversed the polarity of the 12v power to the LCD controller - smoke ensued! I hope it's just a fuse as I really can't spend any more money on this project!


gpz500

Member
Sad about your little accident... anyway, the project is really astonishing and perfectly done!!! 


trag

Well-known member
Yes, this is very cool.  The CRTs for these old machines will run out eventually.   With luck, there will always be displays of the needed size capable of 640 X 480.   

Any chance of adding mounting attachments to the sides of mold?  I can't remember how the screen is attached, but it would be nice to be able to attach the molded polyurethane in the same way.


PB145B

Well-known member
That’s absolutely stunning! If the total cost is reasonable, I might consider doing this to one of my SE/30s. I’m assuming the most expensive part would be a nice video card capable of 640 X 480 color, which might be prohibitive for me depending on how much those run. I love this stuff, but I’ve got my limits when it comes to what I’ll pay for a single expansion board. I’ll save the crazy money for my future Lisa 2 purchase!


LaPorta

Well-known member
You should make copies of the silicone mold for sale. I know a bunch of people would snap them up and help you finance this thing.


nickpunt

Well-known member
This looks fantastic @ants - you're doing an amazing job with your SE/30 projects, its very inspiring! Would love to get my hands on a curved resin screen and try this myself  :)

@PB145B as far as video cards, since the controller board supports 66Hz, your best bet would be a Radius IIsi Color Pivot which were available in decent quantities until relatively recently. Several people here have probably stocked up on a few. Some assembly required though - they're a touch too long for the case so you need to Dremel them (!) or come up with an alternative mounting, such as a PDS extension cable, or @BadGoldEagle's vertical mount hack because it doesn't fit. You also need to make a VGA cable.

 
Last edited by a moderator:

ants

Well-known member
Thanks all for the encouraging words. I was going to pack it all in after frying my LCD controller - but you've motivated me to keep on trying.

@Byrd thanks for the offer. I'm pretty happy with the results using liquid silicone rubber, but I'll keep it in mind cheers.

@trag I actually included the mounting brackets from the original CRT in the mould - see below. The problem was that they were too shallow and in the resulting cast they were too flimsy so I had to remove them. But I have an idea how to fix this next time I make a mould. Currently the resin panel is hot glued into the back of the Mac case - it's horrible so including the mounting tabs would be ideal.

@nickpunt @LaPorta time permitting I'd like to make a few more resin panels for the 68kmla community. Making the pressure chamber for setting the resin free of air bubbles was a big job so it would be good to get some more use out of it.

IMG_20190407_073850.jpg


PB145B

Well-known member
@PB145B as far as video cards, since the controller board supports 66Hz, your best bet would be a Radius IIsi Color Pivot which were available in decent quantities until relatively recently. Several people here have probably stocked up on a few. Some assembly required though - they're a touch too long for the case so you need to Dremel them (!) or come up with an alternative mounting, such as a PDS extension cable, or @BadGoldEagle's vertical mount hack because it doesn't fit. You also need to make a VGA cable.
Sweet! If they were going for that cheap recently, then I’m sure it shouldn’t be too bad to find one. Dremeling the video card sounds like fun as well :)  


Crutch

Well-known member
@ants this is indeed a thing of beauty.  If you had a Kickstarter etc. to produce more resin panels I would be delighted to participate!


galgot

Well-known member
Congrat !! Very cool resin screen.

I tried the exact same thing some time ago, but i couldn't get the resin to stay clear .

I think it was the resin i used (too old). I still have the silicon mold though.


Bunsen

Admin-Witchfinder-General
how to change the "LVDS mapping" via a hidden menu in the on screen display


Ooh.  What else can you change in this hidden menu?

A board that can be arbitrarily reconfigured to run oddball displays would be hugely useful to me.

 
Top